Atlantic Water Gardens Pro Series PS4600 User Manual
Page 8
8
SETTING THE FILTERFALLS
It is always recommended that the FilterFalls be placed on undisturbed soil if possible. If the
installation calls for the FilterFalls to be elevated above existing grade, it is critical to compact
the area thoroughly. This will ensure that the FilterFalls will not settle out-of-level over time.
The use of cinder blocks or bricks under the falls to raise it up will help reduce the chance
of settling.
The FilterFalls can be placed adjacent to the pond edge to create a single waterfall, or pulled
away from the pond to create a streambed effect. Refer to the surface area recommendations
on page 3 to ensure that the streambed is properly sized.
Once you have placed the unit, make sure it is level from side to side and check the level
from front to back. FilterFalls should always be installed tilted slightly forward about ¼”.
This will ensure that water never leaks out over the back of the enclosure. When you are
finished positioning the unit, weigh it down with a few rocks to keep it in place while you
backfill and make your liner and plumbing connections. Apply silicone on the threads of the
MTA. Screw the MTA into the bulkhead until tight. Use PVC Glue (not included) to glue the
PVC flex hose into the MTA.
Do not completely backfill the FilterFalls until all of your plumbing connections are
made and the liner has been attached.
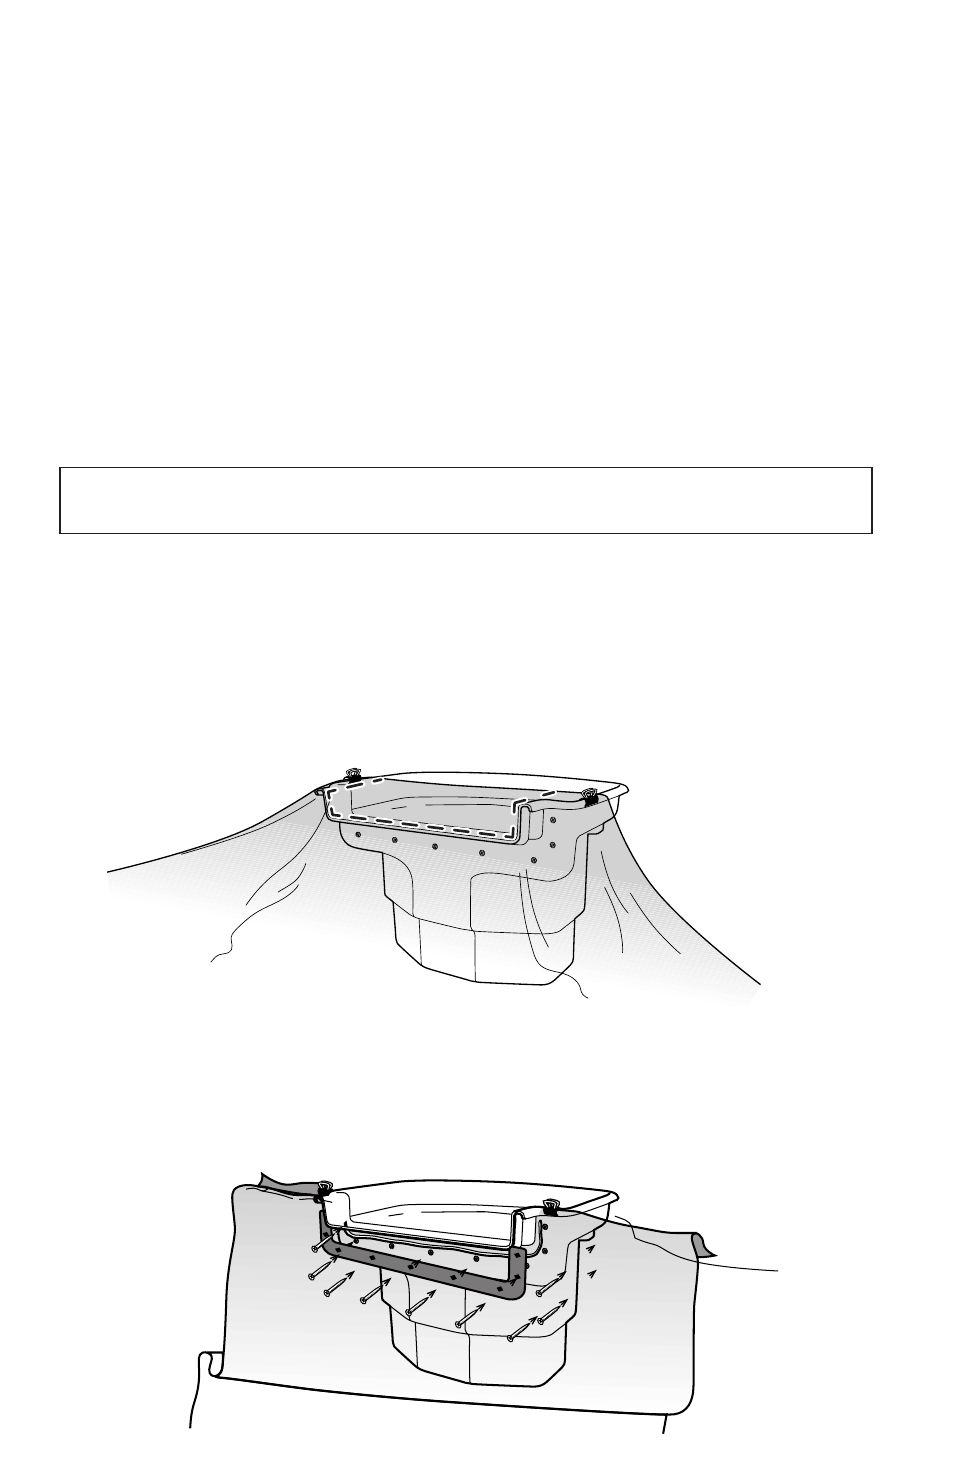
Figure 10.
Remove the spring clips and pull the liner away from the face of the enclosure. Make sure that
the front of the FilterFalls and the back side of the liner are clean and free of debris. Apply a
consistent bead of Atlantic fish-safe silicone to the face of the FilterFalls along the center line
of the threaded inserts.
Return the liner to the face of the FilterFalls and hold it in place by attaching the spring clips
to the rolled lip on either side of the spillway (Figure 10).
LINER ATTACHMENT
Atlantic FilterFalls come equipped with a solid spillway, threaded inserts and a ‘U’ shaped
wrap-around flange to provide the best possible seal.
Start by positioning the liner. Pull the liner up the face of the FilterFalls and drape a minimum
of 6” of liner over the top of the enclosure. Use the provided spring clips to temporarily hold the
liner in place. Leave some excess slack in the liner below the spillway. This will help to alleviate
any future strain on the liner connection. With the liner firmly in place, use a sharp razor knife to
cut the spillway opening in the liner using the inside of the spillway as a guide (Figure 9).
Figure 9.