Atlantic Water Gardens Pro Series PS4600 User Manual
Page 6
6
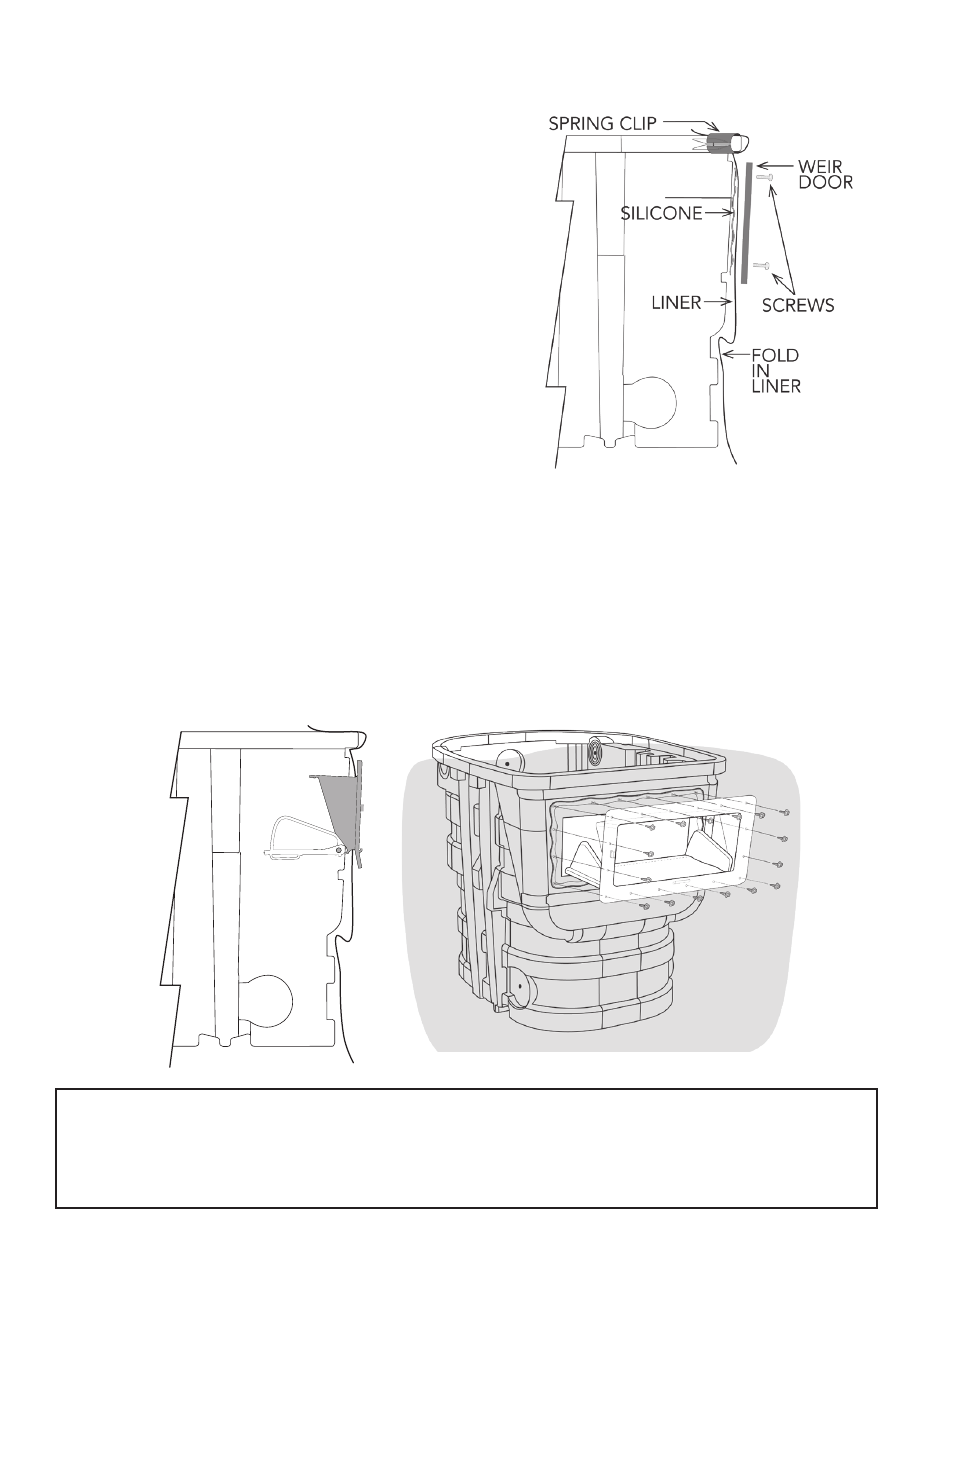
When you are satisfied with the position of the
liner, clip it in place with the provided spring clips.
With a sharp razor knife, cut a hole in the liner for
the weir door using the hole in the face of the
Skimmer as a guide. When you are finished,
remove the spring clips and pull the liner away from
the face of the Skimmer. Apply Atlantic’s fish-safe
RTV Silicone Sealant around the weir door opening
on all four sides. (Figure 6.)
Apply the silicone in a consistent bead
approximately ¾” away from the opening itself,
directly on top of the bolt holes. Once you are
finished, you can return the liner to its original
position and replace the spring clips.
Figure 6.
ATTACHING THE WEIR DOOR
Unlatch the weir door and lower the door to its fully open position. Insert the weir door
assembly into the Skimmer opening and push the weir door frame tight against the
Skimmer face. (Figure 7.)
Line up the holes of the weir door frame with the holes in the Skimmer face. Use a nail or
an awl to help line up the holes and pierce the liner in the top corners. Loosely fasten the
top corners using two of the supplied 1/4-20 machine screws and serrated flange nuts. Next,
install two screws in the bottom corners of the weir door frame. Once you have the weir door
tacked at the corners, install the rest of the screws. Do not fully tighten any screws until all of
the screws have been installed.
Figure 7.
It is recommended that you install an AWG Check Valve Assembly between the pump and the
outlet pipe. The check valve will prevent the FilterFalls from draining when the pump is turned
off. There are drill-points provided on the sides of all Pro Series Skimmer models to show the
proper location for the installation of an AF1000 Auto Fill valve (not included). See the Auto
Fill installation instructions for more information. There are also drill-points provided on the
back of all Pro Series Skimmer models to show the proper location and elevation for the
installation of an overflow (not included).
Use your fingers to hold the flange nut and a hand held screwdriver to tighten the
screws. The serrations on the flange nut will grab the plastic enclosure once it makes
contact, eliminating the need to use a wrench. Use caution when tightening the
screws. The screws need only be snug for the silicone to make a seal.