Atlantic Water Gardens Pro Series PS4600 User Manual
Page 16
16
Place the TidalWave pump with installed Triton Check Valve into the Pro Series Skimmer. Connect
the outlet fitting of the Triton Check Valve to the PVC supply line that feeds the waterfall using PVC
glue and cleaner. For your convenience; 2” and 1 ½” outlet fittings are supplied with the Triton
Check Valve.
Complete installation by tightening the union nuts on the Triton Check Valve. Hand tighten only. Do
not use channel locks to tighten the union nuts.
AF1000 AUTO FILL KIT
Drill points have been provided for the
proper Auto Fill location on either side of the
Pro Series Skimmer and Pump Vault (Figure
22).
It is a good idea to completely install the
pump, check valve assembly, and discharge
hose before you drill for the Auto Fill. This will
help you determine the best side of the
Skimmer or Pump Vault to place the Auto Fill
so that it has proper clearance on all sides.
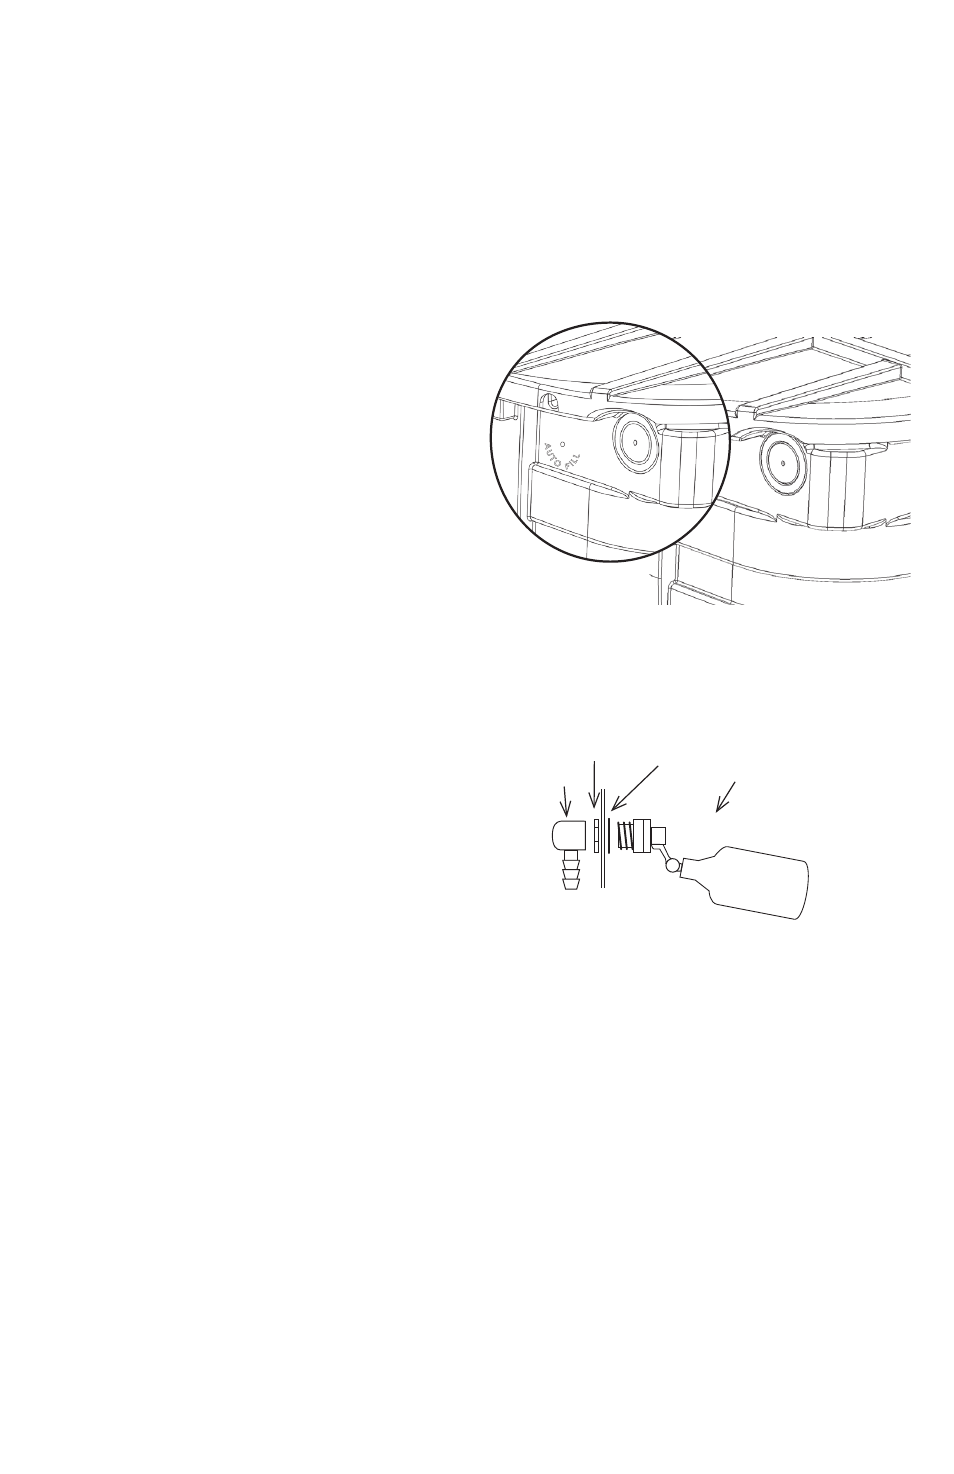
Once you have determined the location of
the Auto Fill, drill a 7/8” hole using a spade bit
or hole saw. Insert the Auto Fill making sure
the gasket is on the inside of the enclosure
and the plastic retaining nut is on the outside.
Tighten the retaining nut until snug. Do not
over-tighten the retaining nut (Figure 23).
Fittings to connect the Auto Fill to a
garden hose, ½” irrigation line, and ½” Sch40
PVC are included in the kit. Wrap the ½” male
threads on the Auto Fill with thread sealant
and install the fitting of your choice. Once
water is supplied to the Auto Fill it will
maintain the set water level by automatically
adding water when the level drops. This level
can be adjusted by loosening the wing nut and raising and lowering the height of the Auto Fill
float. Use the water line mark on the weir door frame to help establish proper water level.
VALVE
GASKET
RETAINING
NUT
FITTING
Figure 23.
Figure 22.
OVERFLOW
A drill-point has been provided on the back of the
Pro Series Skimmer and Pump Vaults to
show the proper location and elevation to install an Atlantic HA2000 bulkhead fitting and 2”
MTA for the overflow (not included). This combination will position the bottom of the overflow
pipe approximately 1” above recommended water level. (Note: If a HA2000 bulkhead is not
being used, the center point for the hole will have to be recalculated on site.)
Drill a 3” hole and install the bulkhead following the instructions on
page 7.
Install a 2” MTA
and connect the overflow pipe. Apply silicone on the threads of the Male Thread Adaptor
(MTA). Screw the MTA into the bulkhead until tight. Use PVC Glue (not included) to glue the
PVC flex hose into the MTA.