Fiber optic submodule installation – Grass Valley 8949MDA-CXF User Manual
Page 18
18
8949MDA-CXF/-SXF — Instruction Manual
Installation
Fiber Optic Submodule Installation
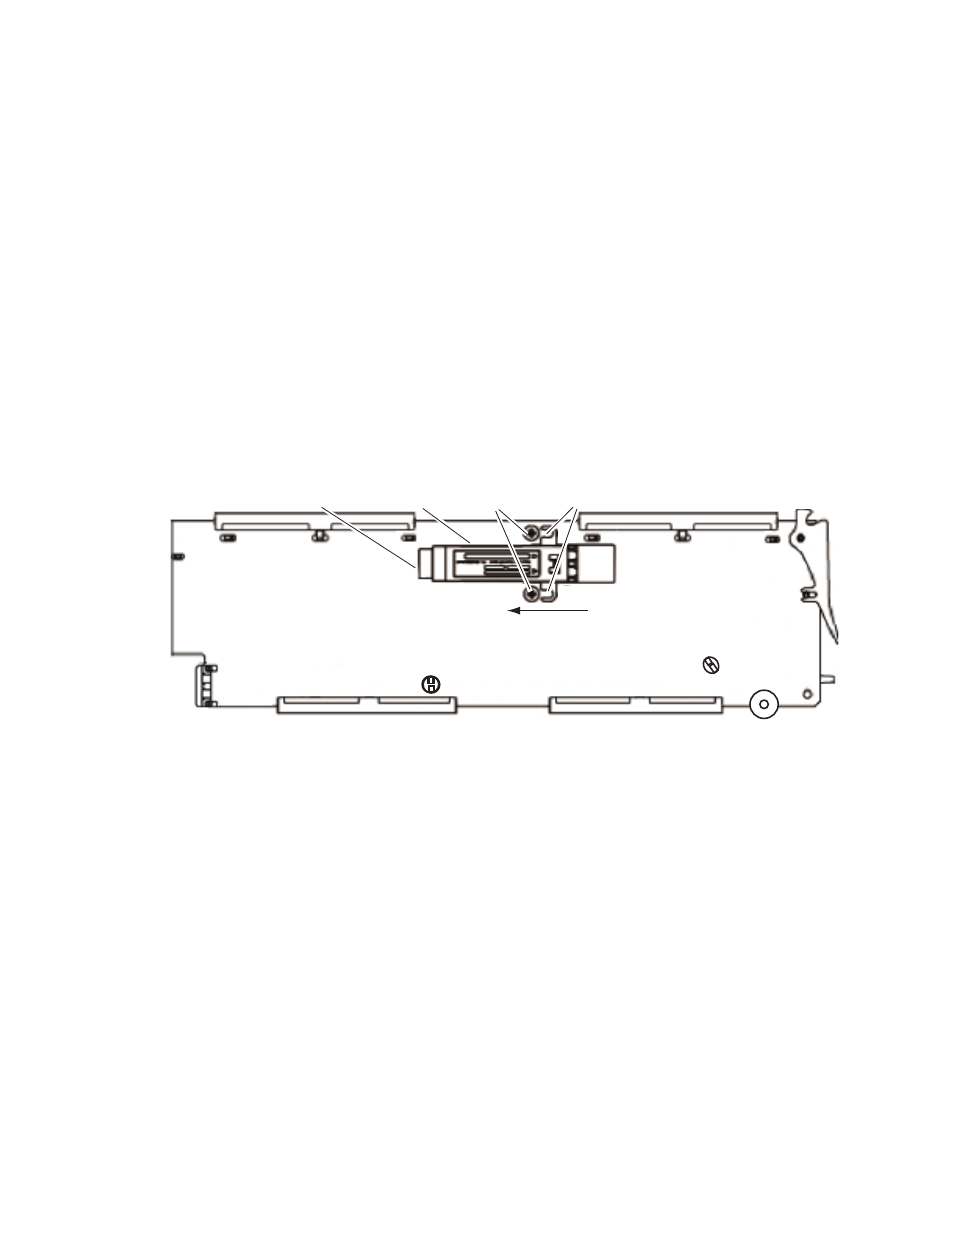
Once the bracket has been installed on the submodule, install the fiber optic
submodule on the back (solder) side of the 8949MDA-CXF or
8949MDA-SXF front module, as follows.
1.
Remove the black rubber dust cover from the submodule.
2.
On the back (solder) side of the front module, locate the two screws and
the SCA-2 connector where the submodule will be installed (
3.
Loosen the two screws slightly so you can slide the submodule bracket
straps underneath the screws and the SCA-2 connector end of the
submodule slides over the SCA-2 connector.
4.
Once the submodule is seated into the SCA-2 connector and the straps
are completely under the screws, tighten the screws to hold the
submodule in place.
Figure 9. Installing Strap-Mount SFP Submodule
5.
Before installing the jumper cable assembly, remove the protective
covers from the ferrule ends of the cable and clean all fiber optic
surfaces on the duplex and simplex connectors of the 2-channel fiber
jumper cable assembly and the SFP submodule connector with a
standard fiber optic cleaning kit as described in
.
SCA-2 connector
Submodule
Screws
Straps
Slide submodule straps under
screws and tighten.
Insert end of submodule
into SCA-2 connector.
8567_01
r0