Installing the device into the iso bay – Silvercrest SAR 28 A1 User Manual
Page 126
122
SAR 28 A1
GB
■
Do not install the device where it is subjected to high temperatures (i.e. direct
sunlight or heating vents), heavy contamination or strong vibrations.
■
Should modifi cations to the vehicle be necessary, contact your vehicle dealer
or specialist workshop.
Installing the device into the ISO bay
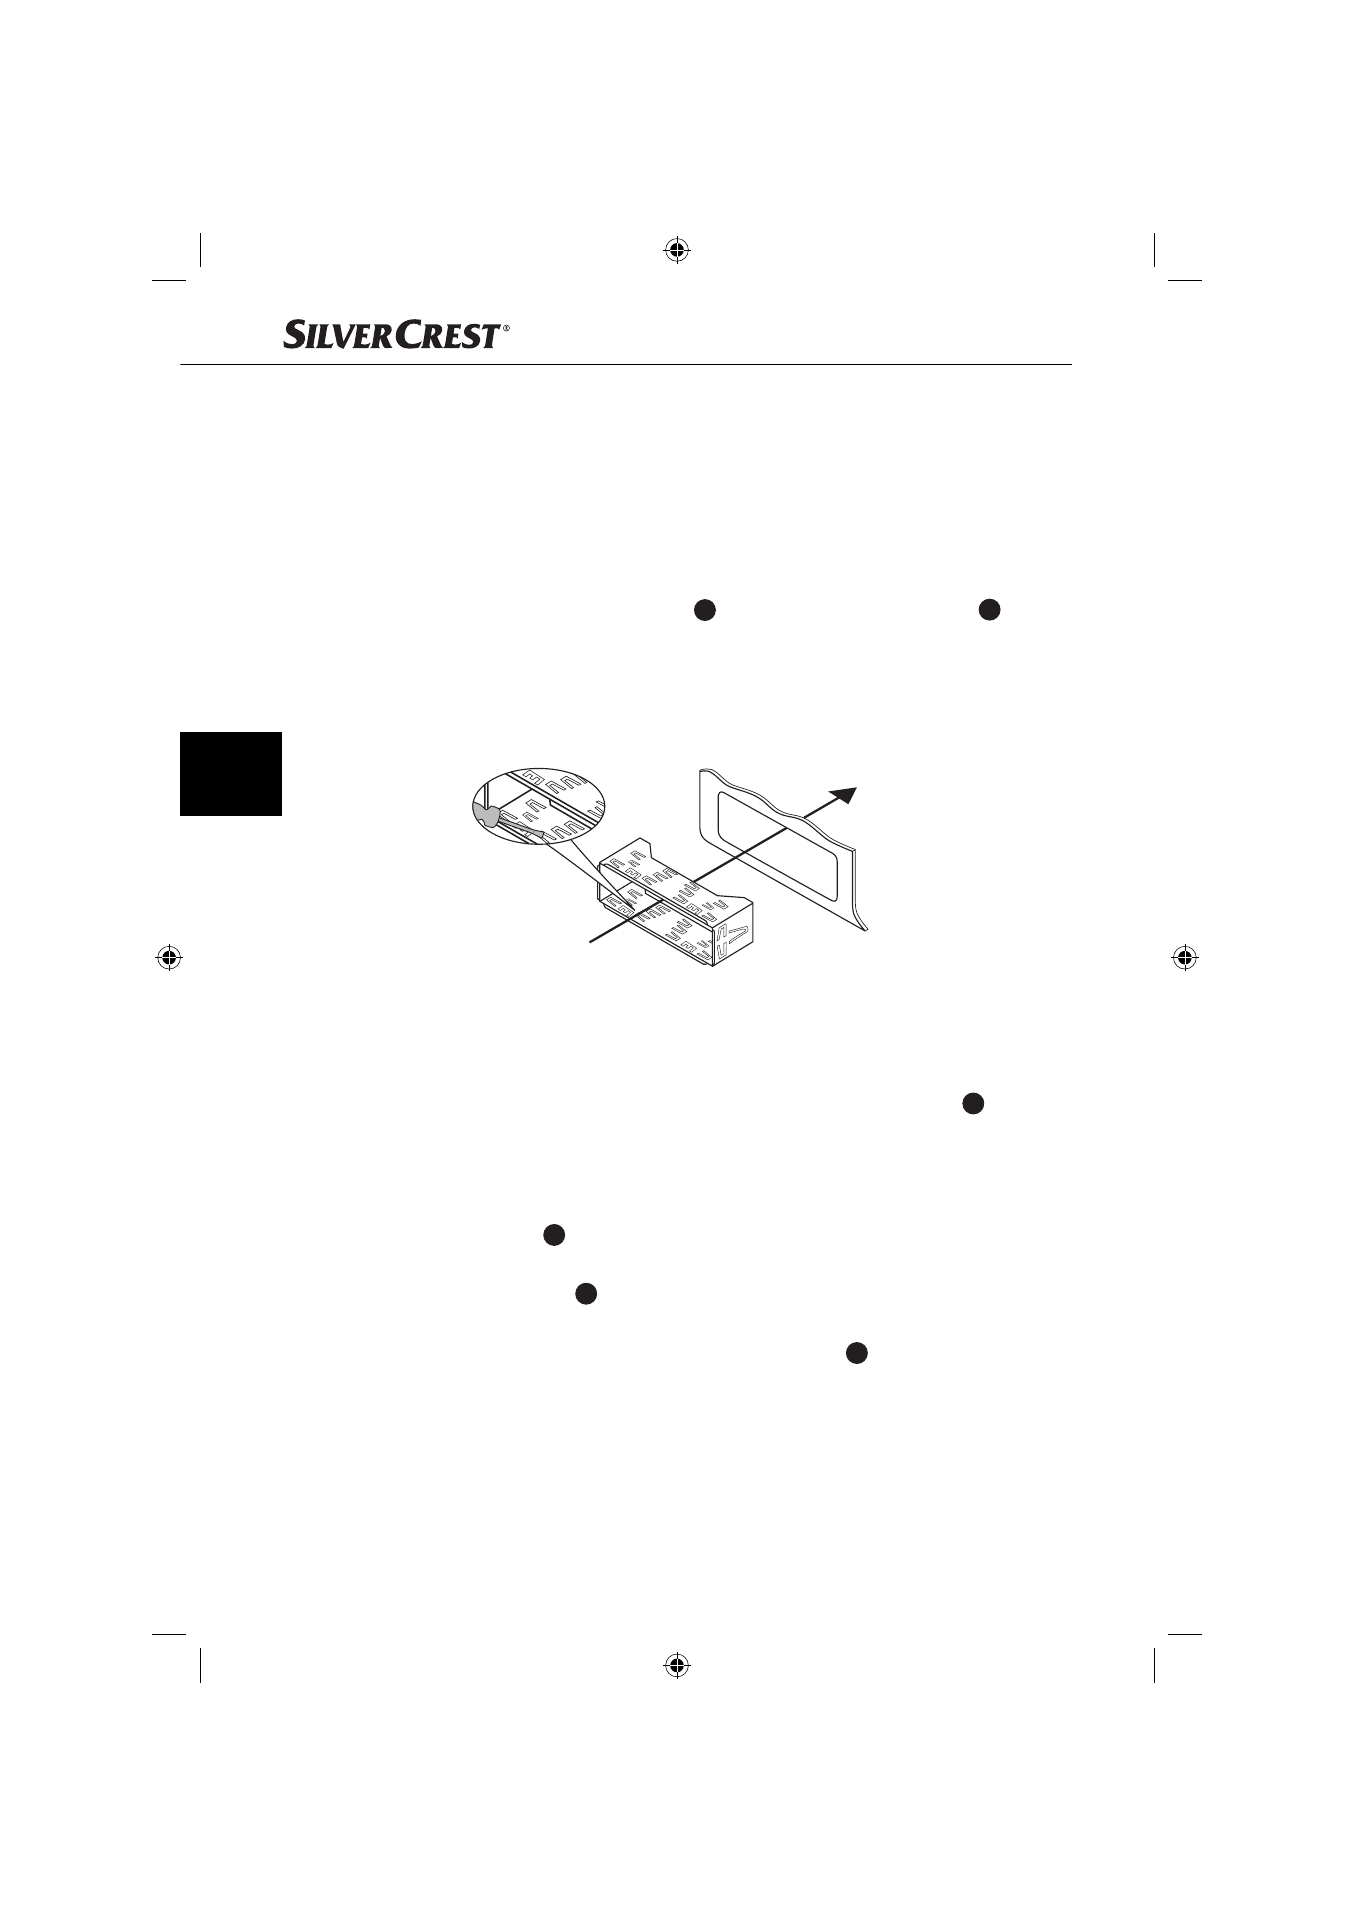
♦
Remove the installation bracket
30
from the device housing. Use the
31
spanner supplied (see also chapter “Removing the device”).
♦
Place the installation bracket into the ISO mounting bay.
♦
Bend the tabs on the installation bracket with a screwdriver so that the
bracket is fi xed fi rmly into the mounting bay (see diagram).
♦
Check to ensure the bracket is securely fi xed.
♦
Connect the ISO socket block of the device to the two ISO plugs on your
vehicle.
♦
Connect the cable from the vehicle antenna to the antenna socket
28
on the
device. The vehicle-specifi c ISO adapters you may require can be sourced
from a specialist workshop, from a local dealer or from a general store’s
technical department.
♦
If required, connect the audio cinch cable of an external amplifi er to the
LINE OUT
27
socket on the device.
♦
If required, connect the audio cinch cable of an external subwoofer to the
orange SUBW
26
cinch socket on the device.
♦
Protect your device against theft with additional measures as required.
Attach the securing screw with the anchoring plate
32
and the securing
material to the engine fi rewall of the vehicle.
IB_42775_SAR28A1_LB1.indb 122
IB_42775_SAR28A1_LB1.indb 122
22.10.13 16:07
22.10.13 16:07