Rose Electronics ServeView Pro User Manual
Page 16
SERVEVIEW PRO INSTALLATION AND OPERATIONS MANUAL
12
When all needed CPU ports have been pre-configured, the computers can
be connected. Perform the following for each computer to be connected:
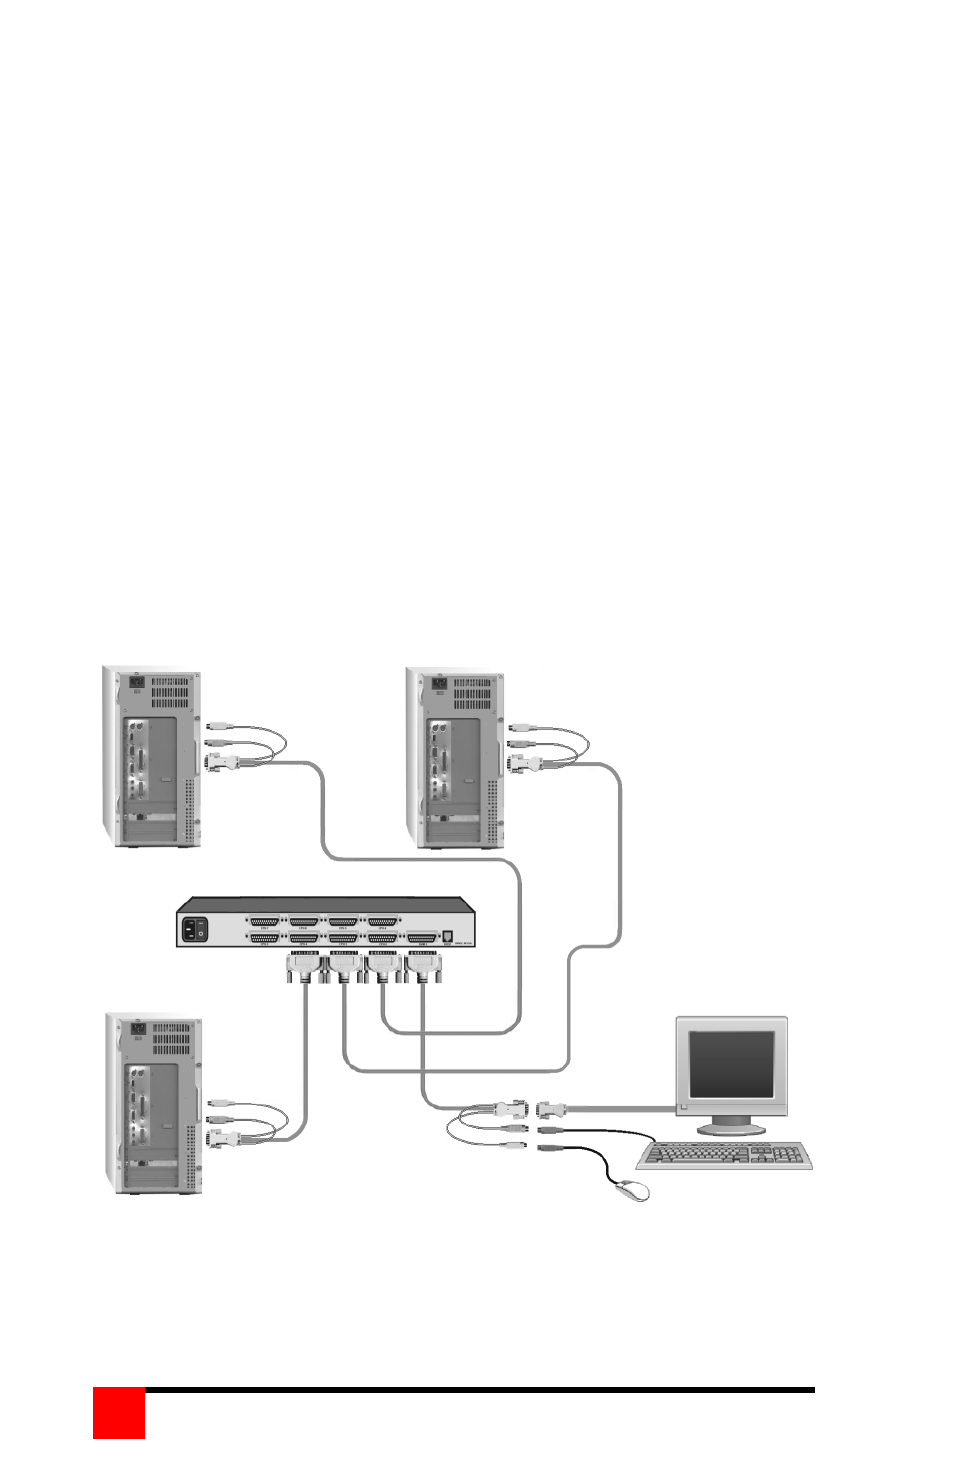
(Refer to the Troubleshooting section if needed and Figure 3 for a example
of a single unit installation)
Steps
1. Turn on the KVM stations monitor and apply power to the ServeView
Pro.
2. Wait until the “SELECT 1” LED on the front panel lights.
3. Switch the ServeView Pro to CPU port x. (Ctrl,port #,[Enter])
(Starting with x = 1)
4. Connect the computer that has been pre-determined to be connected to
the CPU port being configured using the appropriate CPU cable.
5. Boot the computer, if needed. You should see the boot-up sequence on
the KVM monitor. If the computer was connected to a pre-configured
CPU port with power applied, you should see that computers video.
6. Switch to the next CPU port to connect a computer to as defined in step
3 and perform steps 4 and 5 for this computer and for then for the
remaining CPU ports.
4 CPUs can connect to a 4-port model,
8 CPUs to an 8-port model,
16 CPUs to a 16-port model)
Figure 3. Single Unit installation
CPU-2 CPU-1
CPUs 3-8 KVM-1 Station
ServeView Pro
CPU cable KVM cable
CPU cable CPU cable