Amprobe SOLAR-500 Solar-Analyzer User Manual
Page 18
12
Auto Scan
1. Press
button to turn on the Analyzer.
2. Properly connect the pair of Kelvin clips to the solar panel and the
Analyzer. The red Kelvin clip is for positive pole and the black Kelvin clip
for negative pole. (refer to above Connecting Diagram).
3. Turn on standard light source and let it illuminates solar panel uniformly.
4. Press
(AUTO SCAN) button to perform Auto-scan. After the
scanning is finished, the result will come out like below.
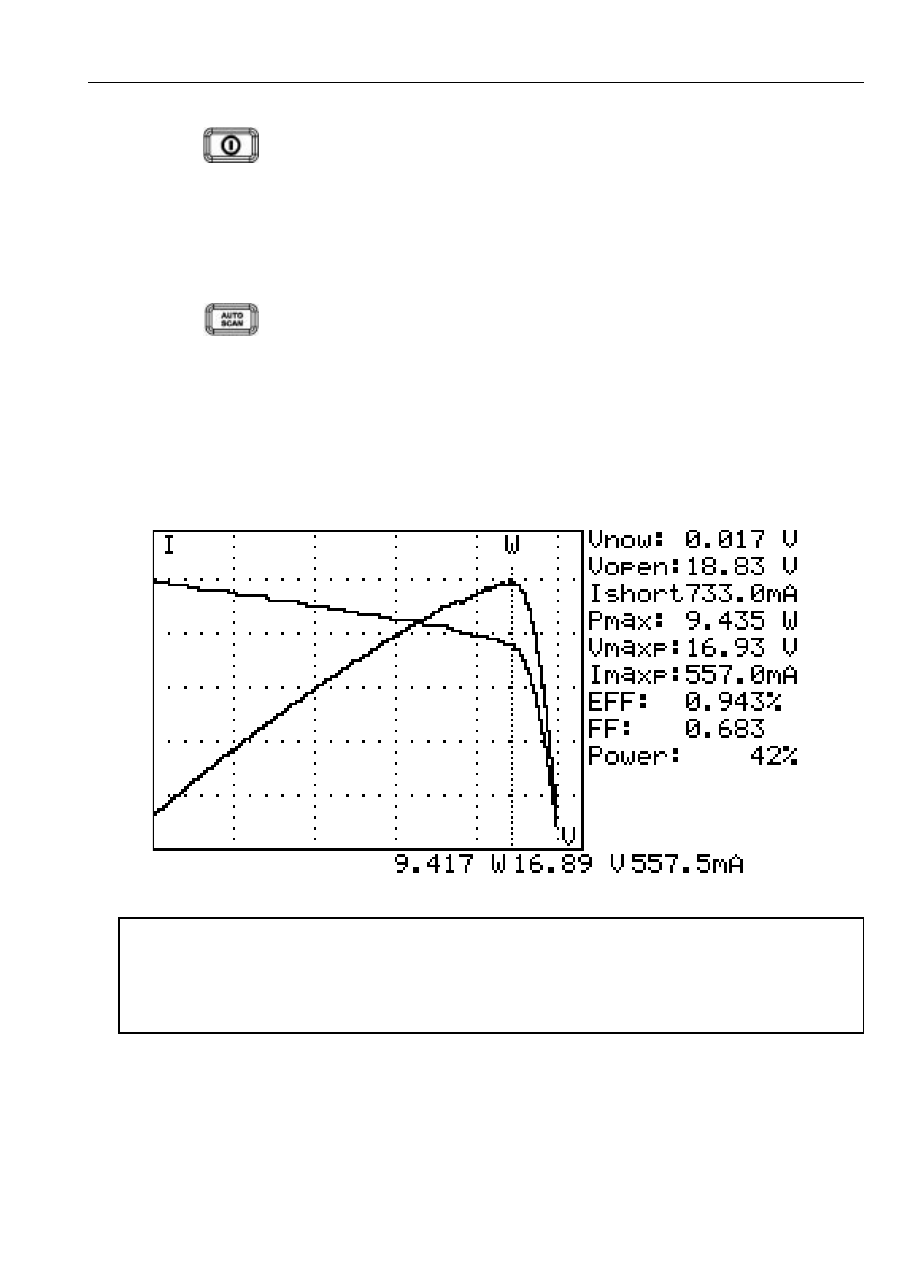
5. The unit automatically measures the followings parameters: Vopen,
Ishort, Pmax, Vmaxp, and Imaxp. Based upon those parameters, the unit
run simulation and draw I-V / V-I curve and P-V / P-I curves in LCD.
6. Users can move the cursor to review each individual values along the
curve.
�
WARNING!
There is a time delay before the unit performs the “Auto Scan”. This time
delay allows the light source to be turned on before “Auto Scan” starts.
Time delay can be set in the SETUP menu.
Note: If the short circuit current (Ishort) exceeds 6A, Auto Scan will not be
performed. Please select Manual Scan and limit the ending value of Scan
to be less than 6A.