Recording, Recording a performance, Recording your performance along with a song – Roland TD-17 Drum Sound Module User Manual
Page 10: Recording on a connected computer, P. 10, Recording your performance along with a, Song, Transmitting and receiving audio via usb, Installing the usb driver), Ding (p. 10)
10
Recording
Recording a Performance
You can easily record your own performance and play it back.
* If you want to save (export) your recorded song to an SD
card, insert the SD card before you continue (p. 3).
MEMO
You can record for up to 60 minutes if an SD card is inserted,
or up to approximately three minutes if an SD card is not
inserted. If an SD card is not inserted, you can play back
by pressing the [F2] (PREVIEW) button after recording, but
cannot save the recording to this unit.
Recording
1.
Press the [
t
] button.
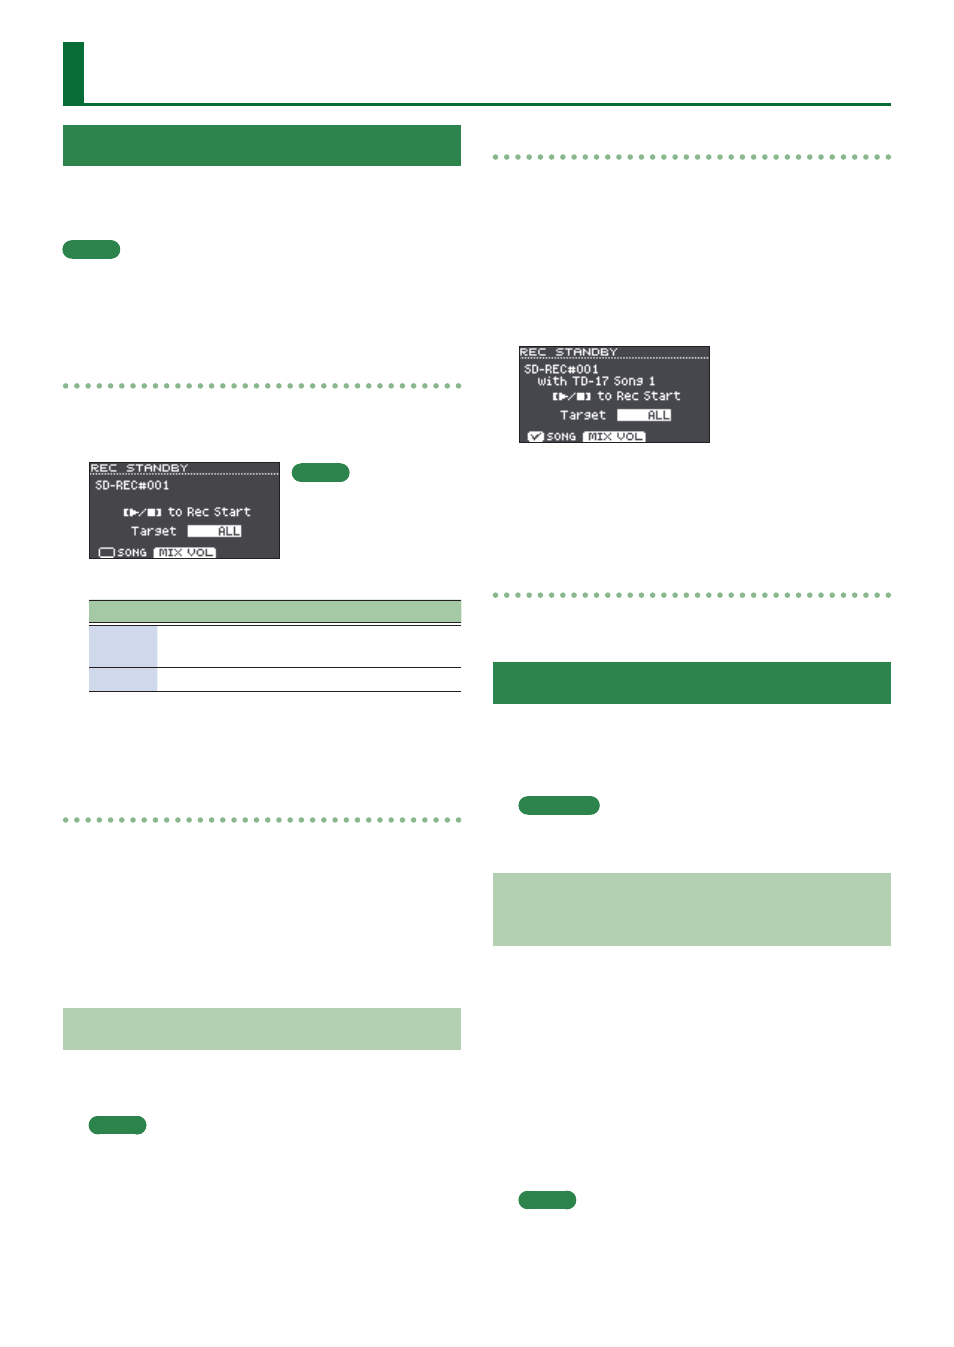
The REC STANDBY screen appears, and this unit is in the
record-standby condition.
2.
Turn the dial to select what will be recorded.
Display Explanation
ALL
Record all sound (except for the click and the
guide track).
DRUMS
Record only the sound of the drums.
3.
Press the [
s
] button to start recording.
4.
Press the [
s
] button once again to stop
recording.
Playback and saving
5.
Press the [F2] (PREVIEW) button.
The recorded performance plays back.
If you want to exit without saving the song to the SD
card, press the [F1] (DELETE) button
0
[ENTER] button to
delete the song.
6.
Press the [F3] (EXPORT) button to save the
song.
Recording Your Performance Along with a Song
You can record your performance along with one of
this unit’s built-in songs (audio data) or a song that’s saved
on the SD card.
MEMO
If you want to record along with a song from a device
connected via the MIX IN jack or Bluetooth, play back
the song on the connected device while you record as
described in “Recording.”
Selecting and recording a song
1.
Select the song (p. 9).
2.
Press the [
t
] button.
The REC STANDBY screen appears; this unit is in record-
standby condition.
3.
Turn the dial to select what will be recorded.
4.
Press the [F1] button to add a check mark to
“SONG.”
5.
Press the [
s
] button to start recording.
This unit starts recording and the song starts playing.
6.
Press the [
s
] button once again to stop
recording.
Playback and saving
7.
Play back and save the recorded
performance.
Recording on a Connected Computer
To enable this unit to transmit and receive MIDI, simply use
a USB cable (sold separately) to connect it to your computer.
In order to transmit and receive MIDI, set the USB Driver
Mode to “GENERIC.”
Reference
For details on the USB Driver Mode, refer to “Data List”
(PDF).
Transmitting and Receiving Audio via USB
(Installing the USB Driver)
The USB driver is software that transfers data between your
computer’s software and this unit.
In order to transmit or receive audio as USB AUDIO, you
must install the USB driver.
1.
Install the USB driver.
2.
Set this unit’s USB Driver Mode to
“VENDOR.”
* The setting takes effect when this unit’ is powered off
and on again.
3.
Connect this unit to the computer (p. 3).
MEMO
For details on downloading and installing the USB driver,
refer to the Roland website.
http://www.roland.com/support/
MEMO
If you want to record
along with a click, sound
the click at this point