Customizing a kit, Choosing a pad to edit, Selecting an instrument (assign) – Roland TD-17 Drum Sound Module User Manual
Page 14: Adjusting the volume of each pad (level), P. 14, Saving the settings, Choosing by hitting a pad, Choosing with the [pad select] button
14
Saving the settings
On this unit, your edits are saved automatically, so
you don’t have to perform any operation to save the
settings.
Settings are also saved when you turn off the power.
Here’s how to edit an individual instrumental sound such as
the snare drum or kick drum.
Reference
For details on the parameters that can be edited, refer to
“Data List” (PDF).
Choosing a Pad to Edit
Choosing by hitting a pad
To edit the settings for a pad, strike that pad to select it.
To select the rim of a pad, strike the rim.
MEMO
By long-pressing the [PAD SELECT] button to make the
PAD SELECT indicator blink, you can prevent the pad
you’re editing from being switched. This is convenient if
you’re playing a phrase while you edit.
Choosing with the [PAD SELECT] button
You can also use the [PAD SELECT] button to select the pad
to edit.
Each time you press the [PAD SELECT] button, the pad
you’re editing will change. The PAD SELECT indicator of the
selected pad is lit.
Setting a parameter for each strike location
([F1] (H&R ON) button)
In screens that show the [F1] (H&R ON) button, you can
press the [F1] (H&R ON) button to add a check mark so that
parameters such as for the head and rim can be selected
and edited as a set.
If you clear the check mark, you’ll be able to select and
specify the head and rim (bow/edge/bell) independently.
* The upper right of the screen indicates which is selected.
At this time, you can also hold down the [ENTER] button
and press the [PAD SELECT] button to switch directly
between the head and rim (bow/edge/bell).
Selecting an Instrument (ASSIGN)
Here’s how to select the instrument that’s played by each
pad.
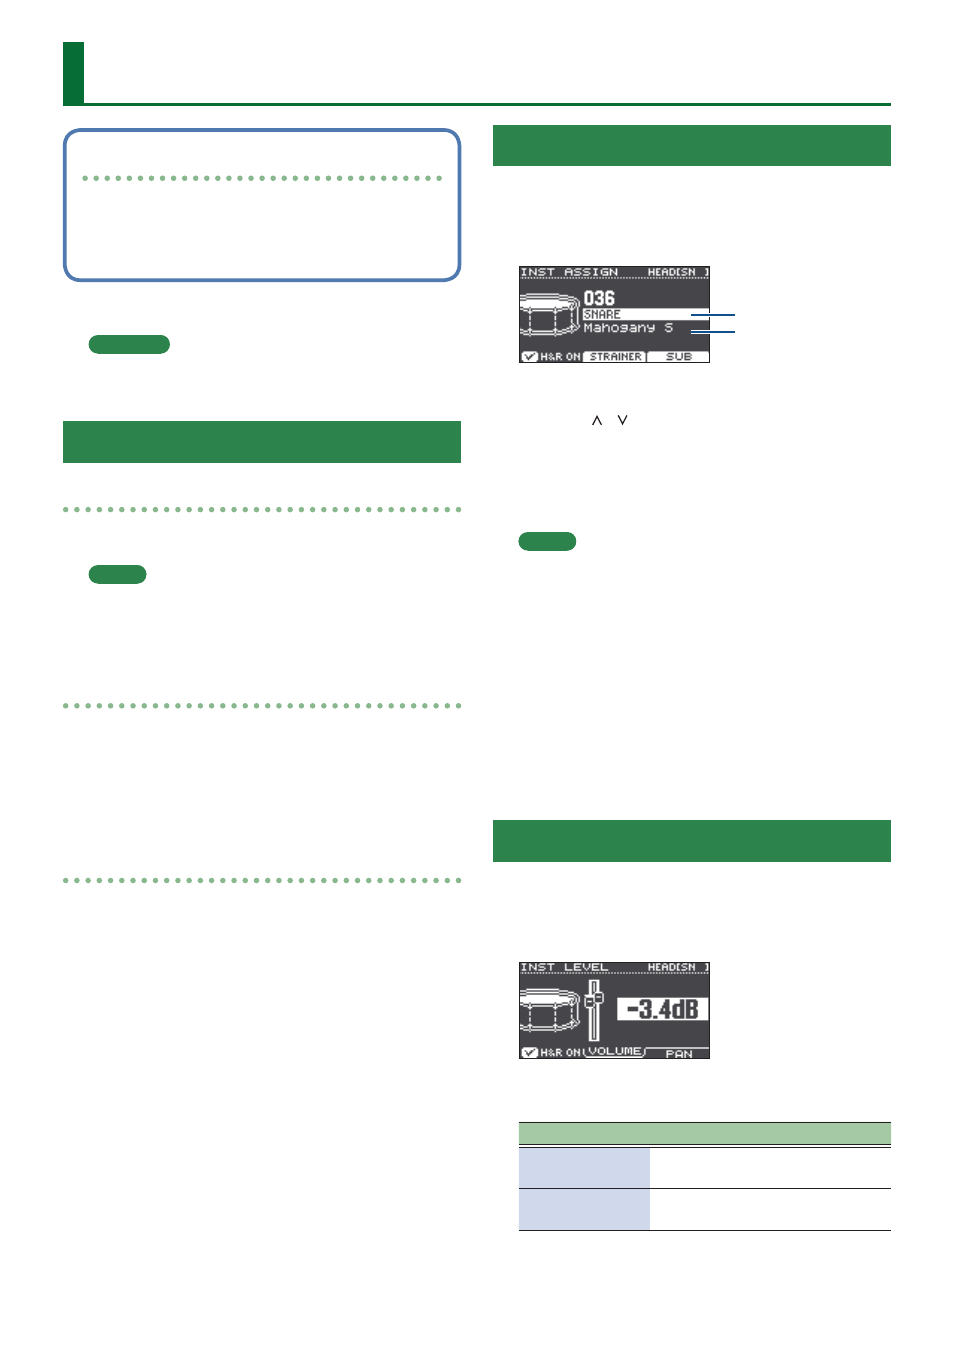
1.
Press the [ASSIGN] button.
The INST ASSIGN screen appears.
Instrument group
name
Instrument name
2.
Select the pad that you want to edit.
3.
Use the [ ] [ ] buttons to move the cursor
to the instrument group or instrument, and
use the dial to select an instrument.
4.
Press the [DRUM KIT] button to return to the
KIT screen.
MEMO
5
For some instruments, you can press the [F2] button
and make detailed settings.
5
By pressing the [F3] (SUB) button you can select a sub-
instrument (layer) and edit its settings.
5
The recommended instruments are selected as a set
according to the instrument that you select.
5
If the [F1] (H&R ON) button shows a check mark, the
instruments for the head and rim etc. can be selected
as a set. According to the instrument that you select,
the recommended instruments are selected as a set.
5
For details on the instruments that can be selected
and their parameters, refer to “Data List” (PDF).
Adjusting the Volume of Each Pad (LEVEL)
Here’s how to adjust the volume and pan
(stereo position) for each pad.
1.
Press the [LEVEL] button.
The INST LEVEL screen appears.
2.
Select the pad that you want to edit.
3.
Turn the dial to edit the value.
Button
Parameter
Explanation
[F2] (VOLUME)
button
VOLUME
Adjusts the volume
of each pad.
[F3] (PAN) button
PAN
Adjusts the stereo
position of each pad.
4.
Press the [DRUM KIT] button to return to the
KIT screen.
Customizing a Kit