Mounting this unit on the stand, Turning the power on/off, Making hi-hat settings – Roland TD-17 Drum Sound Module User Manual
Page 4: Turning the power on, Turning the power off, Getting ready
4
Getting Ready
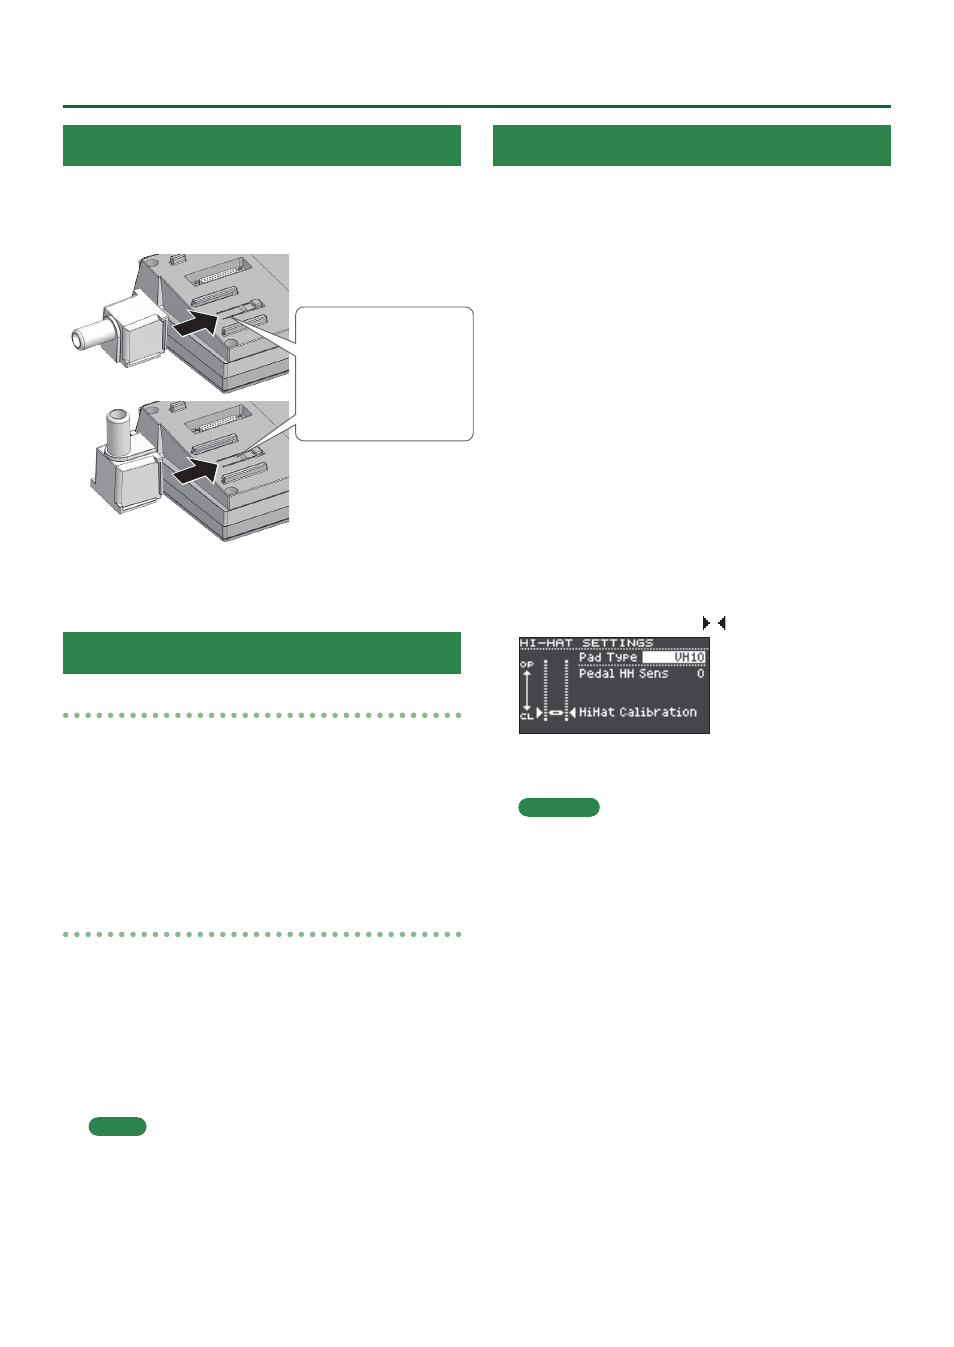
Mounting This Unit on the Stand
Use the included sound module mount to attach this unit to
your drum stand.
Attach the sound module mount in the orientation that’s
appropriate for your drum stand setup.
Align the protrusions
of the sound module
mount with the rails of
this unit, and slide it in
until you hear it click.
* When turning the unit over, be careful so as to protect
the buttons and knobs from damage. Also, handle the
unit carefully; do not drop it.
Turning the Power On/Off
Turning the power on
1.
Minimize the volume of this unit and the
connected devices.
2.
Press the [
L
] (power) button to turn on the
power.
The power turns on.
3.
Power-on the connected devices, and adjust
the volume.
Turning the power off
1.
Minimize the volume of this unit and the
connected devices.
2.
Turn off the power to the connected devices.
3.
Hold down the [
L
] (power) button for one
second or longer.
The screen indicates “Shutting Down” and after a time
the power turns off.
MEMO
The power to this unit will be turned off automatically
after a predetermined amount of time has passed since it
was last used for playing music, or its buttons or controls
were operated (AUTO OFF function).
If you do not want the power to be turned off
automatically, disengage the AUTO OFF function (p. 23).
Making Hi-hat Settings
If you’re using a VH-10 or VH-11 V-hi-hat (subsequently
called a “VH”), adjust the offset on this unit.
This adjustment is required in order to correctly detect
open, close, and pedal operations.
1.
After making the hi-hat settings, release
your foot from the pedal, and while keeping
your foot off the pedal, turn on the power of
this unit.
2.
Loosen the clutch screw and let the hi-hat
rest naturally on the motion sensor unit.
3.
Press the [SETUP] button.
4.
Use the dial to select the “Hi-Hat Settings,”
and press the [ENTER] button.
5.
Use the dial to set the Pad Type to “VH10” or
“VH11.”
6.
While reading the meter displayed on the
right side of this unit’s screen, adjust the
offset with the VH’s offset adjustment screw.
Adjust the offset so that the
appear in the meter.
7.
Press the [DRUM KIT] button to return to the
KIT screen.
Reference
If you need, make further adjustments to the parameters,
refer to “Data List” (PDF).