Replacing the projection lens, Removing, Attaching – Sony E 30mm f/3.5 Macro Lens User Manual
Page 45
45
GB
Replacing the Projection Lens
Replacing the Projection Lens
Avoid removing/attaching the lens with the projector
installed suspended from a ceiling.
For usable projection lenses, see “Optional accessories”
in the Help Guide.
Do not attach any lens other than the specified accessory
lens sold separately.
Be careful not to drop the projection lens.
Avoid touching the lens surface.
1
Return the projection lens to the center
position.
While the unit is turned on, press the LENS
SHIFT key on the Remote Commander, then
press the RESET key on it. The projection lens
returns to the center position.
The projection lens cannot be removed unless it has
returned to the center position.
2
Turn off the projector, then unplug the AC
power cord from the wall outlet.
When replacing the lens, your eyes may be
damaged if a strong light accidently gets into your
eyes. Before replacing the lens, turn off the
projector and then unplug the AC power cord.
3
While pressing and holding down the LENS
RELEASE button, rotate the projection lens
counterclockwise to pull out the lens straight.
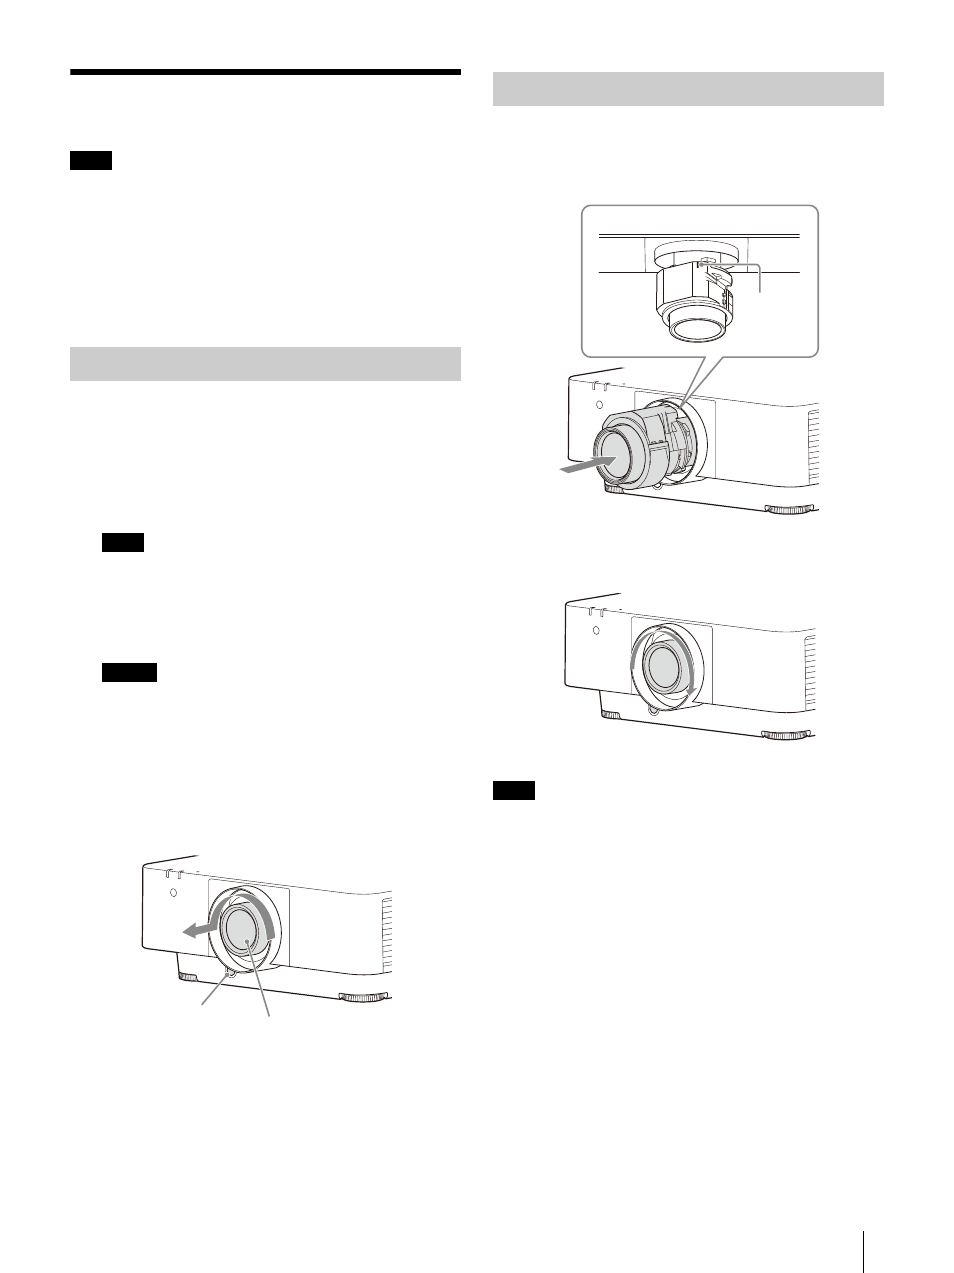
1
Fully insert the projection lens with the index
on the lens facing toward the top surface of
the main unit.
2
Rotate the lens clockwise until it clicks.
When attaching the projection lens, do not press the LENS
RELEASE button.
Notes
Removing
Note
Caution
Projection lens
LENS RELEASE button
Attaching
Note
Index
Top of surface of the main unit