Blackmagic Design DaVinci Resolve Studio (Dongle) User Manual
Page 107
92
Lesson 4
Assembling a R
ough Cut
When you are ready to add your first clip to the timeline, the easiest way to see all of
the available editing functions is to use the edit overlay.
10
Drag from the center of the source viewer into the timeline viewer but do not yet
release the mouse button.
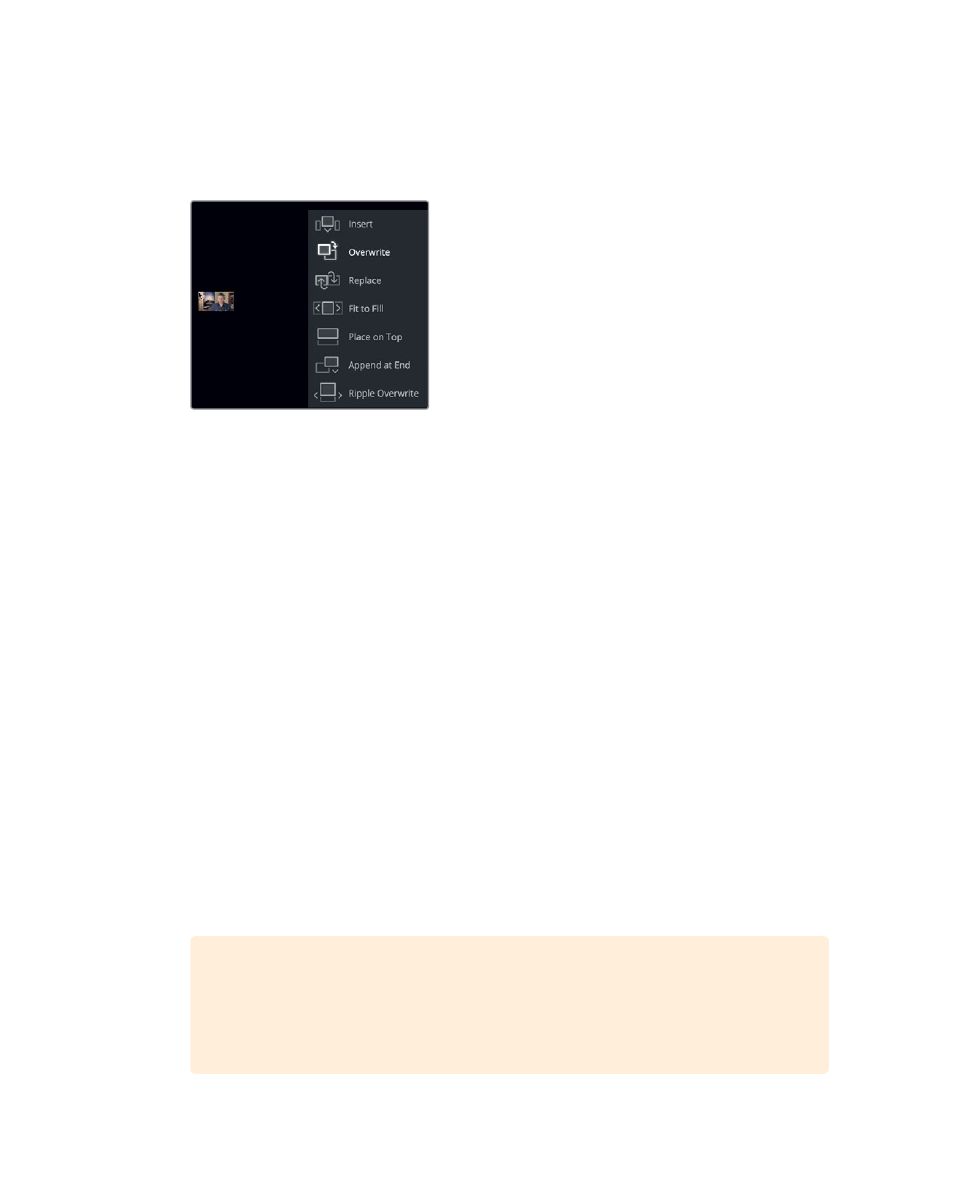
The edit overlay appears in the timeline viewer displaying seven edit functions which
differ slightly from the cut page:
Overwrite
covers up a clip (or part of a clip) in your timeline using the new clip.
Insert
adds the clip to the timeline at the location of the playhead. Everything is split
and moved down to make room for the new clip.
Replace
substitutes a clip in the timeline with a new clip without using any In
or Out points.
Fit to Fill
changes the speed of a clip to fit a specified length.
Place on Top
positions one clip on top of another for blending or compositing.
(Same as cut page)
Ripple Overwrite
replaces a clip of one length with a clip of another and ripples the
timeline based on the difference in duration. (Same as cut page)
Append at End
adds new clips after the last clip in the timeline, regardless of where
the playhead is located. (Same as cut page)
The overwrite edit is the default highlighted function which means that you can release
the mouse button anywhere in the timeline viewer to perform that edit. Because you
have nothing else in the timeline, overwrite is a fine choice for this edit.
11
Release the mouse button to perform an overwrite edit.
12
Drag the timeline playhead back to the start of the timeline, and press spacebar to
play a little bit of the first edit.
TIP
If at any time you make a mistake, DaVinci Resolve allows you to undo
your most recent steps. You can choose Edit >Undo several times to undo
multiple steps, or choose Edit > Undo List and select the last step you want
performed from the list of previous steps.