Exploring the interface – Blackmagic Design DaVinci Resolve Studio (Dongle) User Manual
Page 239
224
Lesson 9
Mixing Sound in Fairlight: Exploring the Interface
Exploring the Interface
Let’s talk about workflow. You are almost finished with your edit, and your project is now
more or less complete. At some point, you have to move on to audio finishing. Traditionally,
all audio post-production was completed separately from editing using standalone audio
software. As a result, media conversions and duplication of work were necessary just to
share the edited timeline with an audio-post application. You are about to experience how
that workflow is accelerated by DaVinci Resolve 16.
1
Open DaVinci Resolve, if necessary; and in the Project manager, open the Age of
Airplanes project.
2
In the Rough Cuts bin, double-click the
05 Fairlight Rough Cut
to open it in the
timeline.
This timeline is slightly different from the one you used in the previous lesson. It has all
the volume changes you made, along with the keyframing and fade-up on the music
track, but it also has more sound effects.
3
At the bottom of the DaVinci Resolve interface, click the Fairlight button.
That is the one-and-only workflow step required to move from editing to audio post!
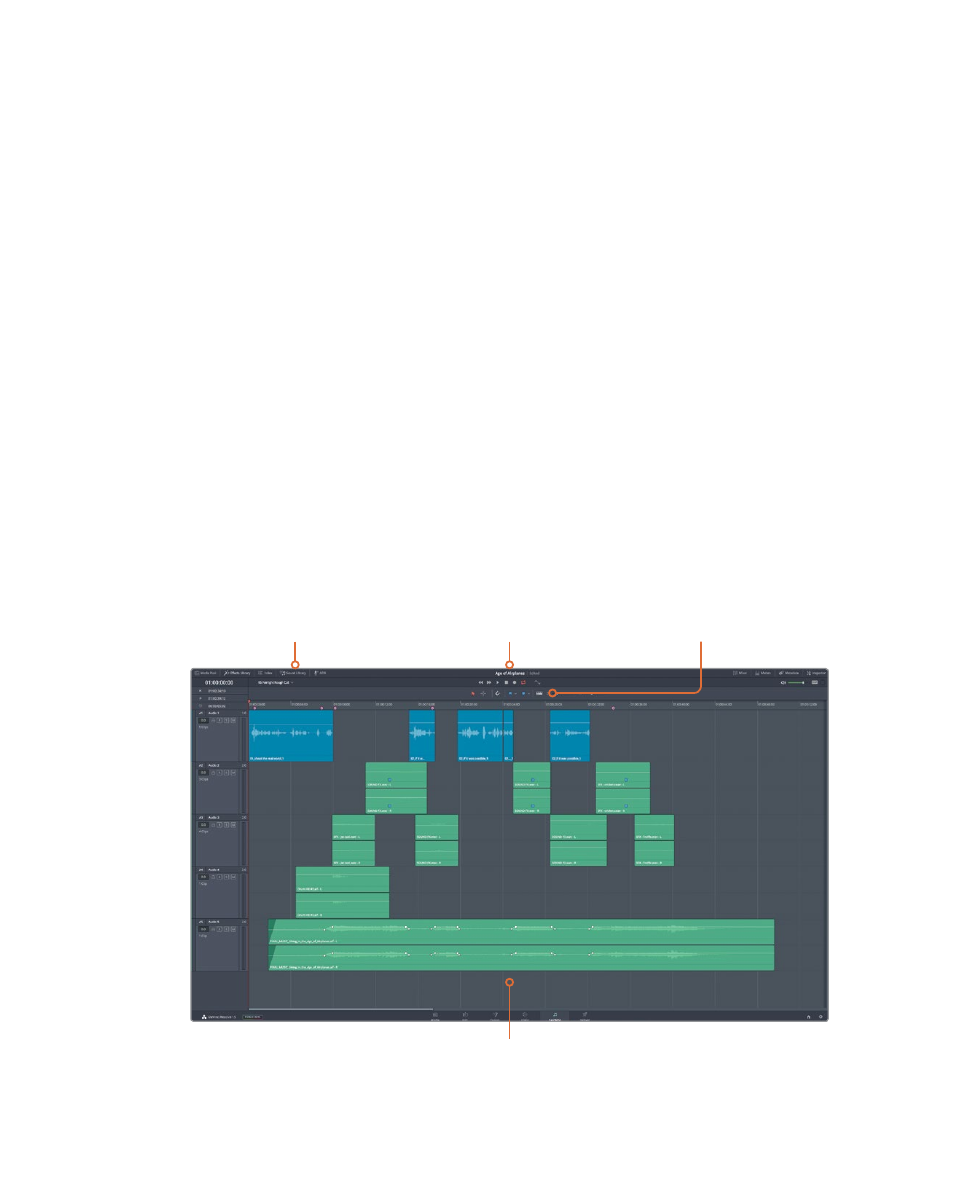
While the interface may appear to be a single large timeline, the Fairlight page is
actually divided into four sections.
Transport controls for
playing, navigating and
recording in a timeline
Timeline that shows
each audio track with
individual channels
Toolbar for commonly
used tools and
commands
Interface toolbar
for showing and
hiding panels