Arming a track for recording – Blackmagic Design DaVinci Resolve Studio (Dongle) User Manual
Page 254
239
R
ecording A
udio in a Timeline
3
In the track header, double-click the Audio 2 name, and type
VO
because this will
be your voiceover track.
4
In the upper-right corner of the window, click the Mixer button to open the mixer.
Input settings appear at the top of each channel strip just below the track number
assignment. Tracks without an assigned input display No Input.
5
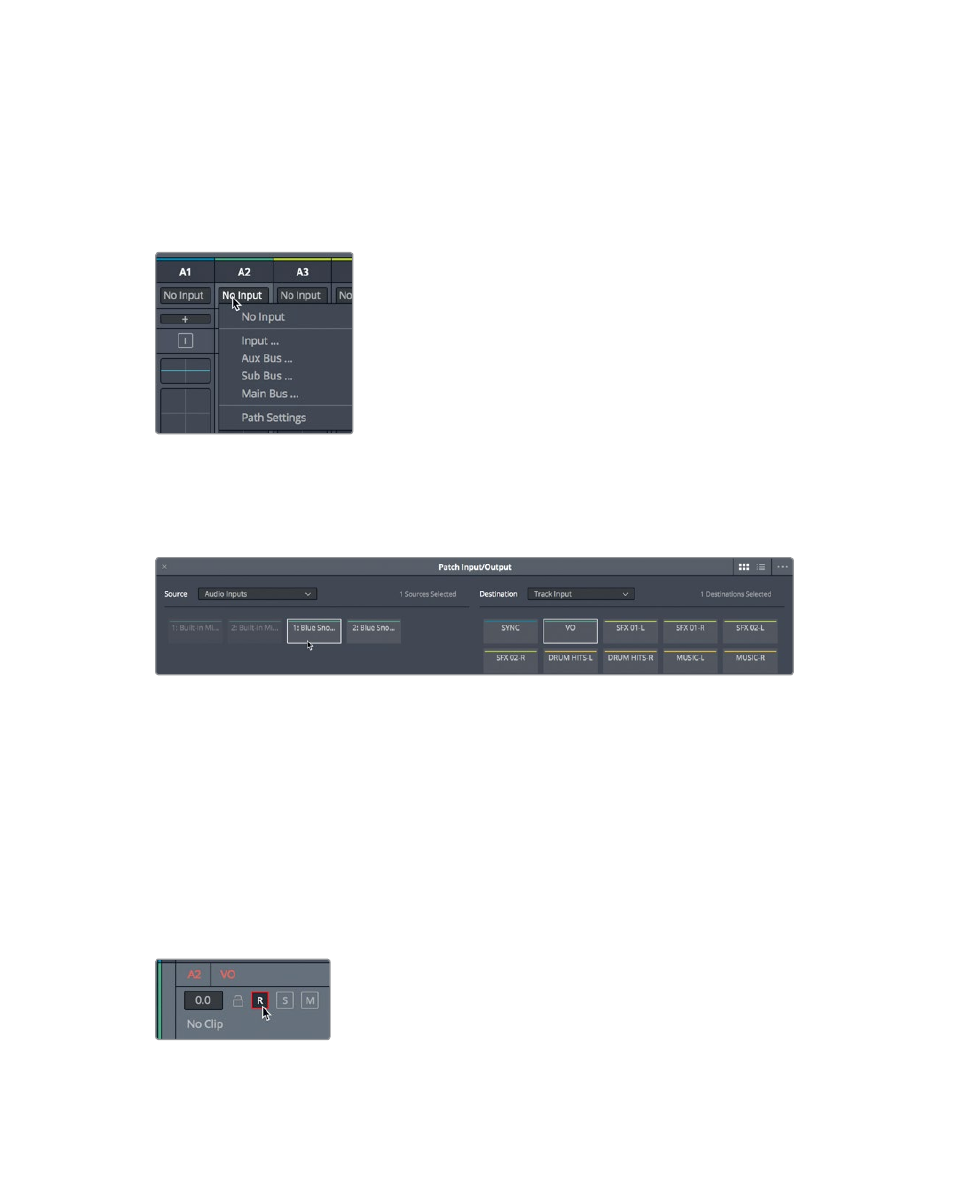
At the top of the A2 channel strip, in the Input pop-up menu, choose Input.
The Patch Input/Output window opens displaying the Source inputs to the left and
the Destination tracks to the right.
6
Select the first channel for your microphone as the source, and select the VO track
as the destination.
7
At the bottom of the window, click Patch to set your input patch, and then close
the window.
Your track is created and patched. Now, you must arm it for recording.
Arming a Track for Recording
Each track header includes an arm button to enable the track for recording. To do so,
you must first patch the track with an input, as you’ve done for the Audio 2 track. The arm
button (R button) is available in both the track header and the track’s channel
strip in the Mixer.
1
In the A2 track header, click the arm button.
The track name and arm button turn red to indicate that the track is armed
for recording.