Applications > motion detection – Vivotek SD9161-H-v2 2MP PTZ Network Dome Camera User Manual
Page 156
VIVOTEK
156 - User's Manual
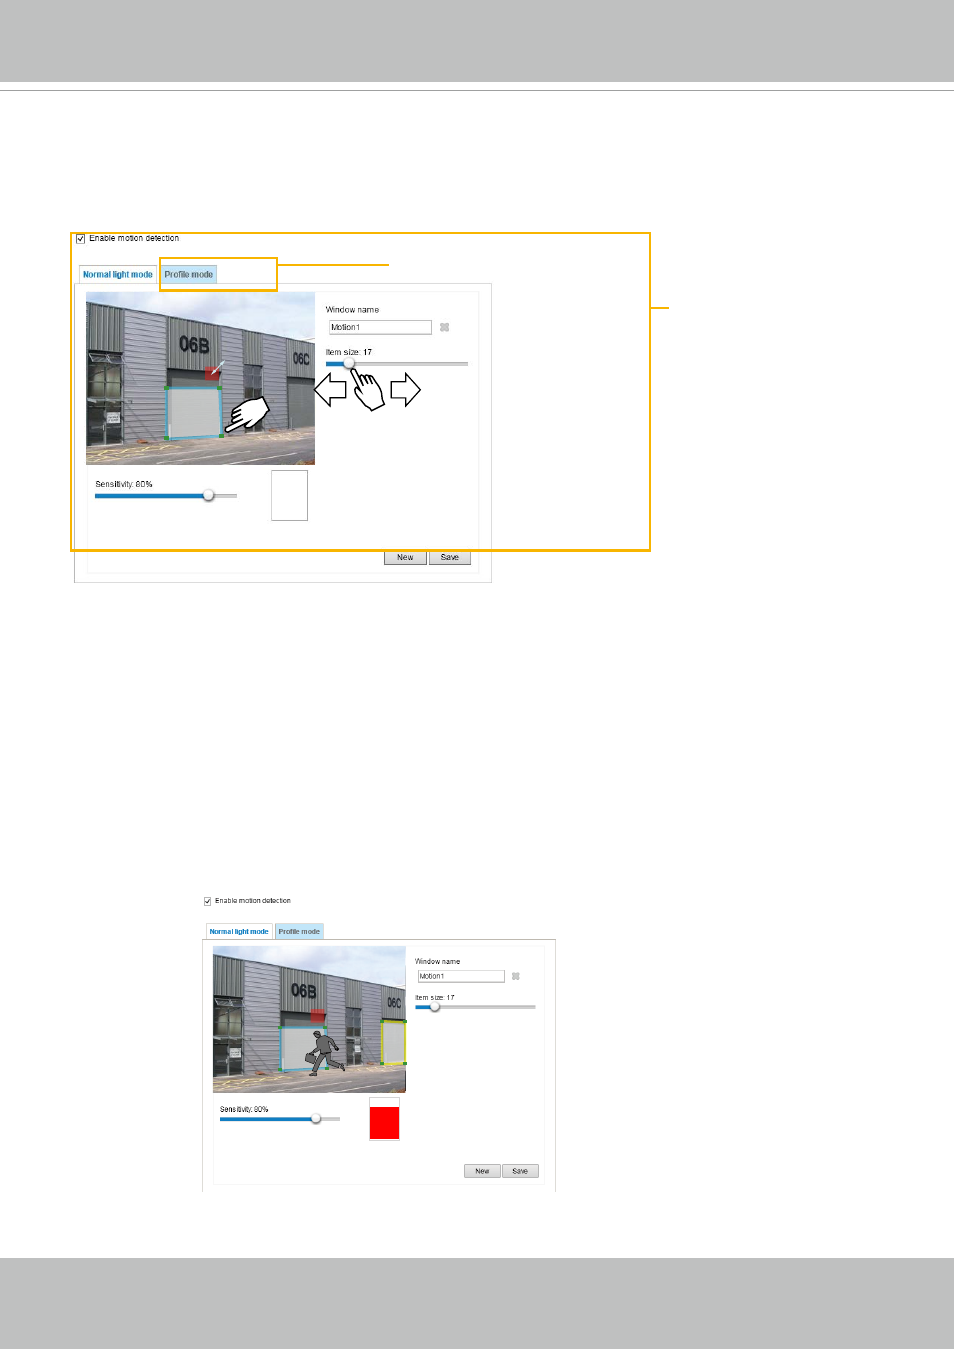
Motion Detection Setting 2:
For special situations
Motion Detection Setting 1:
For normal situations
Applications > Motion detection
This section explains how to configure the Network Camera to enable motion detection. A total
of 5 motion detection windows can be configured.
Follow the steps below to enable motion detection:
1. Click
New
to add a new motion detection window.
2. In the Window Name text box, enter a name for the motion detection window.
■ Use 4 mouse clicks to designate a detection window. You can change the window shape by dragging
the corner marks to a preferred location.
■ Drag the item size tab to change the minimum size of item to trigger an alarm. An item size box will
appear in the center of screen for your reference (in semi-transparent red). An intruding object must
be larger than the Item size to trigger an alarm. Change the item size according to the live view.
■ To delete a window, click the X mark on the right of the window name.
3. Define the sensitivity to moving objects by moving the Sensitivity slide bar. Note that a high sensitivity
is prone to produce false alarms such as the fast changes of light (such as day/night mode switch,
turning lights on/off). A movement must persist longer than 0.3 second for the motion to be detected.
4. Click
Save
to enable the settings.
5. Select
Enable motion detection
to enable this function.
For example:
The Percentage Indicator will rise or fall depending on the variation between sequential images. When
motions are detected by the Network Camera and are considered to exceed the preset threshold, the red
bar rises. Meanwhile, the motion detection window will be outlined in red.