Deq-ii quick start tutorial (continued), Changing presets, Page 8 – Oxmoor DEQ-1 User Manual
Page 10
Page 8
DEQ 1
Title:
ENTER
(
)
PRE 1
OUT
OUT
CURSOR
SELECT
MENU
DEQ
PRESET
EQUALIZE
EDIT
UTILITY
DEQ
PRE
1 kHz
0 dB
OUT
OUT
LE
ENTER
1
1
Continue practicing selecting and adjusting the filters
until you are comfortable with the action of the cursor
keys. If you are processing audio you will hear the effects
of the changes as you make them.
CHANGING PRESETS
So far we have only been making adjustments to one
Preset, in this case, Preset 1. This section will describe
how to access the other Presets so that adjustments may
be made to them.
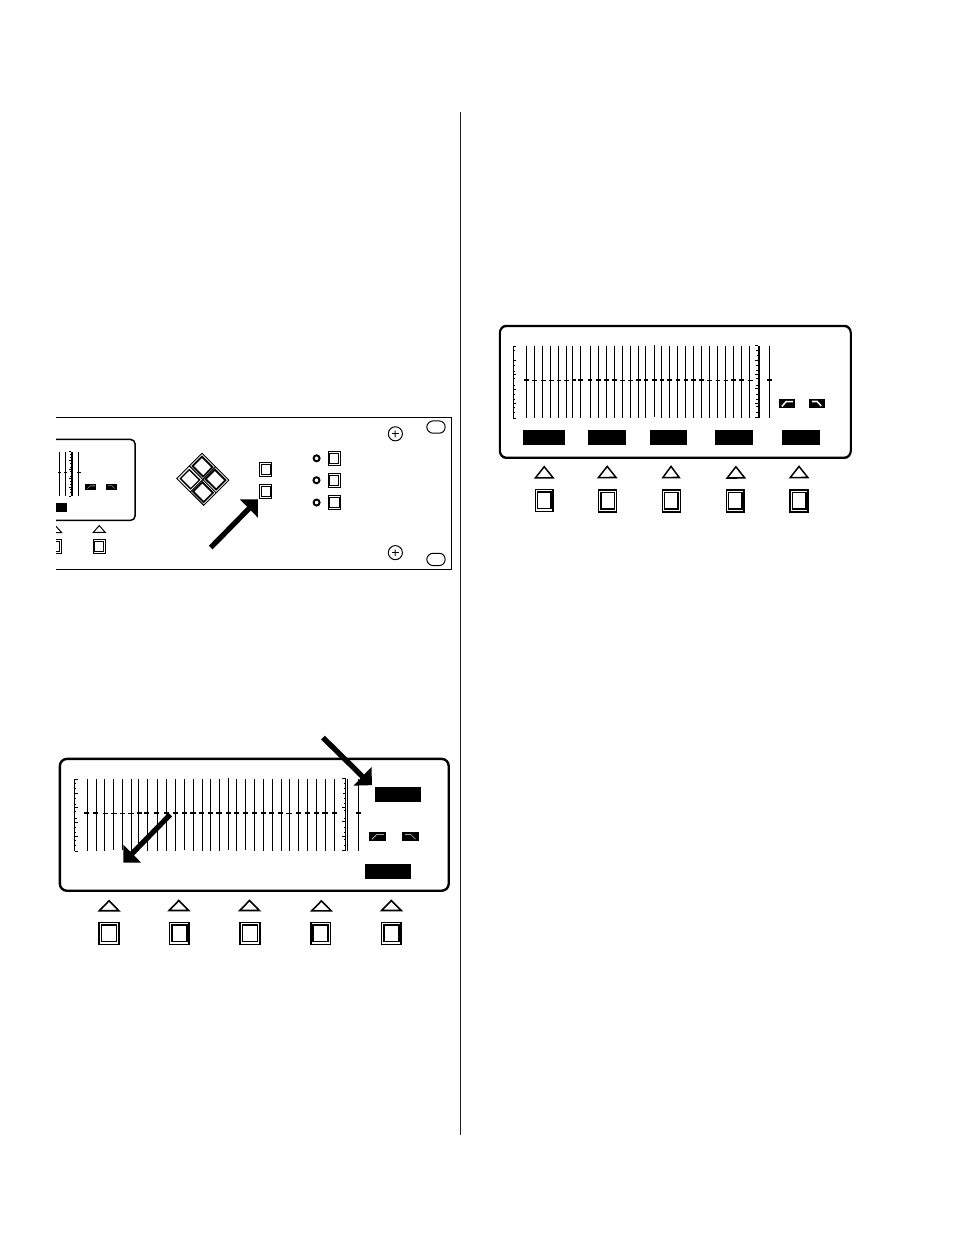
You may change Presets from within any of the main
menus. To do so, simply push the Preset Select button as
shown in Figure 1.10.
The LCD display should appear as shown in Figure 1.11
(if the DEQ is set to Preset 1). Note that the Softkey label
for the Active Preset (Preset 1 ) is in normal-video while
the other labels are in reverse-video. This serves as an
indication of the Active Preset number (the same
information is displayed in the Status Area). As usual,
the Softkey labels indicate the action that will be
performed if the corresponding Softkey is pressed. Press
the Softkey labeled "PRE 2" now. Notice that the Active
Preset is now Preset 2 as displayed in the status area (line
2). Also, notice that you have returned to the menu that
you were in when you pushed the Preset Select button
and that the Softkey have been given labels appropriate
for that menu. Now, reenter Preset Select mode by
pressing the Preset Select button. The screen should
again appear as in Figure 1.11 except that the PRE 2
Softkey is now in normal-video indicating that Preset 2 is
the Active Preset. Note that only Preset 1 through 4 are
currently accessible. To access Preset 5 through 8 press
the Softkey labeled MORE and note that the Softkeys
have been relabeled as "PRE 5", "PRE 6", "PRE 7", "PRE
8", and "CANCEL", as shown in Figure 1.12.
If you decide not to change Presets simply push
"CANCEL" and you will be returned to the menu you
were in before you entered Preset Select mode.
To summarize the procedure for changing Preset:
1. Enter the Preset Select mode by pressing the Preset
Select key.
2. Push the Softkey that is labeled with the number of
the Preset to which you wish to change.
3. Push the Softkey labeled "MORE" to access Preset 5
through 8 and press "CANCEL" to exit Preset Select
mode without changing Presets.
Figure 1.11: Presets 1 through 4
Figure 1.10: Preset Select
DEQ
PRE
OUT
OUT
PRE 6
PRE 7
PRE 8
PRE 5
CANCEL
CANCEL
2
1
Figure 1.12: Presets 5 though 8
DEQ-II QUICK START TUTORIAL (CONTINUED)