3 locations, Locations” on pa – AGI Security CAA-AVM542 User Manual
Page 14
Basics
12
1)
The device list shows all the added devices. The allocated devices will be displayed in blue areas.
2)
Choose the number of blocks for the layout.
3)
Choose between
“Fixed” and “Sequence” (Sequence is for Professional version only)
for live layout.
4)
Choose a user group for access to the layout.
5)
Choose the number of channels for the current block.
6)
Click
“Clear” to clear all devices from the current block.
7)
Give a name to each block. (for sequential view only)
8)
Choose the duration of sequence. (for sequential view only)
9)
Click
“New” to create another layout.
10)
Click
“Load” to call up all the layouts created.
11)
Click to automatically allocate the added devices to the current layout.
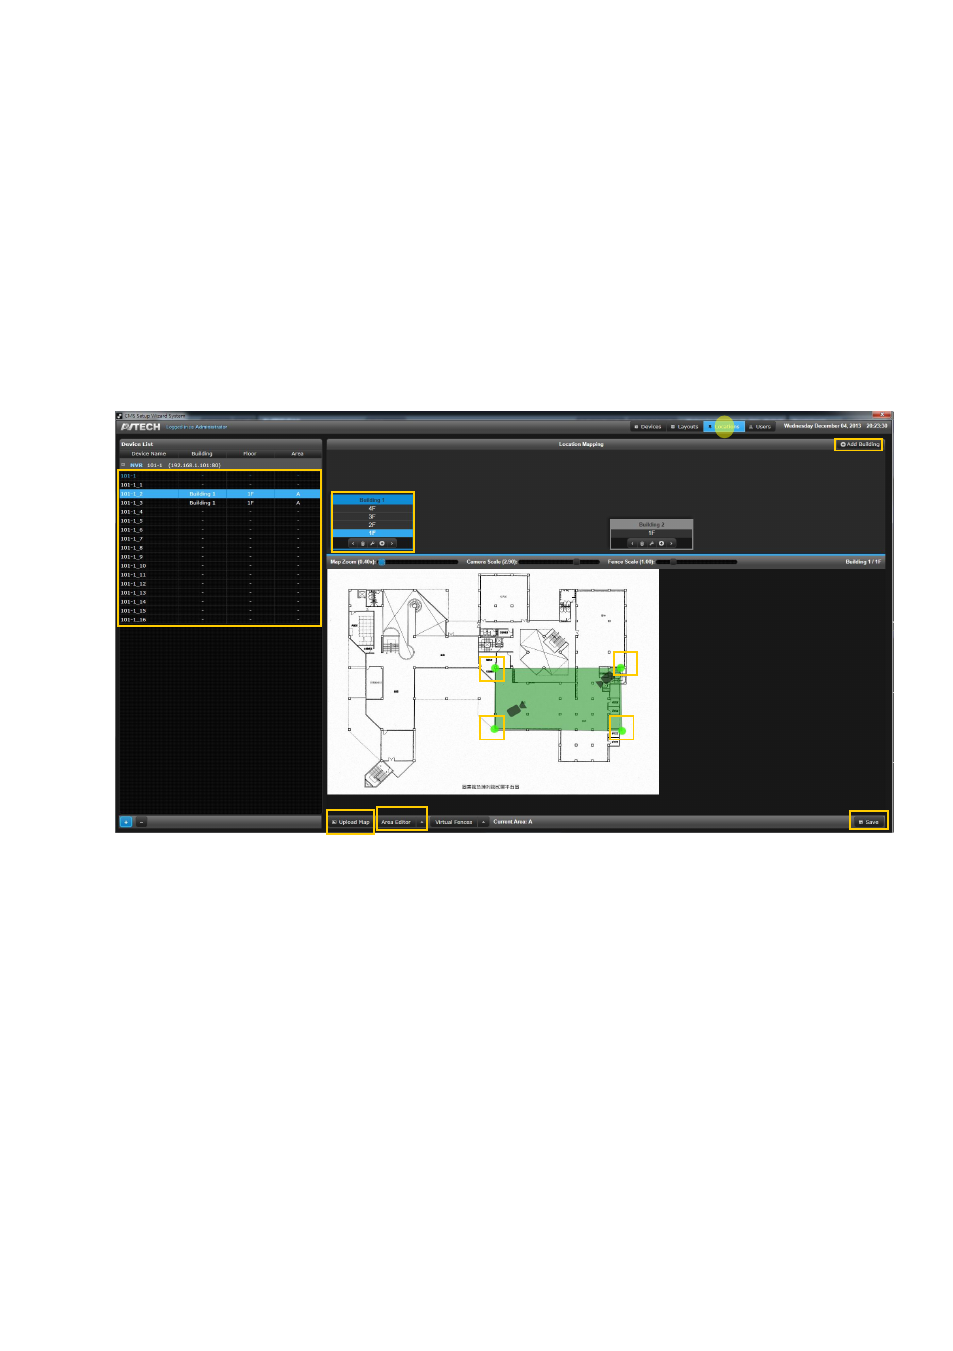
3.2.3 Locations
Here
’s the interface for “Locations.” You can configure E-map here. Get started by clicking “Add Building.” Note
that the numbers in the picture below don't mean the operation order.
1)
To add a building on E-map, click
“Add Building.”
2)
Click
“+” to add a floor. Select the floor you want to configure.
3)
Click
“Upload Map” to upload your floor plan saved as JPG or PNG.
4)
Click
“Area Editor” to add an area on your floor plan. Make an area on the floor plan by clicking on it. Click
the green dots to undo the area.
5)
Drag a device from the device list onto the floor plan. You can move the icons of devices by dragging them.
To adjust the surveillance angle of the cameras, drag the front part.
6)
Click
“Save” and save your current settings.
1
2
3
4
5
6