Argox G-6000 User Manual
Page 13
Setting from Panel
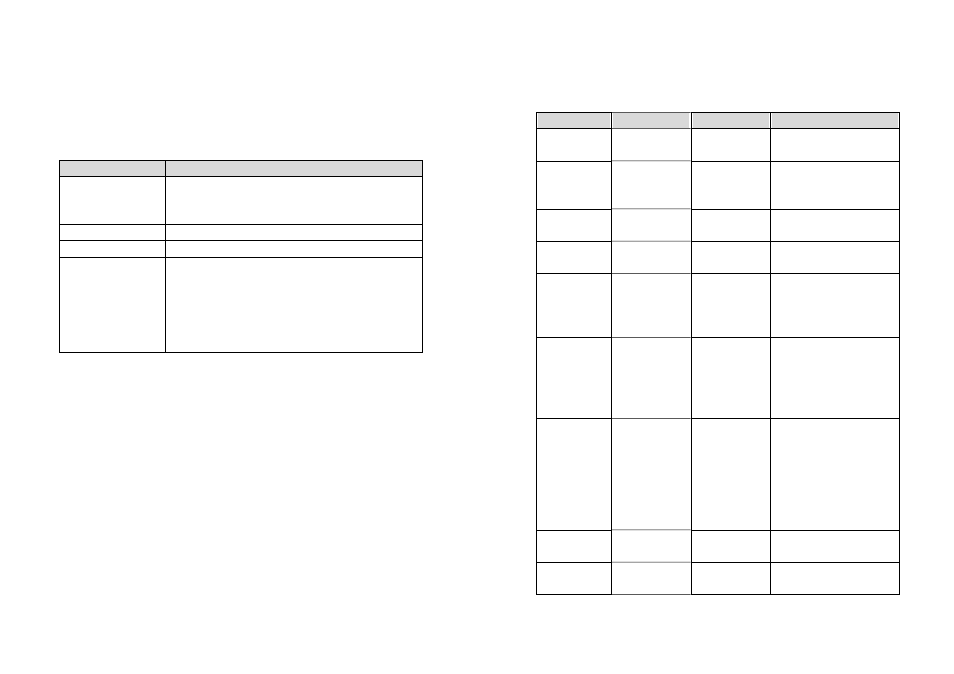
Selection Items
Item
Range
Factory Default
Remarks
CUT/PEEL POS
(mm)
-15 ~ 15 mm
0 mm
Controls cut and peeling
position.
PRINT OFFSET
(mm)
-8 ~ 15 mm
0 mm
Controls vertical print
position. Positive value
only.
TPH VER OFFS
(mm)
-3~3 mm
0 mm
Offset of vertical print
position
RECOVERY
PRINT
ENABLED,
DISABLED
ENABLED
Contents
reprint
after
media-out or
ribbon-out
GAP HEIGHT MORE THAN 10
mm,
5 ~ 7 mm,
8 ~ 9 mm.
MORE THAN 10
mm
This item appears only
when DIP switch bit 4 is at
ON position.
WIN CON LEN
(mm)
0 ~ 254 mm
0 mm
This takes effect only
when you run under
Windows with bundled
printer driver and use
continuous media.
BASE SPEED
(IPS)
0 ~ 4 IPS
0 IPS
This is for the PPLB
emulation only. When
you choose TLP2642/
3642 driver the speed is
limited under 2 ips. This
makes printer to upgrade
the speed.
COUNTER ON
LCD
ENABLED,
DISABLED
ENABLED
MEDIA SENS.
TYPE
REFLECTIVE
SEE-THROUGH
REFLECTIVE
Select the proper type by
the media
You can change some settings from proper panel operation instead of
sending commands.
Buttons
Function
PAUSE + CANCEL
(Don’t press over 1
second)
Enters setting mode.
A second press will exit setting mode and return to
normal mode.
FEED
Pressing this button will show next parameter.
PAUSE
Pressing this button will show next setting item.
CANCEL
Selects certain parameter and causes the
parameter to be saved in the permanent memory
(E
2
PROM).
Except you change it from either panel or
command the parameter will be kept even you
restart the printer.
Procedure
Turn on the printer.
1.
Till “ READY” message is displayed on the LCD, press
[PAUSE]+[CANCEL] buttons simultaneously.
2.
Press [PAUSE] button for several times to select the proper item that
you want to change the parameter.
3.
Press [FEED] button till the specified parameter appears.
4.
Press [CANCEL] button to save it. A “*” mark will appear at the last
column.
5.
Press both [PAUSE] and [CANCEL] buttons at the same time, to
return to normal mode.
Note:
Do not make this operation during printing or communication.
25
26