Printing configuration report – Argox G-6000 User Manual
Page 15
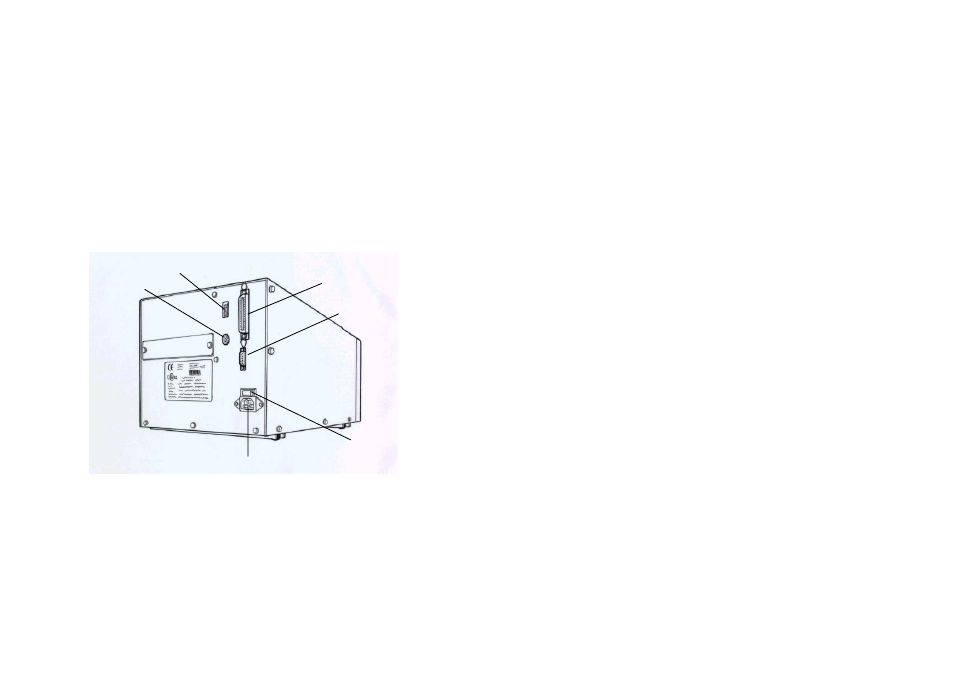
Rear Panel
Printing Configuration Report
The rear panel includes
Performing the Self Test
-
An 8-bit DIP switch
-
A 36-pin parallel port
1. Turn off the printer. Press and hold the FEED button.
-
A 9-pin RS-232 serial port
2. Turn on the power.
-
A PS/2 keyboard connector
3. When the message “SELF TESTING …” is displayed on the LCD and
READY indicator blinks, release the button.
-
A power switch and power connector
4. The printer will print out a configuration report.
5. Finally the “READY” message is displayed and the READY indicator
stops blinking and lights up.
DIP Switch
Centronics
PS/2 KB I/F
6. The following information will be printed on this report.
RS-232
Serial Port
- Font
list
-
DIP switch settings
-
Hardware configuration and status
- Label
parameters
- Firmware
version
Power Switch
Power Connector
30
Note:
After self test the printer will enter character dump mode. For normal
operation press the CANCEL button to stop dump mode.
29