Installing the bracket – Audio Enhancement Product Manual User Manual
Page 50
The Achiever, Elite II, IR-2007 and RA101 Receiver/Amplifier on the MTBR-07S
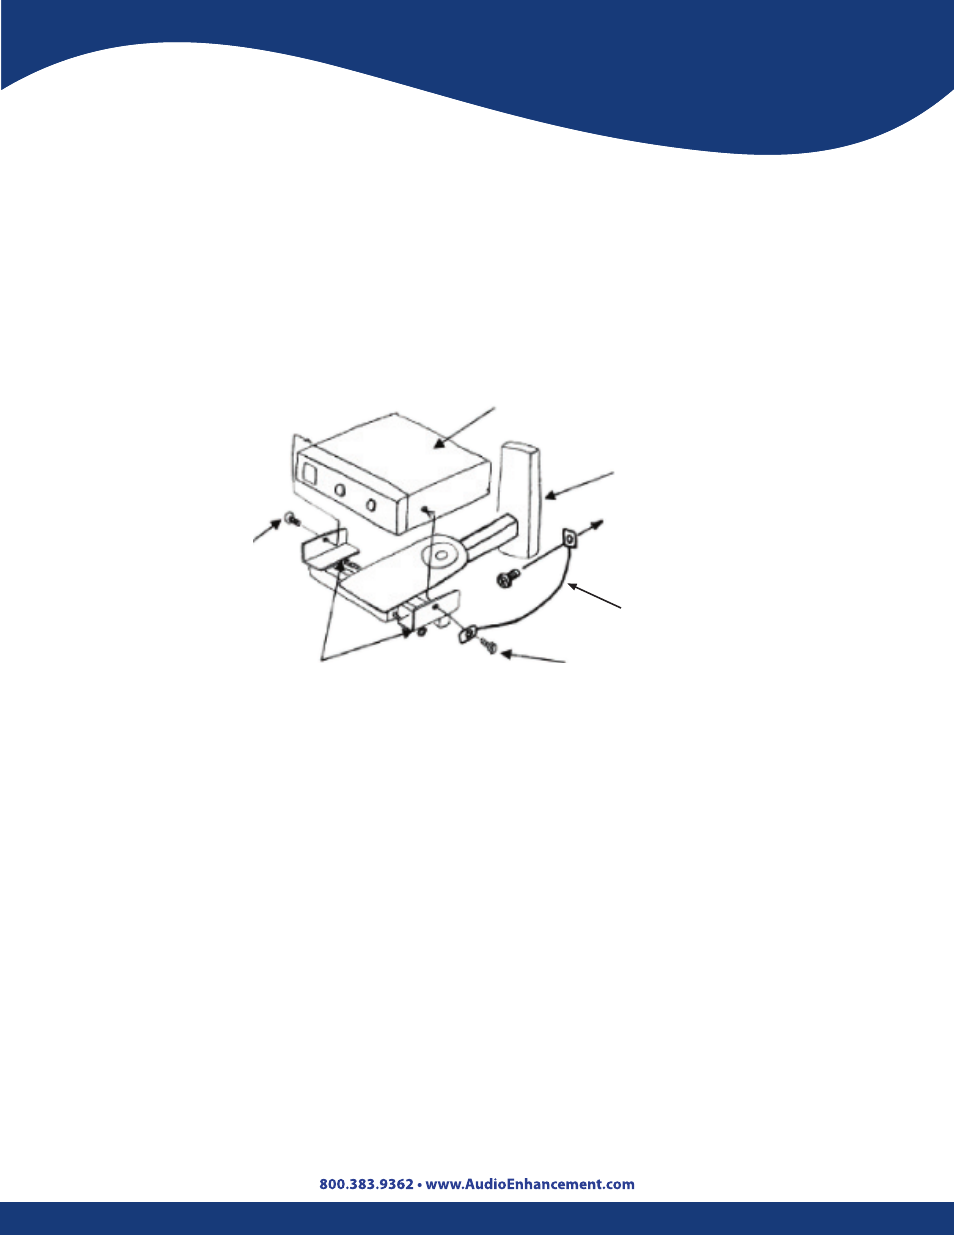
Install the Achiever, Elite II, IR-2007 and RA101 Receiver/Amplifier as described below .
1 . Fix the main unit to the bracket . Use 2 screws to fix the bracket to the side of the main unit .
The torque for the screws is 1 .18 N*m±0 .2 N*m (12 kgf* cm ±2 kgf* cm) .
2 . Fix the adjustment bolts . The torque for the screws is 1 .18 N*m±0 .2 N*m (12 kgf*cm±2
kgf*cm) .
3 . After installation, make sure nothing is loose . Do a visual check and make sure that nothing
is unsteady and the screws are tight .
4 . Fix the wire loop to the wall .
Warning for the Installation of the Bracket
Fix the bracket and the wire loop to the wall .
Please ensure the installation is securely attached to the wall .
Wire Loop Requirement:
• Diameter: more than φ in.
• Material: High carbon steel wire rods
[Caution]
Confirm there is enough strength in the wall to support the infrared receiver/amplifier with the
bracket . Do not install it in plasterboard . Reinforce it when strength is insufficient . Secure the
AC adapter as follows when it is required to be installed higher than 30 in . from floor .
• Use metal tie-wrap and tie up the two parts with something secure:
1 . The brick of the AC adapter (make sure to tie it using more than two tie wraps apart
from each other)
2 . Direct Current (DC) side cable at a very close point to the brick .
50
116
/
Installing the Bracket
Main Unit
MTBR-07S
Bracket
Screw
(provided)
Screw
(provided)
Adjustment bolt
Wire Loop
To the Wall