Optional equipment 47, Installation instructions – Avalon Firestyles Olympic User Manual
Page 47
Optional
Equipment
47
© Travis Industries
93508061
4150520
Front Blower (part # 99000190)
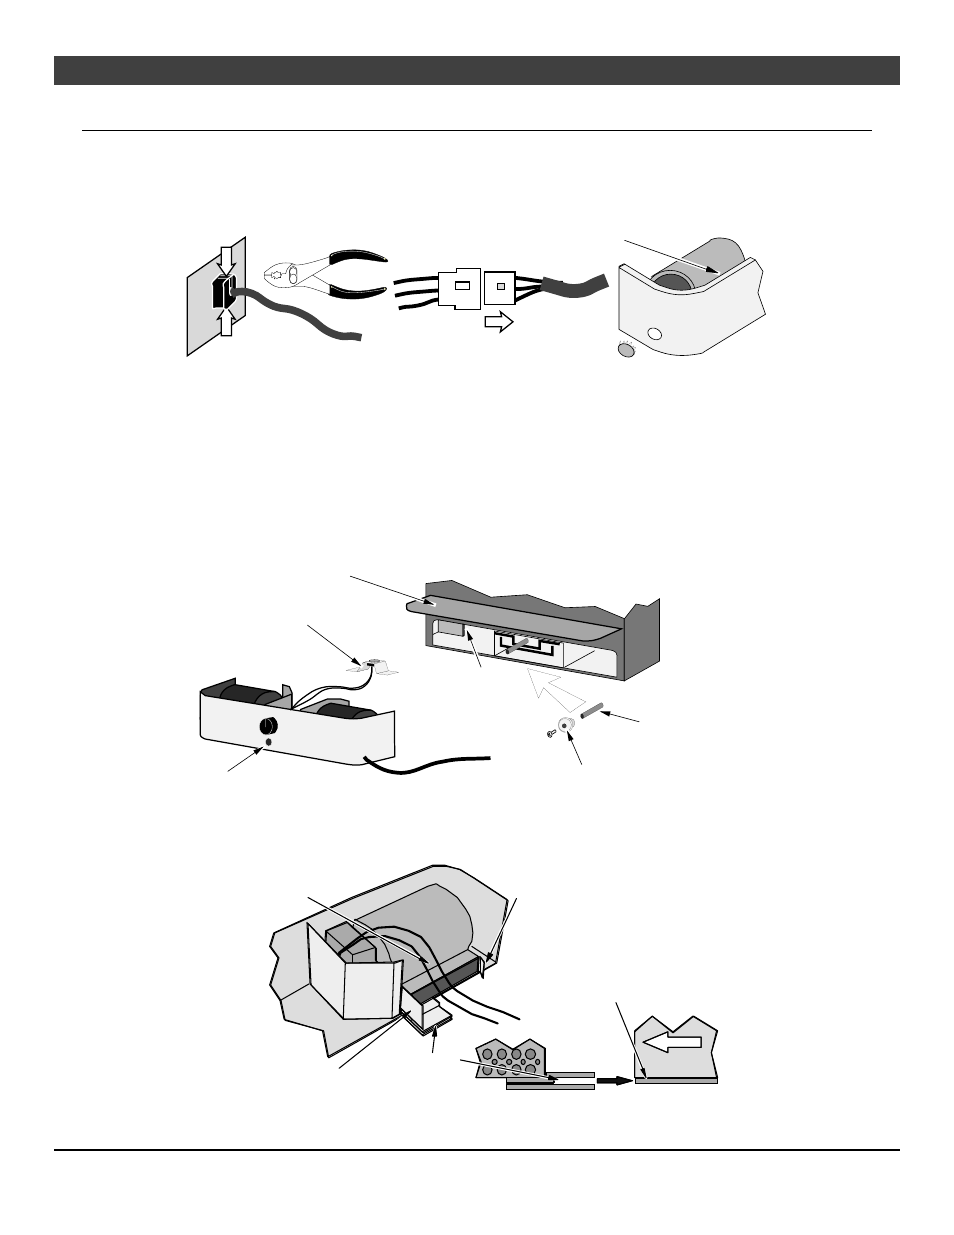
TO SWITCH THE POWER CORD TO THE LEFT SIDE:
Follow the directions below to switch the power cord. Make sure the power cord, wires, or molex
assembly do not protrude into the opening of the blower.
INSTALLATION INSTRUCTIONS
The Olympic (1190), requires removal of the button plug below the blower knob and installation of the air
control rod extention (see illustration below).
Install the snap disk (see the illustration below. The round disc must be facing upwards and come in
contact with the bottom of the firebox for the blower to operate correctly.
Make sure the wires leading to the snap disk are routed above the left side blower outlet (to prevent
damage to the wires during installation). Install the blower following the directions below.
Remove the strain relief by
squeezing it from the top and bottom
with a pair of slip-joint pliers.
Disconnect the molex plug inside the
blower assembly. Remove the power
cord by pulling it out of the hole
exposed by removing the strain relief.
Remove the button plug from the
left side and insert it into the hole
on the right side.
Left Side of
Blower
Assembly
The wires tuck in here, directly
behind the blower cage.
Button Plug for Air Control Rod
(For the Rainier (945/990) and Olympic (1190)
The air control extender
allows the air control rod
to pass through the
blower assembly on the
Rainier (945/990) and
Olympic (1190).
Wood Air Control Handle
Wedge the snap
disk in back of the
stiffener on the left
side
Ashlip of Appliance
Bend these legs on
the snap disk if it
does not fit tightly
Make sure the wires run over
the top of the blower housing
and are not damaged when the
blower is installed.
This clip slips over the edge of
the appliance unibody and
locks the blower in place.
This clip aligns the blower
inside the convection channel.
Insert the baseplate
of the appliance into
this gap.
Front of
Appliance
Baseplate of Appliance
(Below Ashlip)