Replacing needles – Baby Lock Cover Stitch (BLCS-2) Instruction and Reference Guide User Manual
Page 40
M
A
I
N
T
E
N
A
N
C
E
38
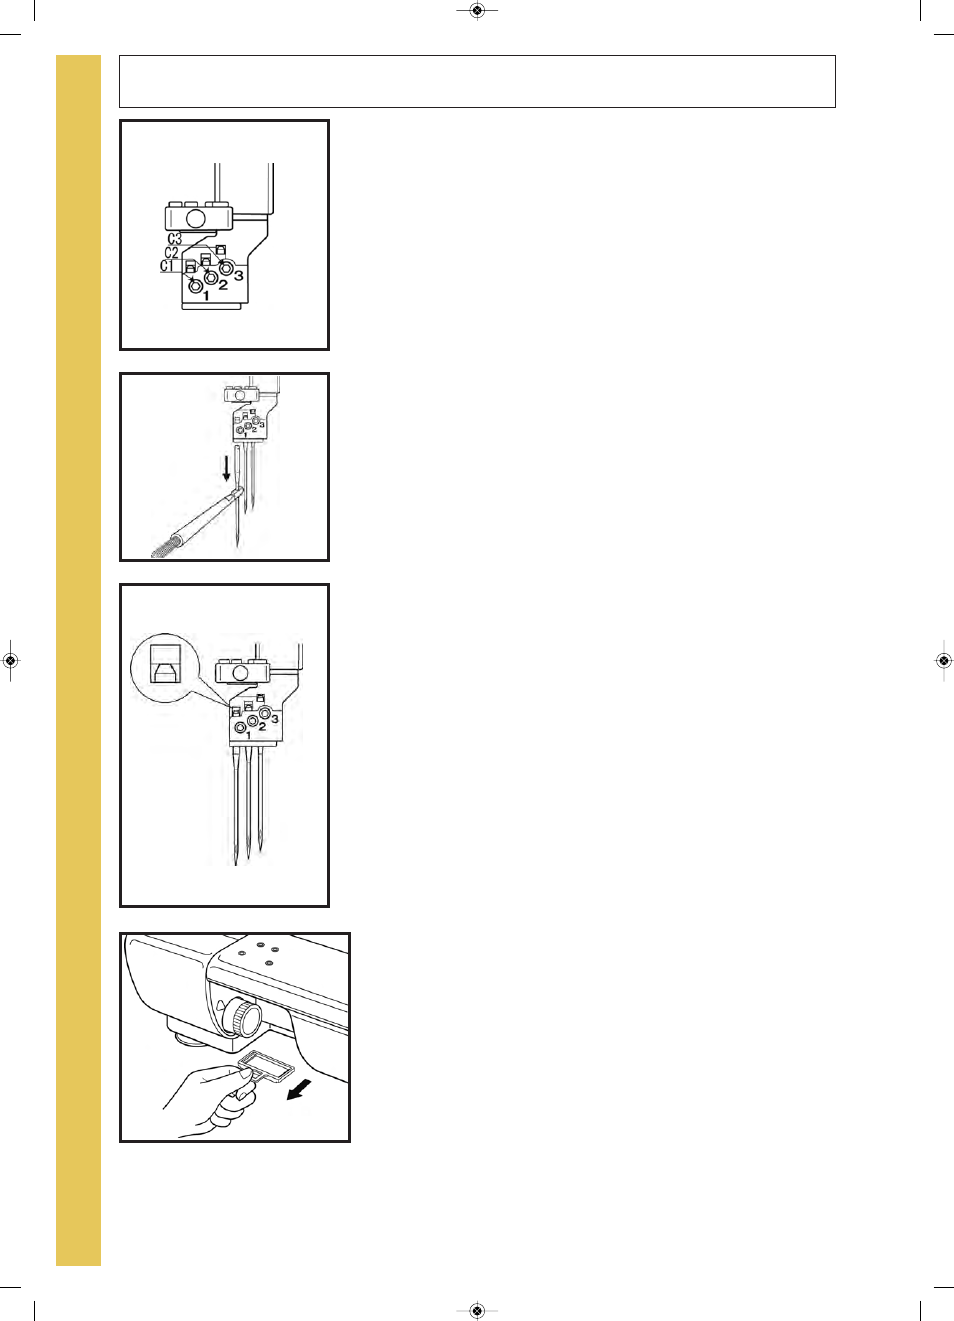
Needle Identification (fig. A)-
The chain/cover stitch needles are on the front portion of the
needle clamp and are identified by C1,C2 and C3.
C1Left chain/cover stitch needle can be used for chain stitch,
left narrow cover stitch, wide cover stitch or triple cover stitch.
C2Center chain/cover stitch needle can be used for a chain
stitch, left narrow cover stitch, right narrow cover stitch or
triple cover stitch.
C3Right chain/cover stitch needle can be used for a chain
stitch, right narrow cover stitch, wide cover stitch, or triple
cover stitch.
To Replace a Needle -
1. Raise the needle to the highest position by turning the hand
wheel toward you.
2. Using the allen screwdriver, loosen the needle screw for the
needle to be changed. Screws are located by sequence as
indicated above.
Note: To prevent the needle from falling into the needle plate,
hold it with the needle insert tool as you loosen the screw (fig.
B).
3. Use the needle insert tool or tweezers to insert the new nee
dle with the flat side to the back. Insert needle as far as it will
go, check the needle viewing window (fig. C).
4. Tighten the needle clamp screw.
Note: If you do drop a needle down into the machine just pull out
the needledrop drawer at the bottom of your serger. The
needle will be on the drawer (fig. D).
Replacing Needles
A
B
C
D
★New_BLCS-2 Ta:BLCS-2 En.qxd 2009/05/25 16:59 ページ 38