CompX eLock Network Cabinet User Manual
Compx cabinet elock instructions, Elock controller, Network cabinet elock has three components
1
200/300 Series — CompX cabinet eLock Instructions
200/300 Series
CompX cabinet eLock Instructions
Thank you for purchasing the CompX eLock. The
information contained in these instructions is intended
to serve as a guide so as to allow the eLock to be quickly
and easily put into service. CompX’s 300 Series eLock
can be configured to work in conjunction with existing
802.11g or Ethernet networks.
For complete set up and installation instructions for
networked and stand-alone eLocks, please see the
“Help” section in CompX’s LockView v4 software.
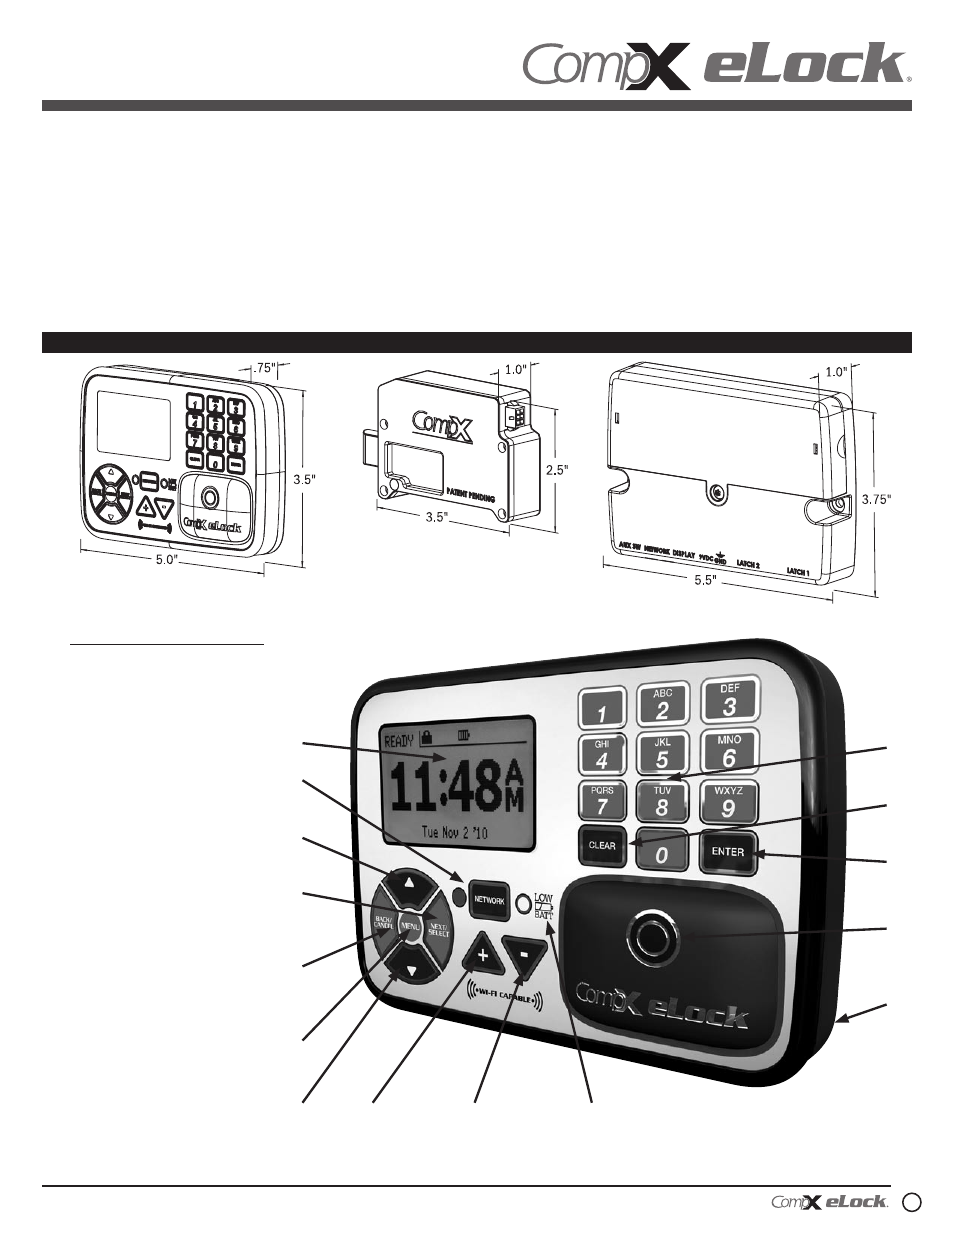
1. Dot matrix LCD
2. Network button (blue LED)
3. “UP” button
4. “NEXT/SELECT” button
5. “BACK/CANCEL” button
6. “MENU” button
7. “DOWN” button
8. + Button
9. - Button
10. Low battery indicator
(yellow LED)
11. Magstripe reader location
(if equipped)
12. HID Prox or HID iCLASS
reader location (if
equipped)
13. “ENTER” button
14. “CLEAR” button
15. Alpha-numeric keypad
1
2
3
4
5
6
7
8
9
10
15
14
13
12
11
eLock controller
Network cabinet eLock has three components:
Controller
Motorized gear-driven latch
Battery compartment
Exterior mount
Interior mount