Cueing screen – Daktronics M SERIES User Manual
Page 15
CUEING SCREEN
07
CUEING SCREEN
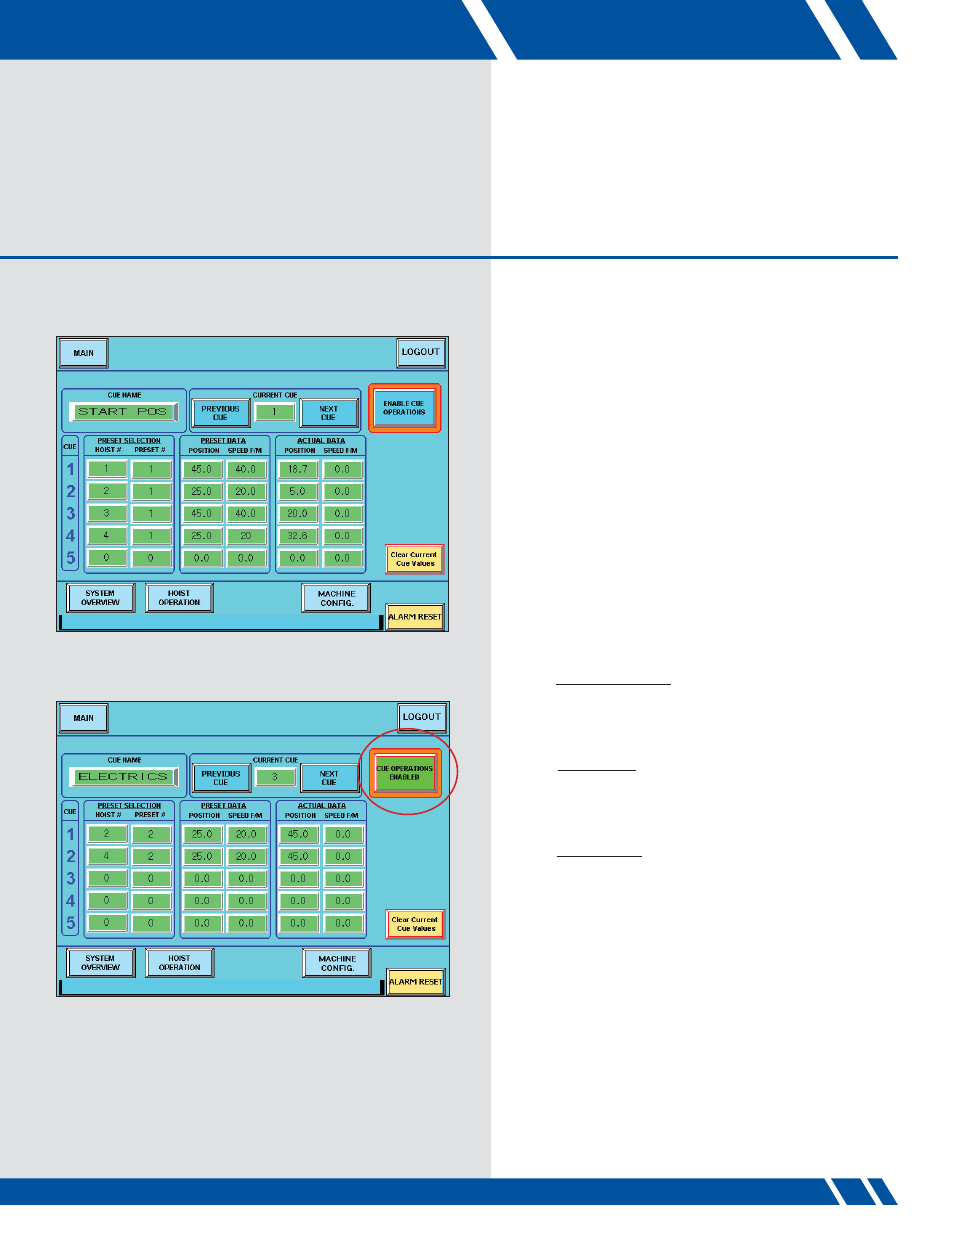
CUEING Screen Layout
The CUEING screen (Figure 6) allows the user to
program a cue with up to five hoists in the cue. The hoist
number and presets are used to program the cue. Up to
eight cues can be programmed.
Cue Setup
a. CUE NAME
Selecting the CUE NAME brings up an on-screen
keyboard that allows the user to enter a cue name of up
to 10 characters.
b. CURRENT CUE
This box displays the current active cue. Change to a
different cue using the PREVIOUS CUE and NEXT CUE
buttons or by pressing the current cue number and
entering the desired cue.
c. PRESET SELECTION
The cue is programmed by putting in the hoist node
number and entering the desired pre-programmed preset
for that hoist. The hoists must be entered in consecutively.
d. PRESET DATA
This shows the preset position that the hoist will move to
and the speed at which the hoist will move when the cue
is executed.
e. ACTUAL DATA
The actual data shows the current position and speed of
the programmed hoists.
f. ENABLE CUE OPERATIONS
To execute the cue once it is programmed, press the
ENABLE CUE OPERATIONS button. The button will
turn green and the text will change to CUE OPERATIONS
ENABLED (Figure 7).
The EXECUTE MOVE button must be pressed and held
until the cue is finished. If the EXECUTE MOVE button is
released, all hoist movements will stop.
Figure 6: CUEING Screen
15
Figure 7: Cue Operations Enabled