Installation instructions – Kleenmaid GCT6010 User Manual
Page 8
8
Installation instructions
This appliance must be installed only by authorised
personnel and in accordance with manufacture’s
installation instructions, local gas fitting regulations,
municipal building codes, water supply regulations,
electrical wiring regulations AS 5601/AG601- Gas
Installations and any other statutory regulations.
• Gas safety regulations (Installation & Use)
• Kleenmaid Installation Instructions.
Installation notes
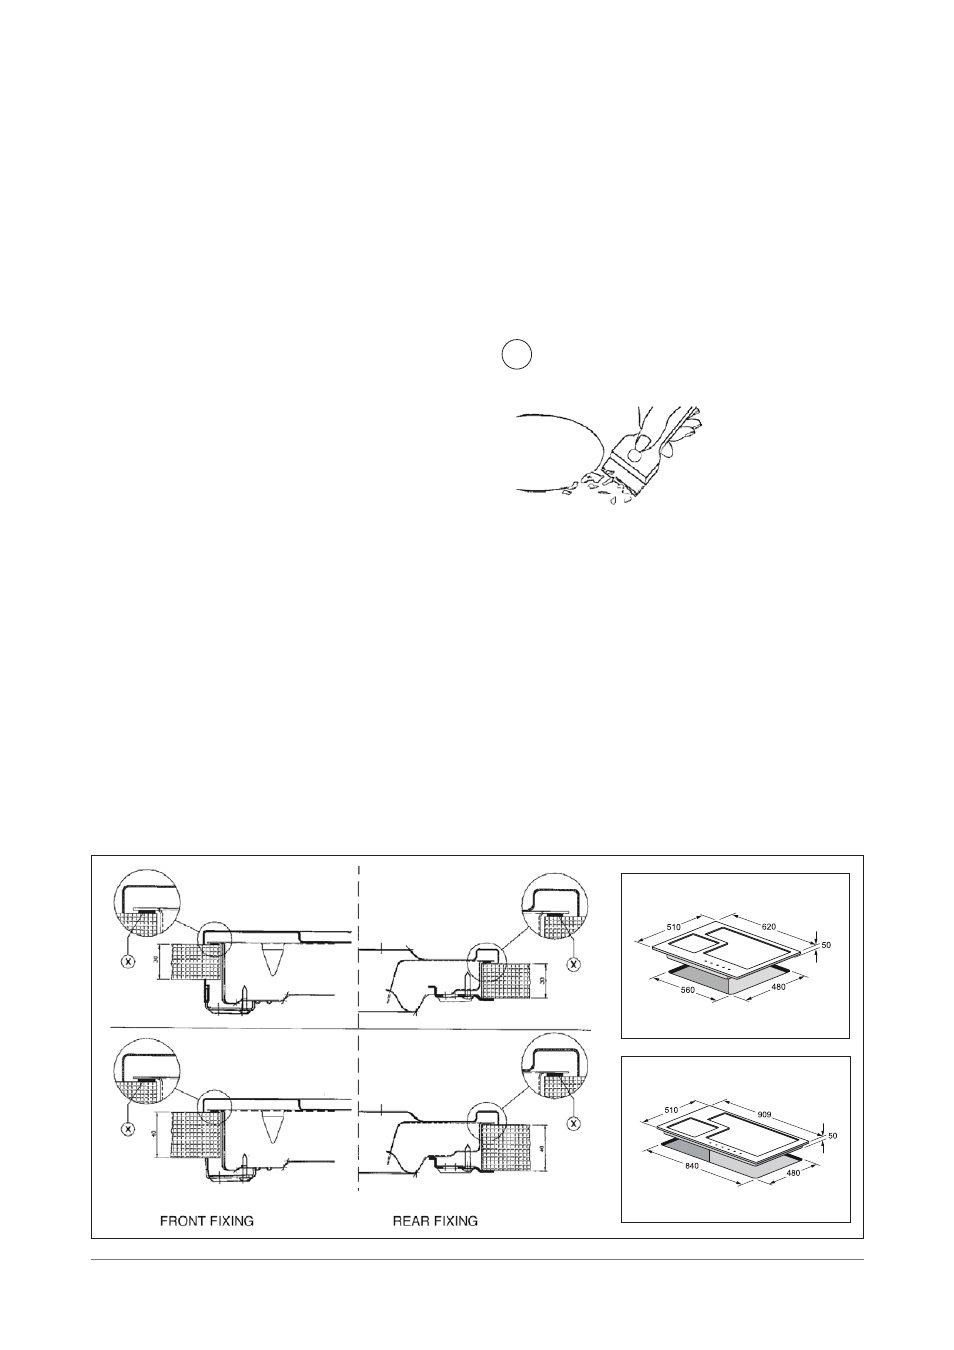
1. Cut the aperture to the dimensions shown below
or use the template if printed on the packaging.
2. Invert the cooktop and apply the sealing agent
provided to match the outer perimeter edge.
3. If the sealing agent is a strip type, the protective
covering must be removed from both sides. Do
not leave a gap in the sealing agent or overlap the
thickness.
4. NOTE: Do not use any Silicone based sealant, as
this can damage the worktop surface if repairs
are required.
5. Insert the appliance into the aperture and fix in
position via the clamps & screws, tightening the
screws evenly (see Fig 2 below).
positioning
The appliance can be fitted into a working area
as illustrated on the corresponding figure. Before
positioning the hob, fit the seal
around the entire periphery
of the hole cut in the worktop.
Ventilation of rooms
The room in which this appliance is installed must be
well ventilated by natural or mechanical means or a
combination of both to ensure correct combustion
and the removal of spent air. The minimum quantity
of air for combustion will depend on the room
volume, number of appliances and their total power
rating. The power rating of your appliance can be
found by reference to the Rating Plate.
NOTE: The actual ventilation requirements must be determined
by reference to the Statutory Regulations in force
X
Figure 2