MacroSystem Deluxe-Titler 3D User Manual
Page 14
14
15
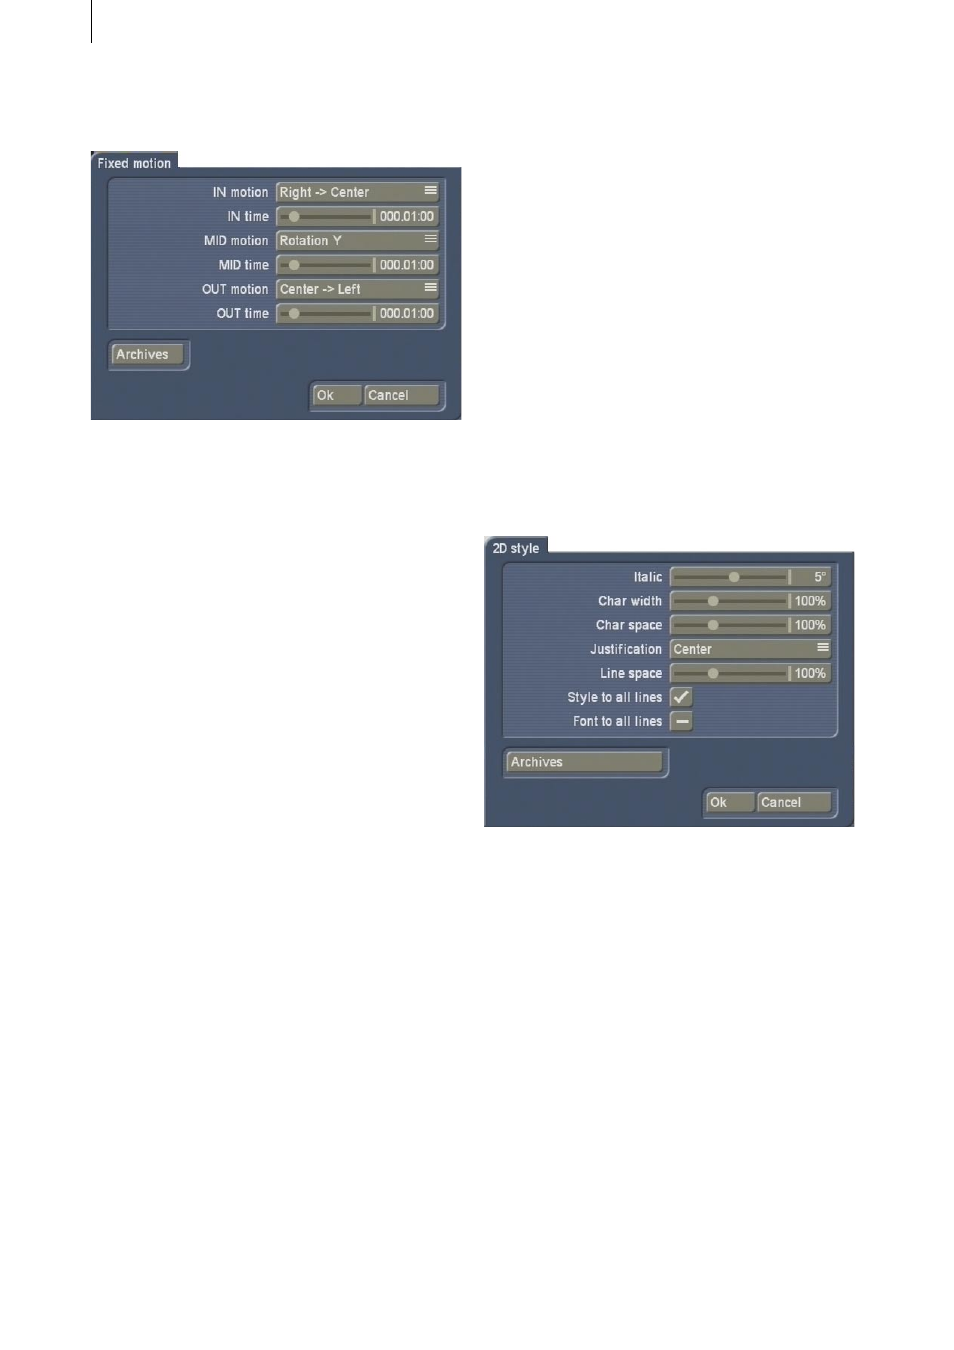
Click on the Fixed motion button so that a new
window opens.
Use the IN motion button to set the Left -->
Centre option so that the text “flies” from the
left to the centre of the picture.
Then use the IN time slider control to assign a
duration to this fade-in effect, for example, 3
seconds.
For the MID motion setting, select a Rotation so
that the text rotates in the middle of the picture.
In this example we recommend a duration of 2
seconds for the MID time option.
Next, also change the OUT motion setting.
Select the Center --> Bottom function so that the
text moves downwards after one rotation and
“flies” out of the picture.
We recommend a duration of three seconds for
the OUT time.
Now that you have configured all the settings,
archive them if necessary and close the menu
by pressing Ok so that you return to the Titling
menu.
Here you can view the title you created in the
preview and then make the system calculate the
title effect.
5.2 Free motion
In this example you can create your own path
for your text.
Insert a suitable scene into the storyboard,
open the Titling menu, select Deluxe Titler 3D
and insert it. Please also take note of the effect
length!
Afterwards, click on the Enter text effect option
and delete the text that is already present.
Then use the Font button to open the
corresponding window, select the desired font
type and set the size to 100.
Next, enter your name so that it breaks across
two lines.
Click on the 2D style button and make further
changes to the settings for the text’s two-
dimensional appearance. For example, you can
set the Justification setting to Center and the
Italic setting to 5°.
Next, close the 2D style window and the Enter
text menu using the Ok button and click on the
3D style effect option.
Use the Text color/texture button to select
yellow for the text and use the 3D color/texture
button to select black for the three-dimensional
effect.
Please make sure that the Animation function is
activated!
Next, set a value of 100 for the 3D option and
activate all three light sources.
Set a value of 50 for the Bevel size and select the
Middle Spike option for the Bevel shape.