Tutorials – MacroSystem Particle Magic User Manual
Page 12
9
4. Tutorials
This chapter contains tutorials for all four effects.
The tutorials are subdivided into separate lessons
so you can easily see how the various settings take
effect step-by-step.
4.1 PM Draw Tutorial
Lesson 1
For this tutorial, you’ll need a scene that’s
approximately 5 seconds long. Insert it into the
storyboard and open the Image-processing Effects
screen.
In this screen, select the PM Draw effect and
insert it. Next, select
"Archive" in the effect
options, click on
"Load" and select the
"-Lesson 1-" entry (first entry in the list) and
confirm your selection with
"Ok".
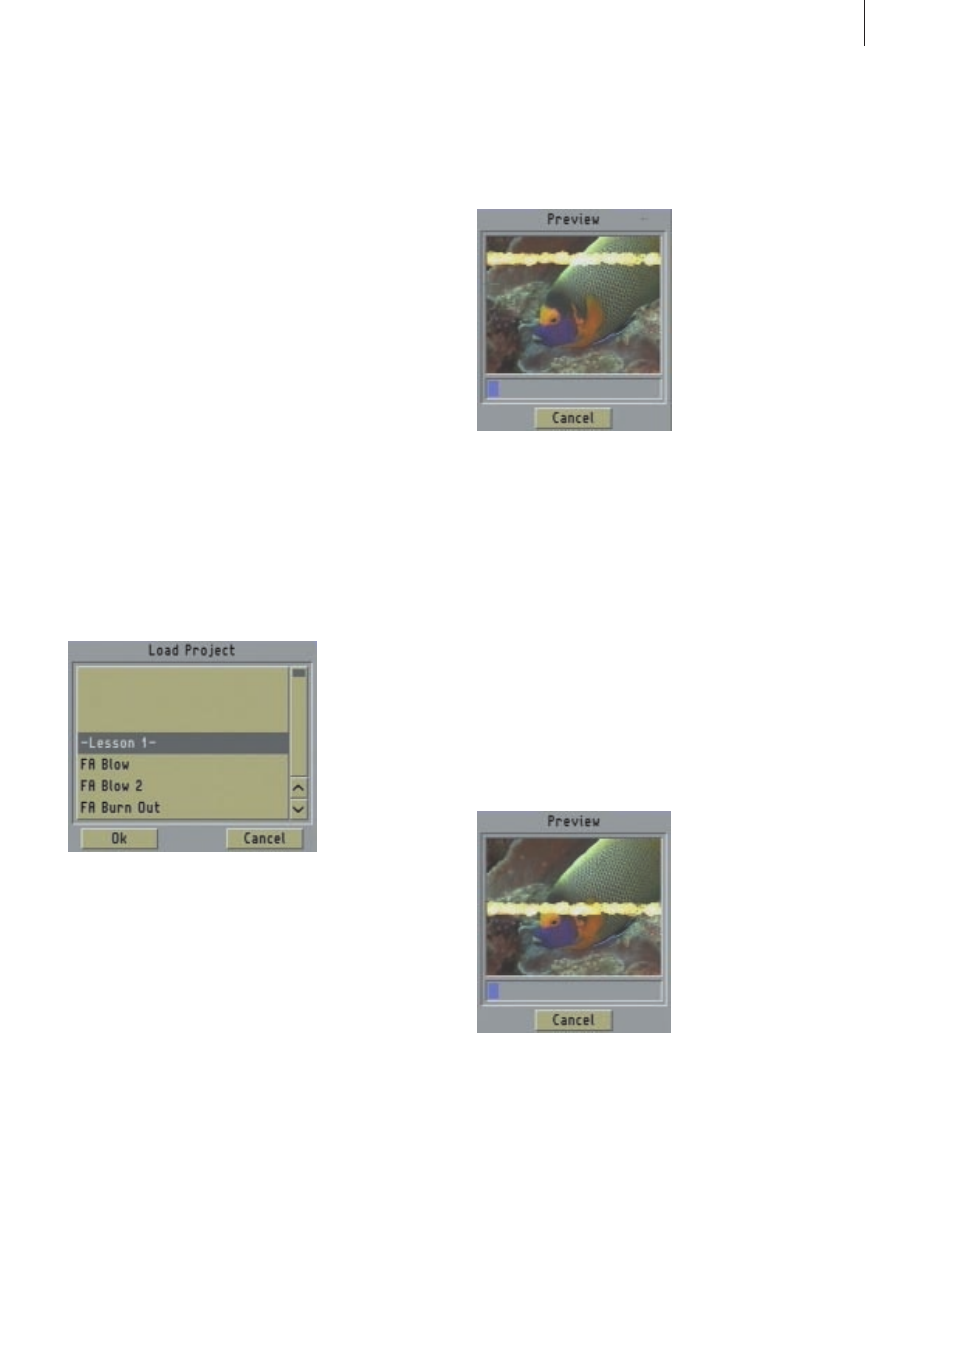
You can view the effect by pressing the
"Preview"
button in the Image-Processing Effects screen. In
the center of the picture you will see an orange/
white dot moving slightly. This is the source of the
particles.
Now you can select a different mask. Click on the
"Source" effect option. A window appears in
which you can click on the
"Select Mask" button.
The
"Circle" mask is highlighted initially. Now
select the
"Vertical" mask (two masks further left
in the list) and close the window with
"Ok" to
return to the
"Source Settings" window.
Adjust the
"Starting Position" slider control to
85% and take a look at the preview by clicking on
the lower button in this window. You’ll notice that
the particles are no longer generated at a single
point in the center of the picture but in a horizon-
tal strip in the upper screen area.
As we already described in chapter 3.2
"Source /
Effect
", the source of the particle is defined by the
mask and the
"Starting Position". The "Starting
Position
" defines the brightness value in the mask
at which you want the particles to form - the
higher the percentage, the greater the brightness
value (0% = black, 100% = white).
You can use the
"Starting Position" control to set
the color nuance that is decisive for this particle
origin. Set a value of 50% here and take a look at
the preview. You will notice that the particles no
longer form at the upper edge of the screen but
around the middle of the picture.
After all, the mask that is set (
"Vertical") has a
color curve that goes from bottom to top, from
black to white. Relative to this, a
"Starting Positi-
on
" of 0% is at the very bottom and 100% is at
the very top. Any values between these two
settings are therefore positioned within the
picture accordingly.