MacroSystem Pro-Pack User Manual
Page 10
10
11
Scene, and Range.
In order to make a new scene just from the effect
with the previously set range, click on Effect and
then on OK. The effect is turned into a scene and
put into the scene bin of the Edit menu.
You can also adjust the length of the new scene
to the range of the previous scene (with inser-
ted effect). In this case click on Effect + Scene
and then on OK. The new scene is created and
appears in the scene bin.
Alternatively, you can create the new scene from
the entire length or a segment of the storyboard.
Click on Range, confirm with OK, and use the IN
and OUT points in the familiar Range menu to
select the range containing the new scene. The
wave form can be of help and can be toggled
on/off with the loudspeaker symbol.
You can operate the titling menu in much the
same way.
Of course, you can generate a separate scene
from an effect-less range of the storyboard from
within this menu too. This works in the same
fashion as explained for the Transition Effects.
3.7 Titling screen
The Pro-Pack also enhances your Titling screen’s
capabilities.
Next to the preceding scene functions, you can
see a new buttons called Line.
Enter the text editor and press the Text button.
The menu that appears next contains the new
Line button.
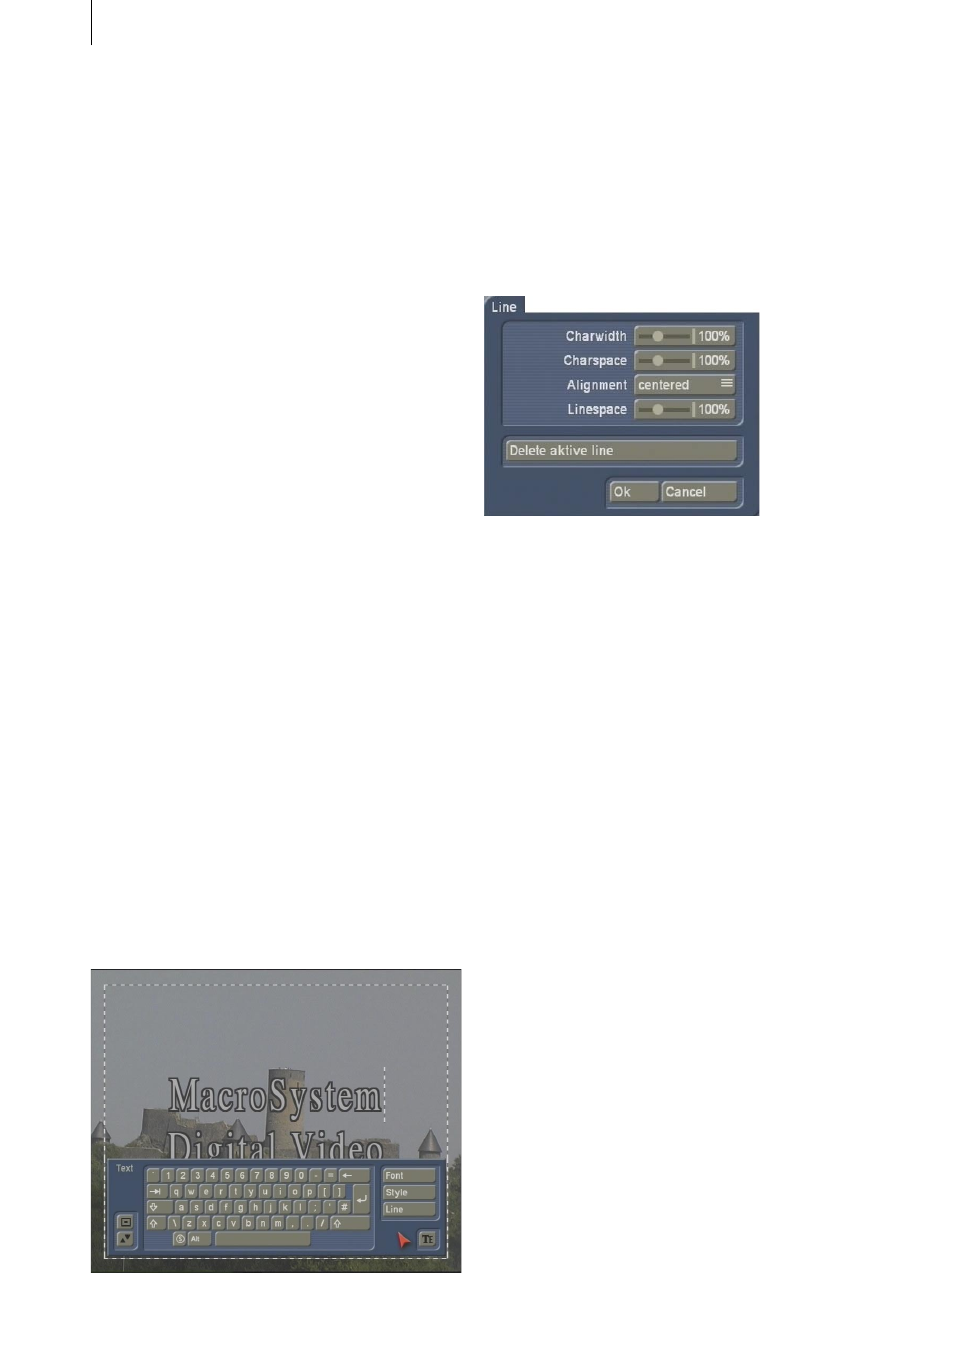
Clicking on this button opens a window in which
the functions Character width, Character space,
Alignment, Line space and Delete active line are
listed.
You can see that the settings of the buttons with
percent values lie between 50% and 200%, whe-
reby 100% corresponds to the default setting.
In the Enter/edit text screen, click anywhere
in the line of text to be edited. Then select the
button Line and under Character width enter
the desired percent. Click on OK to observe the
result. The letters have become wider (> 100%)
or narrower (< 100%), depending on the percent
given, and the entire line has become either
longer or shorter.
The individual words in a line cannot be format-
ted separately. The settings apply only to the
entire line.
The function Character space increases or decre-
ases the space between the letters. In the Enter/
edit text screen, click anywhere in the line of
text to be edited and select the button Line. Use
the Character space slider to enter the desired
percent of the distance.
The line is stretched (> 100%) or narrowed (<
100%), depending on the percent value given.
The individual words in a line cannot be format-
ted separately. The settings apply only to the
entire line.
Under the selection button Alignment you can
specify whether the line should be formatted
left, centered or right.
With the function Line space you can specify the