MacroSystem Pro-Pack User Manual
Page 6
6
7
on the right of the graph.
As you scroll through the scene you hear the
corresponding audio. Depending on the scrol-
ling speed you hear the audio faster or slower
(often referred to as "scrub audio”).
The wave form has two different display forms.
When scrolling through the scene you see a de-
tailed wave form or a segment of the wave form.
As soon as you receive a preview of the last
second the wave form for the entire playback
time is shown.
You can disable the Waveform simply by clicking
on its button once more (it will turn gray).
An additional function is splitting a scene in
series through the Index button. Click (in the
splitting menu) on the Play button so that you
see the Index button.
While the video is running with audio, each time
you click on the Index button a split position is
set. Afterward the split segments are positioned
after the original scene in the scene bin.
This function serves to roughly split up a scene
before you begin with final editing.
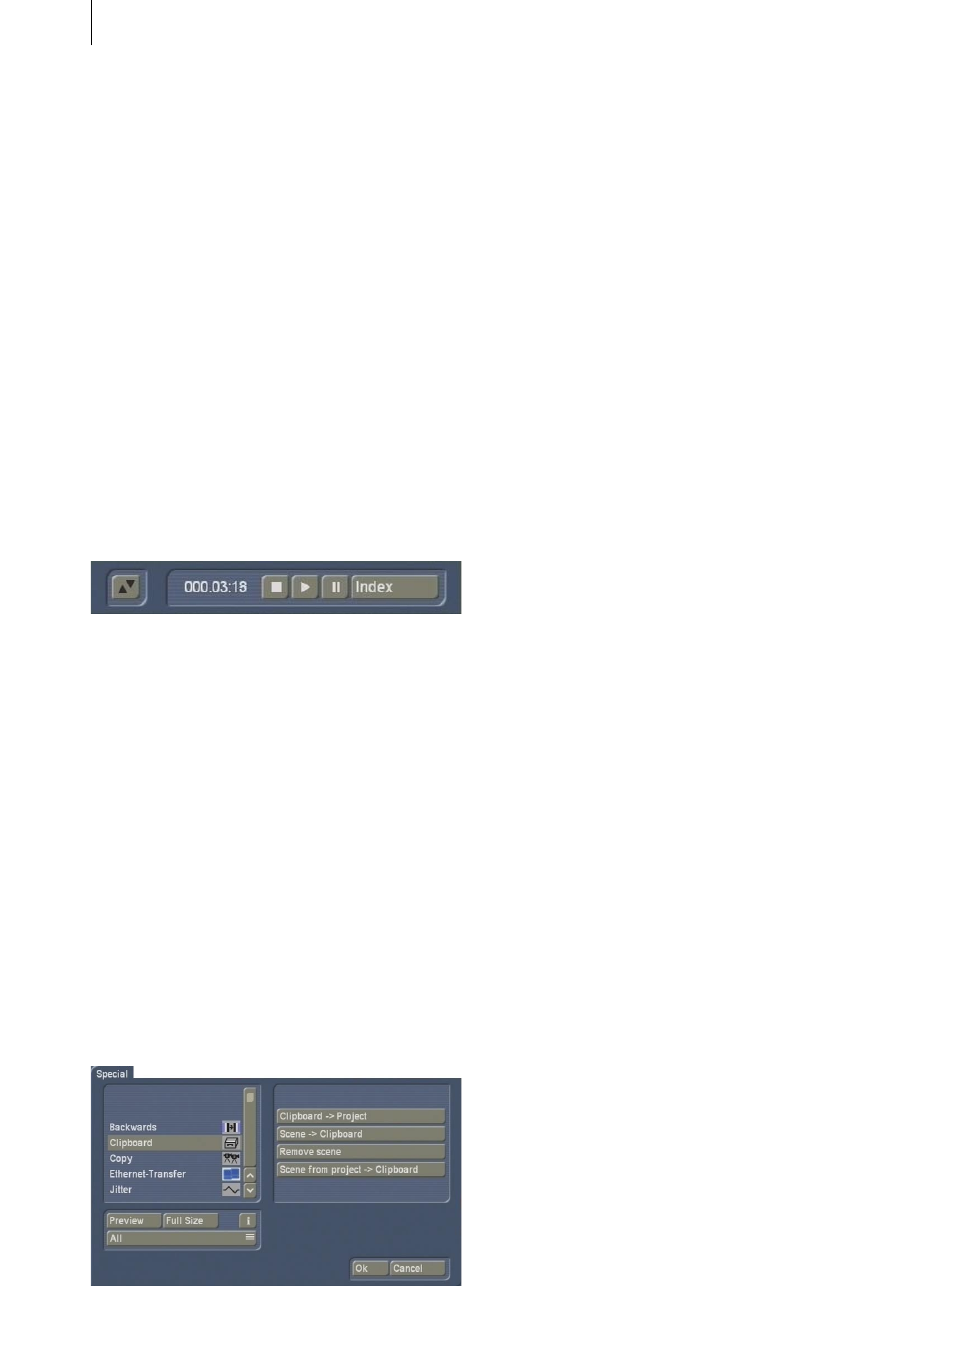
Enhancements also have been added to
the Edit, Special menu. Click on the Special
button and you’ll see that a bar separates the
image-processing effects from the special
effects. A new special effect you can select
is the Clipboard function. On the right are
four functions: Clipboard --> Project, Scene -
-> Clipboard, Remove scene and Scene from
project --> Clipboard.
If you click on Scene --> Clipboard, the scene
you selected from the scene bin will be added
to the Clipboard (if there’s no scene in the scene
bin, a No scene currently available! message
will appear).
Before you load a scene from the Clipboard
you’ll need to choose a place in the scene bin
for it to go. (To do this, click on any scene in
the scene bin, and the Clipboard scene will be
placed after it.)
When you click on Special, then on Clipboard
and then select Clipboard --> Project, the Load
Scene from Clipboard dialog box opens.
Here you can select the scene you want, click
on OK and leave the Special menu by pressing
OK. You will then see that the scene that has
been added to the scene bin (it may have a
new number if the scene or the scene name is
already stored in the scene bin).
If you click on Remove scene in the Clipboard,
the Remove scene from clipboard box will open
and you can mark the scene you want to delete
from the Clipboard. Click on OK to delete the
scene.
Tip: If you click on Remove scene, you’ll notice
that the OK button is grayed out and disabled.
This is a safety feature that prevents the
accidental deletion of a scene. However, if you
want to delete a scene, just click on the scene
you want to delete (even if it’s already grayed
out) and then click on the now-active OK button.
The function Scene from project --> Clipboard is
used to choose scenes in other projects without
entering the project settings.
Clicking on the button Scene from project -->
Clipboard opens the screen Select project, in
which you can choose one of your Projects, from
which you want to export a scene.
After marking a project and having clicked on
"Ok", the scene bin of the activated project
opens from which you can choose the desired
scene. After confirming with Ok the scene is
transported in the clipboard.
Now you can click on Clipboard --> Project, so
that a window appears in which you can mark