Scale information setting – MicroLinks UM02 - user manual User Manual
Page 56

Microscope Application Program http://www.ViTiny.com
56
Copyright © 2008-2012 MicroLinks Technology Corp.
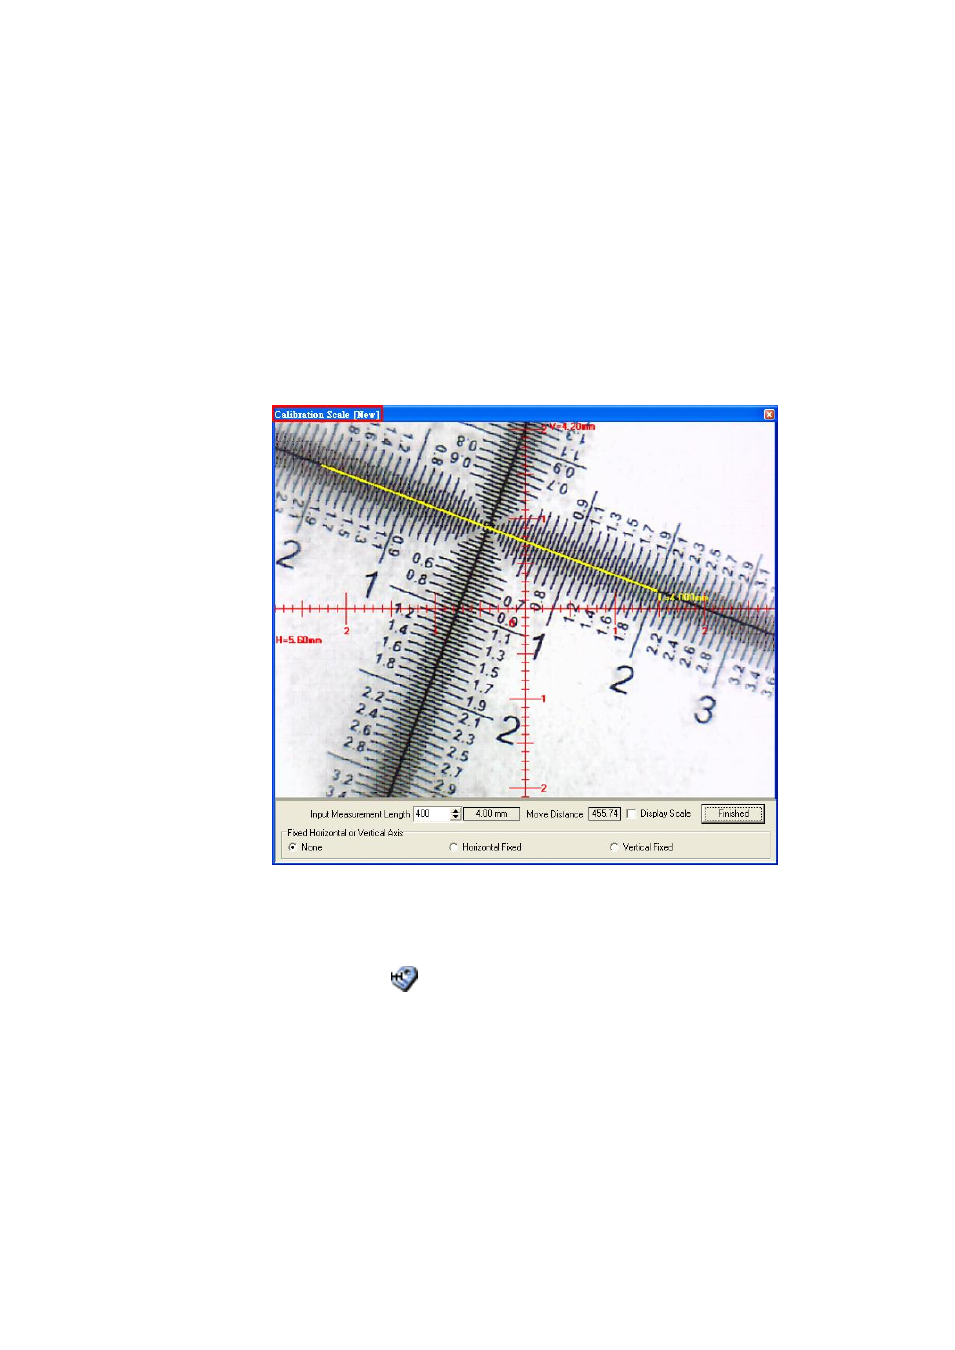
Fig.5-60 Input the actual measurement length
The calibration frame can be freezed by pressing the right button on the mouse. The freezed
frame helps for calibrating in a stable condition.
(1) Put the calibrator under the machine and adjust focus to clearly see the scale.
(2) Key in “400” length in the check-box of “Input Measurement Length”.
(3) Use mouse to draw a yellow line for 4.00mm.
(4) Click “Finished” to complete and save the new calibration figure.
The new setting scale (Calibration Scale [New]) show on the frame. See Fig5-61.
Fig5-61. Draw a line in actual length
5.4.6Scale information setting “
”
This setup screen indicates to set whether to show the unit value or not, see Fig. 5-62.
Choose “length” means to display the length of the line, by capital letter “L” expression, if
length is 2.33mm, it will show L=2.33mm besides the line. If choose “none”, no value will
show on the dialogue. If show “P” means “perimeter”, “A” means “Area”, “C” means
“Circumference, and “R” means ”radius”.