Service, Pvhfl5-300 motor removal / servicing (from inside) – Montigo PVHFL58-300 User Manual
Page 14
Service
Page 14
XG0519 - 070714
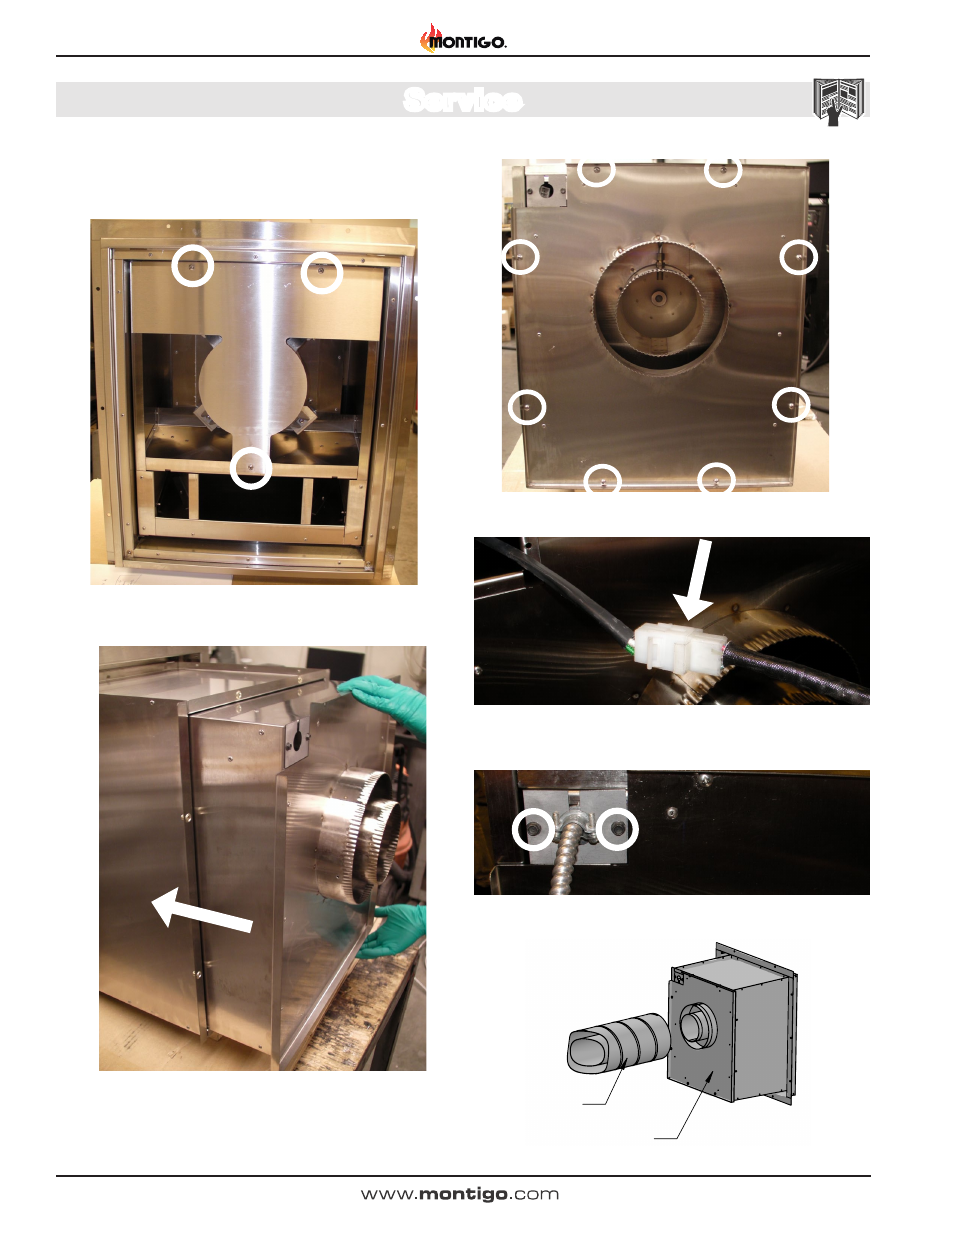
Step 3: Secure inner can to the outer can with supplied 8 screws.
Figure 8b.
Figure 8c.
Step 4: Plug control cable back into power vent power cable.
Figure 8d.
Step 5: Stuff excess wire back into electrical channel and secure
electrical plate with supplied two screws.
Step 6: Reconnect venting to the power vent.
Step 7: Check spin and operation of power vent from outside.
PVHFL58-300 & PVHFL510-300 Horizontal Power Vent
Reinstalling the inner can
From the inside of the house
Step 1: Screw the rain guard back on with the supplied 3 screws.
Figure 8.
Step 2: Slide the inner can into the outer can
Figure 8a.
Vent Termination
Venting
Rear Panel
Screw Locations
x8 places
Outer Case
Screw Locations
2x places
Rain Guard
Fan Motor Gasket
Screw Locations
8x places
Fan Motor
Assembly
Fan Motor Capacitor
Step 1:
a) Remove the screws holding
the venting to the rear of the
termination. Pull the vent
away from the termination.
PVHFL5-300
Motor Removal / Servicing (from inside)
Step 2:
a) Remove the screws holding
the Rear Panel on the
Termination.
b) Slide the Inner Blower
Assembly out of the Outer
Case
Inner Blower
Assembly
Step 3:
a) Remove 2 upper screws and
remove Rain Guard.
Step 4:
a) Replace the Fan Motor
Assembly.
b) Re-attach wires as required.
c) We recommend changing
the Motor Capacitor as well.
d) Make sure the Fan Motor
Gasket is in place.
e) Re-assemble the entire
termination in the reverse
itemized above.