Installation, Tuscany – Montigo 34DVI Tuscany User Manual
Page 6
Page 6
Tuscany
Gas Fireplace Insert
P/N XG0515
Installation
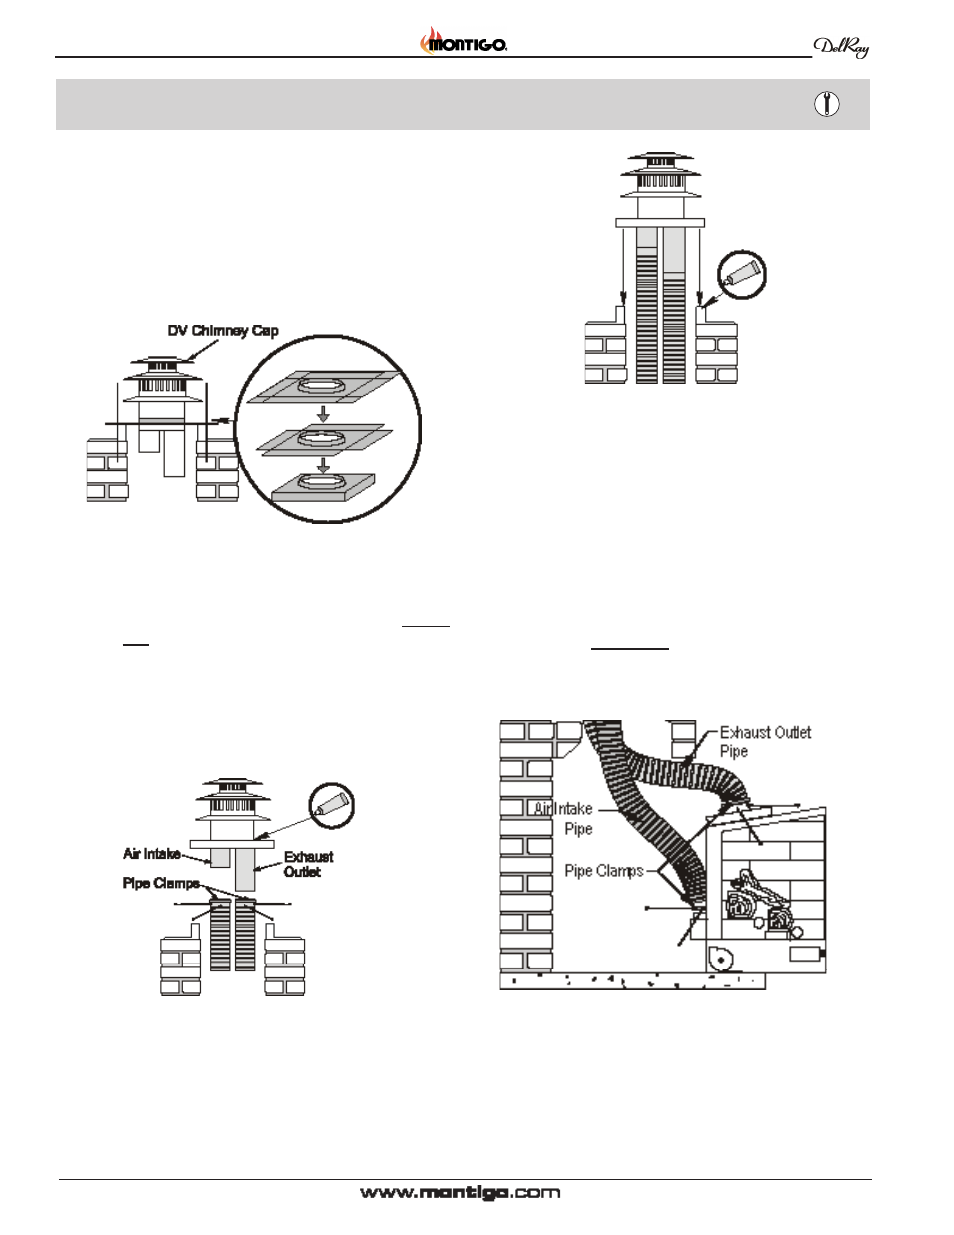
Figure 6. Connecting the exhaust outlet and air intake flex liner.
STEP 3:
Place the flashing around the chimney cap. Center the
flashing on top of the clay tile. Mark the outline of the clay
tile on the underside of the flashing. Notch the corners and
bend over the excess at the marked outline using a pair of
hand folders. See figure 5.
STEP 4:
Set aside the chimney cap and flashing, and install the two
lengths of 3" flex liner from the top of the chimney down to
the masonry opening.
Figure 5. Center, measure, and notch the flashing.
STEP 5:
Place a pipe clamp around each piece of flex as illustrated
below. Connect one flex liner to the exhaust outlet on the
chimney cap, Connect the other flex liner to the air intake
collar of the chimney cap. Mark both ends of the exhaust
pipe with black paint or by other means to ensure the
proper connection is made. Tighten the pipe clamps and
fasten the pipe with the screws provided. Seal between the
flashing and chimney cap with high temperature silicone
See figure 6.
STEP 6:
Run a wide bead of silicone along the top of the clay liner,
and press the flashing and chimney cap down on top of
the chimney.
STEP 7:
Before placing the Tuscany in its location, lay a piece of
cardboard on the hearth to protect it. Place the Tuscany
just in front of the fireplace opening, and connect the gas
line. (See Installing Gas Line).
STEP 8:
Slide the Tuscany just inside the fireplace opening.
STEP 9:
Reach inside the opening above the Tuscany and slide
clamps around both flex liners. Pull both flex liners straight to
ensure the exhaust and the air intake will not be obstructed.
Place a pipe clamp around each piece of flex as illustrated
below. Make sure the air intake pipe is connected to the
inlet at the back of the fireplace and the marked or black
painted exhaust pipe is connected to the outlet on top
of the fireplace. Tighten the pipe clamps and fasten the
pipe with the screws provided. See fig.8.
Figure 7. Silicon and seal the chimney and flashing in place.
Figure 8. Connect the flex to the exhaust outlet and air intake.