Tuscany – Montigo 34DVI Tuscany User Manual
Page 7
P/N XG0515
Page 7
Tuscany
Gas Fireplace Insert
Installation Section 7
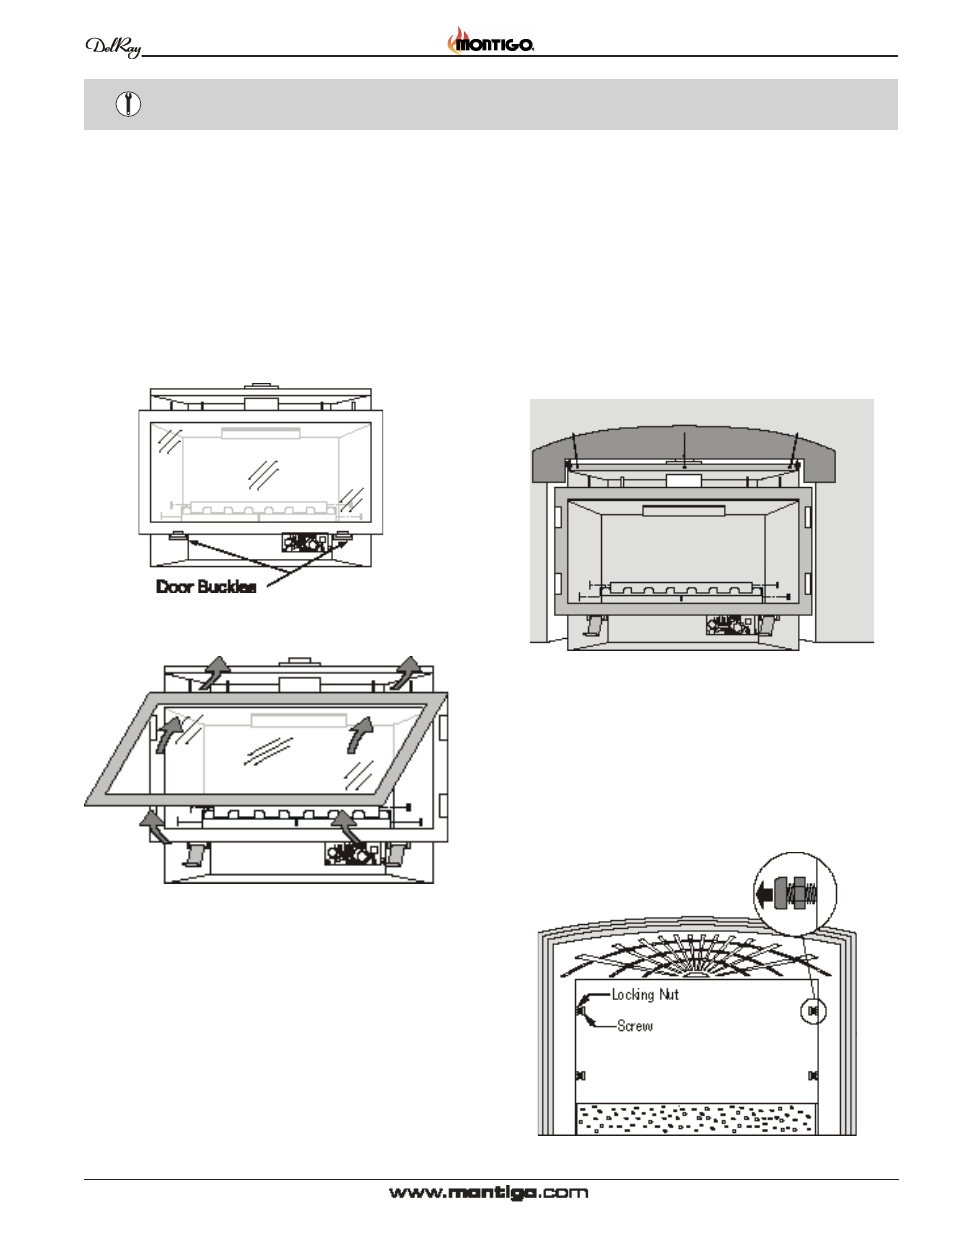
Removing and Installing the Door
removing the door:
The door is held in place by a lip on the top of the metal frame and two
buckles at the bottom. Release the buckles and lift the door carefully
up and away from the front of the fireplace. See figures 9a and 9b.
Installing the door:
Hook the top edge of the door frame into place. Lower and rest the door
frame in place and fasten the buckles. See figures 9a and 9b.
Figure 9b. Removing and installing the glass door.
Figure 9a. Removing and installing the glass door.
Installing the Face Plate
1. Remove the Tuscany's glass door, as shown in the previous section.
2. Position the insert just in front of the fireplace opening and ensure
that both the air intake and exhaust vents are properly installed. As
per previous section
3. ensure that the gas line is properly connected to the flexible gas
connector and tested for any leaks.
4. Position the backing plate along the top of the insert and attach it
using the three screws provided. See figure 10a, below.
5. Loosen the four screws on the inside edge of the face plate, but do
Figure 10a. Installing the backing plate.
not remove them. Make sure the screws are backed off far enough
so that the heads of the screws can be pushed into the four mounting
slots on the front of the insert. Also, back off the four locking nuts
slightly. Refer to figure 10b.
Line up all the screws with the four slots on the left and right side
of the Tuscany, and centre the faceplate around the fireplace.
Fasten the faceplate tightening the four nuts. See figure 10c.
Figure 10b. Adjusting the face plate mounting screws.