ONICON System-10 MODBUS User Manual
Page 12
11451 Belcher Road South, Largo, FL 33773 • USA • Tel +1 (727) 447-6140 • Fax (727) 442-5699 • [email protected]
System-10-MOD Network Interface Installation Guide 05/14 - 0653-10 / 18321
Page 12
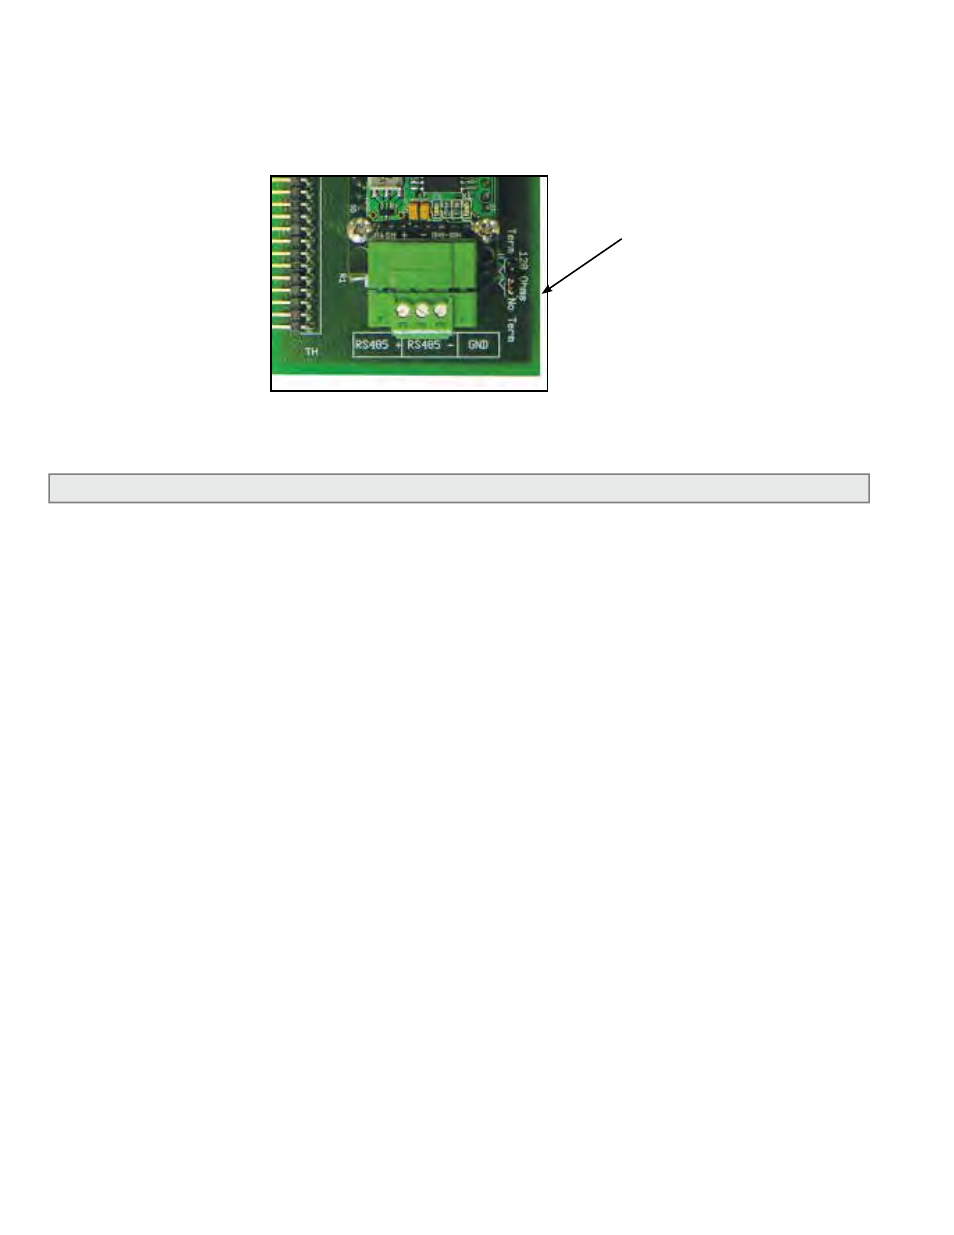
1.5.2 Biasing and Termination
The ONICON System-10 BTU Meter does not provide biasing voltage to the RS485
network. A jumper selectable 120W resistor is provided as show below. The termination
resistor should only be used when the meter is installed at the end of the line.
NOTE: See Fig. 1 on page 8 to locate the termination resistor on network interface board
with auxiliary input.
Jumper selectable
120 Ohm resistor
1.6 NETWORK ADDRESSING
Before the System-10 can communicate on the MODBUS network, the appropriate device address
must be programmed into the meter. For TCP/IP networks an IP address must also be assigned
to the Btu meter.
The MODBUS network address for ONICON System-10 Btu meter may be set to any address from
001 to 247 in compliance with the MODBUS standard. This address is set at the Btu meter.
Section 1.6.1 details the procedure for changing this address.
MODBUS TCP/IP Btu meters also require an IP address to operate on the network. In addition,
managed TCP/IP networks may require a gateway address. The procedures for entering the IP
address and gateway address are detailed in sections 1.6.2 and 1.6.3. Both require the use of the
RUInet utility program and a PC with an Ethernet card and an available port.
1.6.1 Changing the MAC (Device) Address
Every ONICON System-10 is individually programmed at the factory with application
specific data provided by the customer during the ordering process, and this may include
network addressing information. If the device address information was provided, the
meter will be programmed with that number. If no address is provided, ONICON
meters are programmed with a default address of 017. The address may be changed at
the System-10 using the procedure outlined in the table on the next page.