Assembly, Warning – Partner B305 CBS Rev.7 User Manual
Page 4
WARNING:
Please assemble the
unit according to the assembly instructions.
Failure to do so may cause injury to the
operator.
-- 4 --
•
DO NOT USE ANY OTHER FUEL than
that recommended in your manual.
Always follow instructions in the Fuel and
Lubrication section of this manual. Never
use gasoline unless it is properly mixed
with 2-cycle engine lubricant. Permanent
damage to engine will result, voiding
manufacturer’s warranty.
•
DO NOT SMOKE while refueling or
operating equipment.
•
DO NOT OPERATE UNIT WITHOUT A
MUFFLER and properly installed muffler
shield.
•
DO NOT TOUCH or let your hands or
body come in contact with a hot muffler or
spark plug wire.
•
DO NOT OPERATE UNIT IN AWKWARD
POSITIONS, off balance, outstretched
arms, or one-handed. Always use two
hands when operating unit with thumbs
and fingers encircling the handles.
•
INSPECT YOUR TRIMMER AND ATTA-
CHMENTS BEFORE EACH USE - Never
use unless all bladeattaching hardware is
properly installed.
•
BLADE COASTS AFTER THROTTLE IS
RELEASED - A coasting blade can cut
you or bystanders. Before performing any
service on the blade, always turn off
engine, and be sure coasting blade has
stopped.
•
50-FOOT (15 meters) DIAMETER HAZA-
RD ZONE - Bystanders can be blinded or
injured. Keep people and animals 50 feet
(15 meters) away in all directions.
•
DO NOT RAISE TRIMMER HEAD above
ground level while unit is operating. Injury
to operator could result.
•
DO NOT USE UNIT FOR ANY
PURPOSES OTHER than trimming lawn
or garden areas.
•
DO NOT OPERATE UNIT FOR PROL-
ONGED PERIODS. Rest periodically.
•
DO NOT OPERATE UNIT WHILE
UNDER THE INFLUENCE OF ALCOHOL
OR DRUGS.
•
DO NOT OPERATE UNIT UNLESS
CUTTING ATTACHMENT GUARD AND/
OR GUARD IS INSTALLED AND IN
GOOD CONDITION.
•
DO NOT ADD, REMOVE OR ALTER ANY
COMPONENTS OF THIS PRODUCT.
Doing so could cause personal injury
and/or damage the unit voiding the
manufacturer’s warranty.
•
DO NOT operate your unit near or around
flammable liquids or gases whether in or
out of doors. An explosion and/or fire may
result.
•
DO NOT USE ANY OTHER CUTTING
ATTACHMENT. Use only replacement
parts and accessories, which are design-
ed specifically to enhance the performan-
ce and maximize the safe operation of our
products. Failure to do so may cause poor
performance and possible injury. Use only
the cutting head supplied with this
product.
Do not use any other cutting
attachment. Use of such attachments will
void your factory warranty and could
result in serious bodily injury.
ASSEMBLY
WARNING:
To avoid serious
personal injury, shut unit off before
removing or installing attachment.
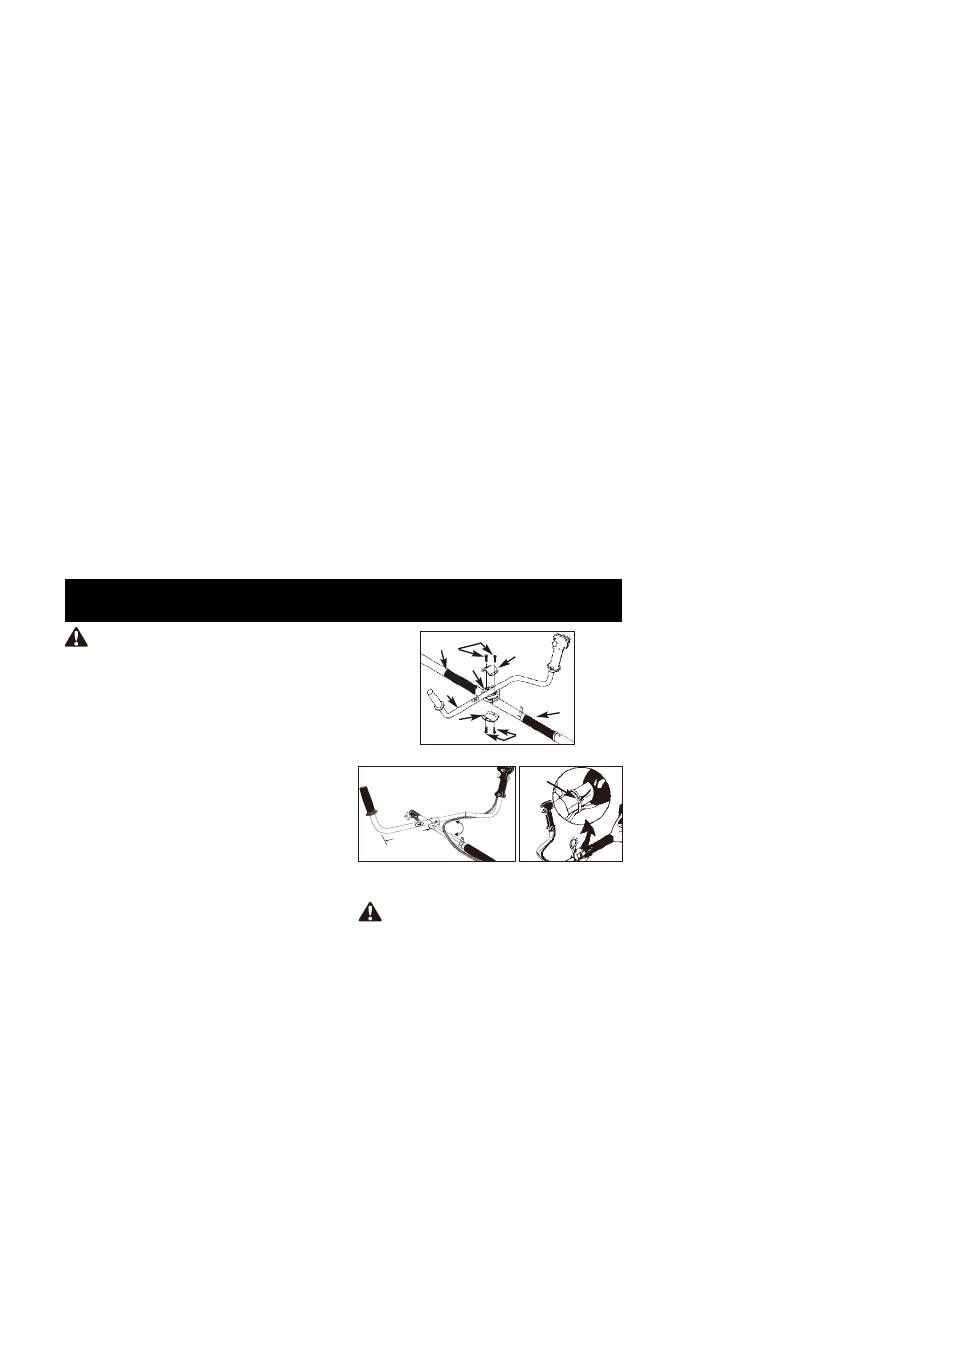
“Bullhorn¨ HANDLE INSTALLATION
1.
To install handle onto unit, you will need
the following components from your user
kit: “Bullhorn” handle (A), fixing holder (B),
clamp (C) and screws (D). (Fig.1A)
2. IInstall the fixing holder (B) between the
sponge sleeve (E and G), and adjust it to a
proper position.
3. Install the Bullhorn handle (A) on the fixing
holder, put the other clamp (C) over
bullhorn-handle,
adjust
handle
to
appropriate position and tighten the other 2
screws (D). The left handle shall be at least
200mm horizontally perpendicularly from
the shaft tube. The handle shaft must be
mounted on the right side of direction of
arrow head on the handle shaft. (Fig.1B)
4. Install wire tie (F) included in the user kit as
shown (Fig.1C).
INSTALLING THE ATTACHMENT
NOTE: To make installing or removing the
attachment easier, place the unit on the
ground or on a work bench.
1. Turn the knob (A) counterclockwise to
loosen (Fig. 2A).
WHAT NOT TO DO
90ß
Fig.1B
Fig.1C
Fig.1A
F
200mm
(minimum)
D
C
C
D
E
G
B
A