Dip-switch settings, Before dip-switch settings, S2 below panel – Westermo EDW-100 User Manual
Page 27: Factory settings
27
6616-2203
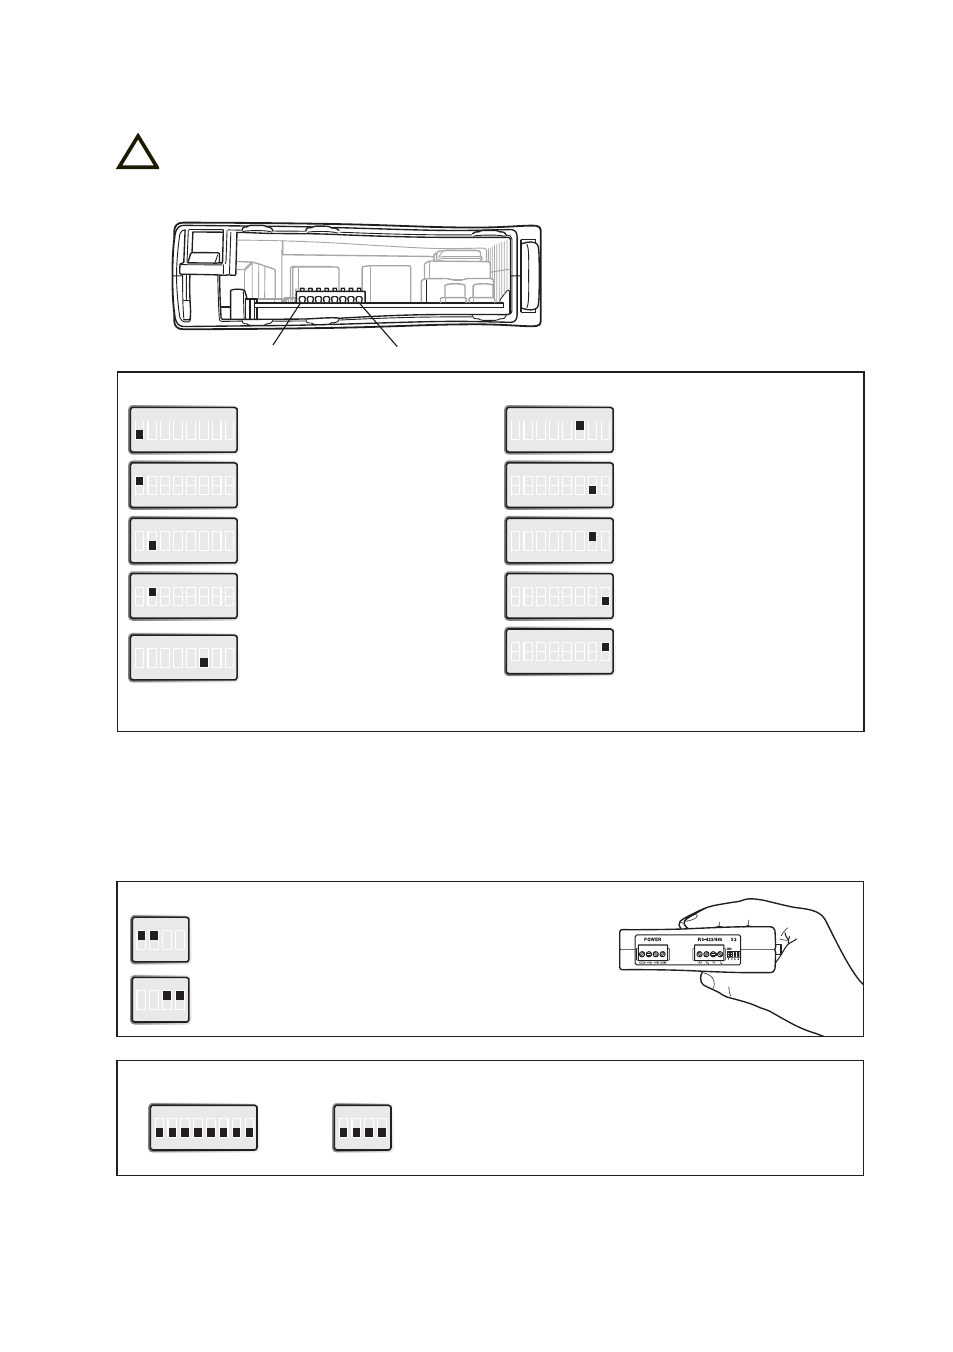
DIP-switch settings
Before DIP-switch settings:
Prevent damage to internal electronics from electrostatic discharges (ESD) by
discharging your body to a grounding point (e.g. use of wrist strap).
!
S1:1
S1:8
Note! DIP-switch alterations are only effective after a power on.
A setting configured by any other method during normal operation, possibly overrides
the DIP-switch setting. However, an override situation is indicated by the RC LED.
S1* DIP-switch
ON
1 2 3 4 5 6 7 8
Normally OFF
* DIP switch functions may be override by WEB configuration tool. Override is indicated by RC LED. S1, 3, 4
and 5 not used.
ON
1 2 3 4 5 6 7 8
Enable local IP configure via serial
interface.
ON
1 2 3 4 5 6 7 8
Normally OFF
ON
1 2 3 4 5 6 7 8
Restore factory default.
ON
1 2 3 4 5 6 7 8
Ethernet Auto-negotiation enabled.
Auto-crossover enabled.
10 Mbit/s.
ON
1 2 3 4 5 6 7 8
Ethernet Auto-negotiation disabled.
Auto crossover (MDI/MDIX)
disabled. 10 Mbit/s.
ON
1 2 3 4 5 6 7 8
Ethernet 100 Mbit/s when Auto-
negotiation disabled
ON
1 2 3 4 5 6 7 8
Ethernet 10 Mbit/s when Auto-
negotiation disabled
ON
1 2 3 4 5 6 7 8
Ethernet Full duplex when Auto-
negotiation disabled or is not
supported.
ON
1 2 3 4 5 6 7 8
Ethernet Half Duplex Auto-
negotiation disabled or is not
supported.
S2 Below panel
4-wire termination.
120 ohm 4-wire termination and fail-safe
ON
1 2 3 4
2-wire termination.
120 ohm 2-wire termination and fail-safe
ON
1 2 3 4
Factory settings
ON
1 2 3 4
ON
1 2 3 4 5 6 7 8
S1
S2