ARAG Bravo 300s series computers crop spraying - Direct connection - INSTALLATION User Manual
Page 10
10
8
cONNEctiNg thE cAbLE tO thE cONtROL UNit AND SERvicES
• Use only the cables provided with the ARAG computers.
• Take care not to break, pull, tear or cut the cables.
• Use of unsuitable cables not provided by ARAG automatically voids the warranty.
• ARAG is not liable for damages to the equipment, persons, animals or things cau-
sed by failure to observe the above instructions.
8.1
Connecting the multi-pin connector
Connect the multi-pin connector to the panel (item
1, Fig. 4) and connect the other end of its cable to
the control unit. Make sure that it is correctly fitted and turn the collar clockwise until it locks in place.
8.2
Connecting the control unit valves
• Use ARAG valves: use of unsuitable valves not provided by ARAG automatically
voids the warranty.
ARAG is not liable for damages to the equipment, persons, animals or things caused
by failure to observe the above instructions.
• All valve connectors must be provided with seals before being connected (Fig. 10).
• Make sure the seals are correctly fitted to avoid water infiltration when using the
control unit.
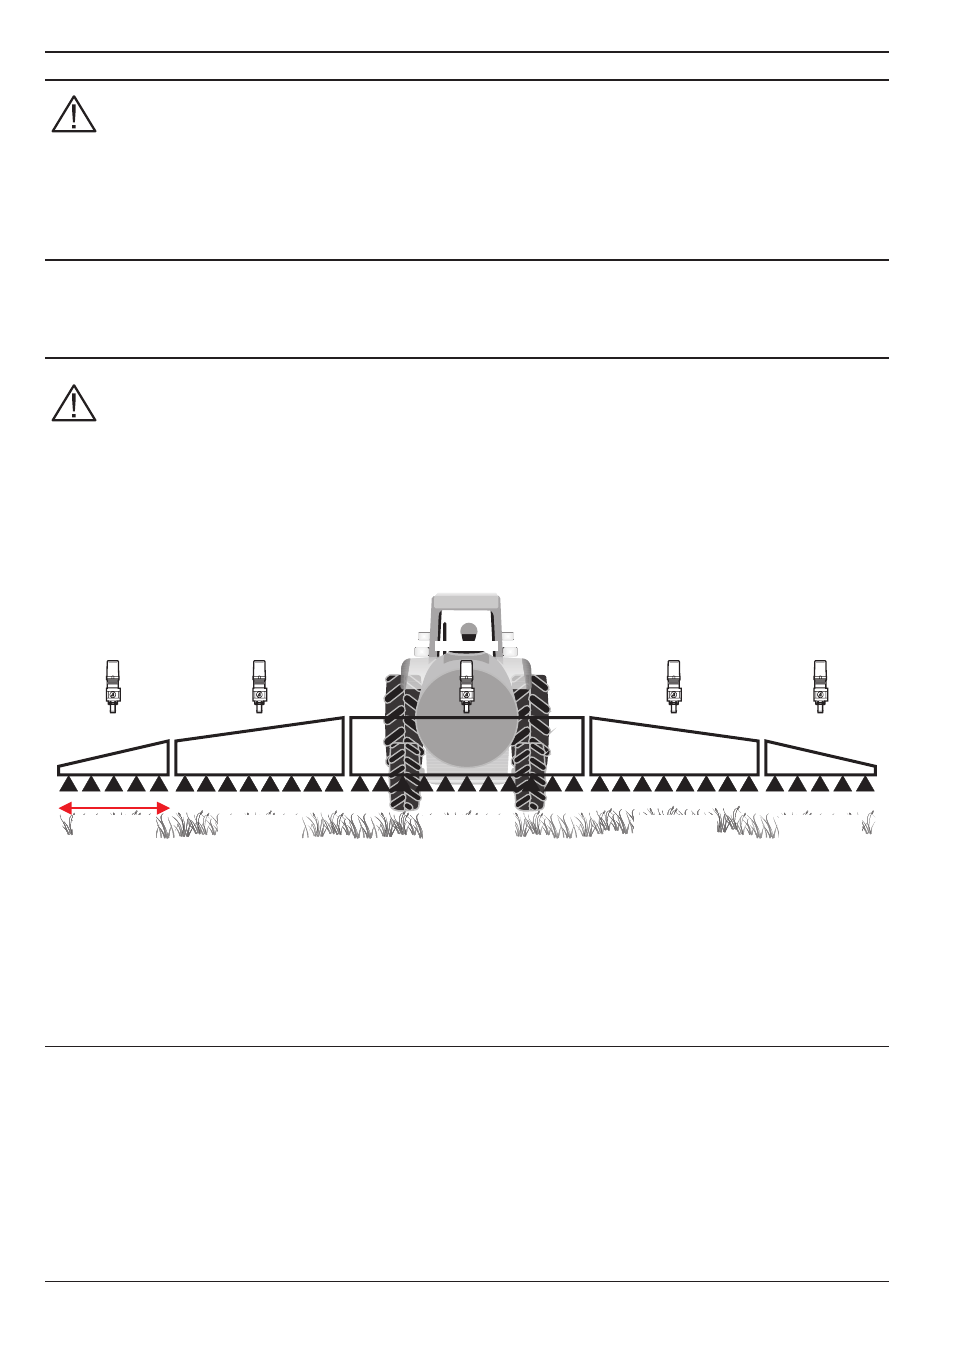
Boom
section 2
Boom
section 3
Boom
section 4
Boom
section 1
Valve 1
Valve 3
Valve 2
Valve 4
Boom
section 5
Valve 5
Fig. 9
Connector 1 shall control the valve which in turn is connected to the boom section 1 and so on with
the other valves.
Connect
"connector 1" to "valve 1", and then the other connectors, with rising numbers from left to
right:
the boom section 1 is the left one looking the machine from the rear side (Fig. 9).
CONTINUeS