Motion detection, Motion detection setup – ARM Electronics ENDVR9A User Manual
Page 17
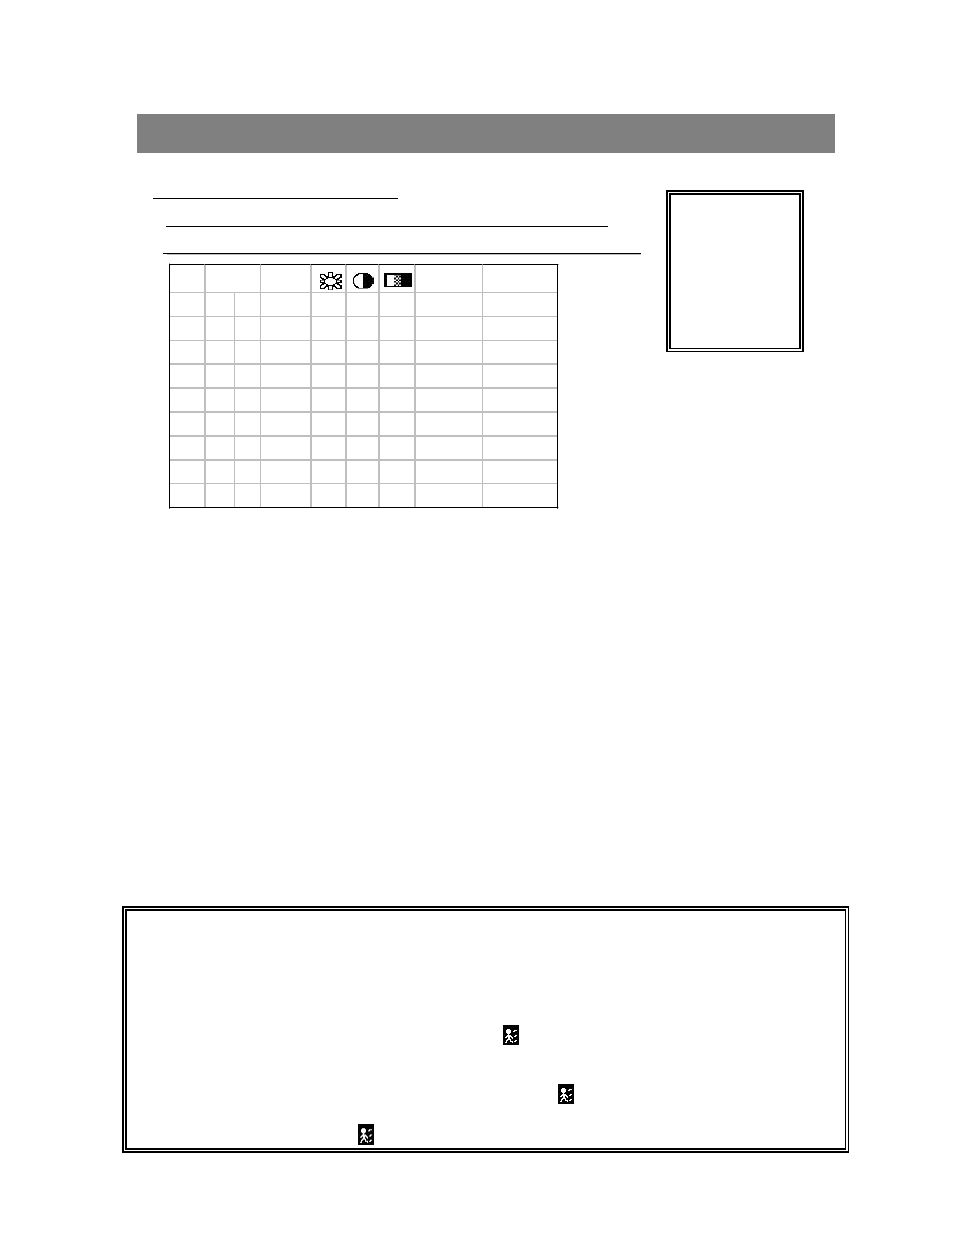
MOTION DETECTION SETUP
1.
Press
Press
“
“
MENU
MENU
“
“
to enter the menu set up, then
to enter the menu set up, then
“
“
Down
Down
”
”
to CAMERA setup.
to CAMERA setup.
2.
Choose a channel and press
Choose a channel and press
“
“
ENTER
ENTER
”
”
twice to enter the Motion Detection Setup.
twice to enter the Motion Detection Setup.
3. Each screen displays the current camera picture overlaid with the motion targets (as Figure 1).
You can push the button “ Left ” or “ Right ”, ” Up ” or “ Down ” to adjust motion detection in ON or OFF.
4. The targets on each motion setup can be turned to ON or OFF individually. To set up targets, using the
front panel buttons:
àPress “ENTER” to confirm the channel
àPress “ENTER” to enter motion mode
•
▲ Up -- moves the target cursor up one row at a time.
•
▼ Down -- moves the target cursor down one row at a time.
•
◄ Left -- moves the target cursor left one column at a time.
•
► Right -- moves the target cursor right one column at a time.
àPress “ENTER” to turn the target cursor ON and press “ENTER” again to turn the target cursor OFF(Figure 1-1).
•
Zoom – turns all targets in the current row ON or OFF. (Figure 1-2)
•
PIP – turns all targets on the screen ON or OFF. (Figure 1-3)
5. Press “ SLOW “ button to setup the Sensitivity list up to 255 and “ REC “ button to setup the Sensitivity list down to 000.
The default value is set on 32.
NOTE : Sensitivity value is related to motion and brightness change. Low value (as 001) means higher sensitivity
on motion and brightness change. High value (as 255) means lower sensitivity on motion and brightness
change. User can choose the suitable sensitivity value in different locations.
NOTE : When motion trigger record setting is ON, it can automatically switch from stand-by mode to record mode.The motion
detection will change the scanning sequence and show on the monitor. There will be an action as following:
For example : If the motion is detected on Camera #1, its recording & scanning sequence will be more frequently. The
sequence will be as 1st, 2nd, 1st, 3rd, 1st, … 9th. And channel 1 will show on the screen. If 2nd camera and 3rd camera
both motion detection are activated, they will be scanning as 1st, 2nd, 3rd, 2nd, 2nd, 3rd, 3rd, 2nd, 3rd, 4th, 2nd, 3rd … and
vice versa. And CH2 & CH3 will show for a period of time which is same as Alarm Duration time.
13
MOTION DETECTION
(MENU)
SEARCH
TIMER
RECORD
►CAMERA
SYSTEM
EVENT
NETWORK
DWELL
ALARM
RECORD
►
---- 01
ON
5
5
5
LOW
EVENT
---- 02
ON
5
5
5
LOW
EVENT
---- 03
ON
5
5
5
LOW
EVENT
---- 04
ON
5
5
5
LOW
EVENT
---- 05
ON
5
5
5
LOW
EVENT
---- 06
ON
5
5
5
LOW
EVENT
---- 07
ON
5
5
5
LOW
EVENT
---- 08
ON
5
5
5
LOW
EVENT
---- 09
ON
5
5
5
LOW
EVENT
TITLE