Contour-parallel roughing in icp" unit, 2 units—roughing – HEIDENHAIN SW 54843x-02 DIN Programming User Manual
Page 65

HEIDENHAIN MANUALplus 620, CNC PILOT 640
65
2.2 Units—Roughing
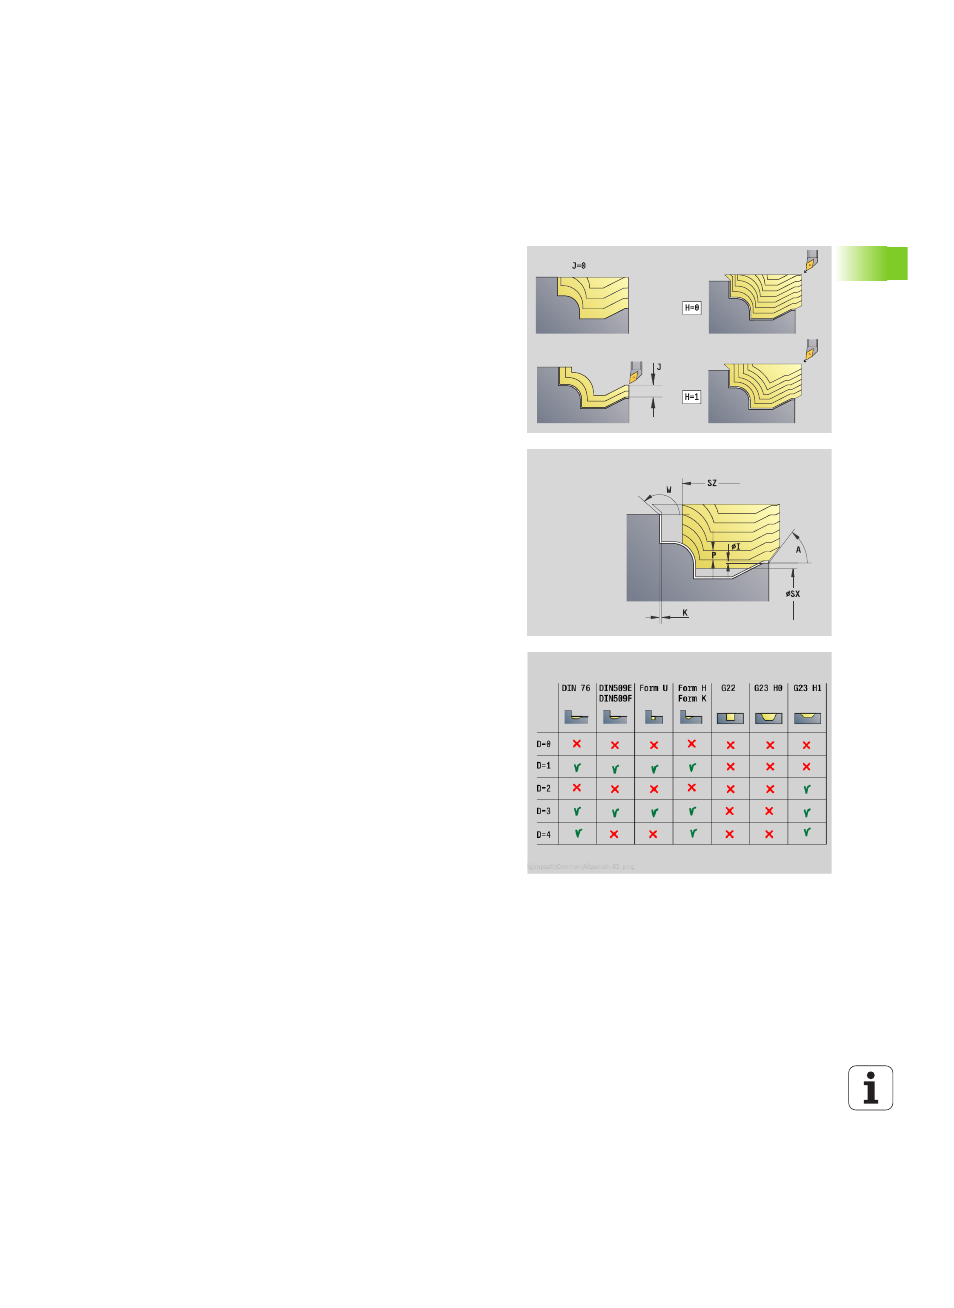
"Contour-parallel roughing in ICP" unit
The unit machines the contour described in the FINISHED program
section from "NS to NE" parallel to the contour. Any auxiliary contour
defined in FK will be used.
Unit name: G830_ICP / Cycle: G830 (see page 268)
Access to the technology database:
Machining operation: Roughing
Affected parameters: F, S, E, P
Contour form
J
Workpiece blank oversize (radius value)—active only if no
blank has been defined.
B
Contour calculation
0: Automatic
1: Tool to the left (G41)
2: Tool to the right (G42)
Further parameters of the contour form: see page 58.
Cycle form
P
Maximum infeed
I, K
Oversize in X, Z direction (I: diameter value)
SX, SZ
Cutting limit (SX: diameter value)—(default: no cutting limit)
A
Approach angle (reference: Z axis)—(default: parallel to Z
axis)
W
Departure angle (reference: Z axis)—(default: orthogonal to
Z axis)
Q
Type of retraction at end of cycle
0: Returns to starting point, first X, then Z direction
1: Positions in front of the finished contour
2: Retracts to safety clearance and stops
H
Type of cut lines (cutting paths)
0: Constant cutting depth: Contour is shifted by a
constant infeed value (paraxial)
1: Equidistant cutting lines: Cutting lines run at a constant
distant from the contour (contour parallel). The contour is
scaled.
HR
Main machining direction
0: Automatic
1: +Z
2: +X
3: –Z
4: –X
D
Hide elements; do not machine form elements (see figure)
Further forms: see page 56