Part 5 character attributes and text effects, Fonts, Character styles – Casio KL-8200 User Manual
Page 13: E-12
E-12
Part 5 Character Attributes and
Text Effects
The operations in this part of the manual explain how to
change fonts and character styles. These characteristics are
called “character attributes”. It also tells you how to assign
such text effects as underlining, shading, and box printing to
text.
Important!
• Character attributes you specify affect printed text only.
The characters on the display do not change.
• Remember that character attributes are assigned to spe-
cific characters. Whenever you replace a character with
another one, the new character also picks up the attributes
of the original character.
• Text effects are applied to both displayed text and printed
text.
Fonts
This label printer gives you a choice of 13 different fonts.
See page E-30 for examples of each type of font.
The following sections describe how to change the default
font setting (the font that is automatically used whenever
you input text), how to change the font for displayed text,
and how you can find out what the font setting is for text on
the display.
Important!
• Note that you cannot make font changes for illustrations.
• Note that non-English characters (З, Я, Б, etc.) can be
used with the sans-serif, sans-serif italic, sans-serif round,
roman, and roman italic fonts only.
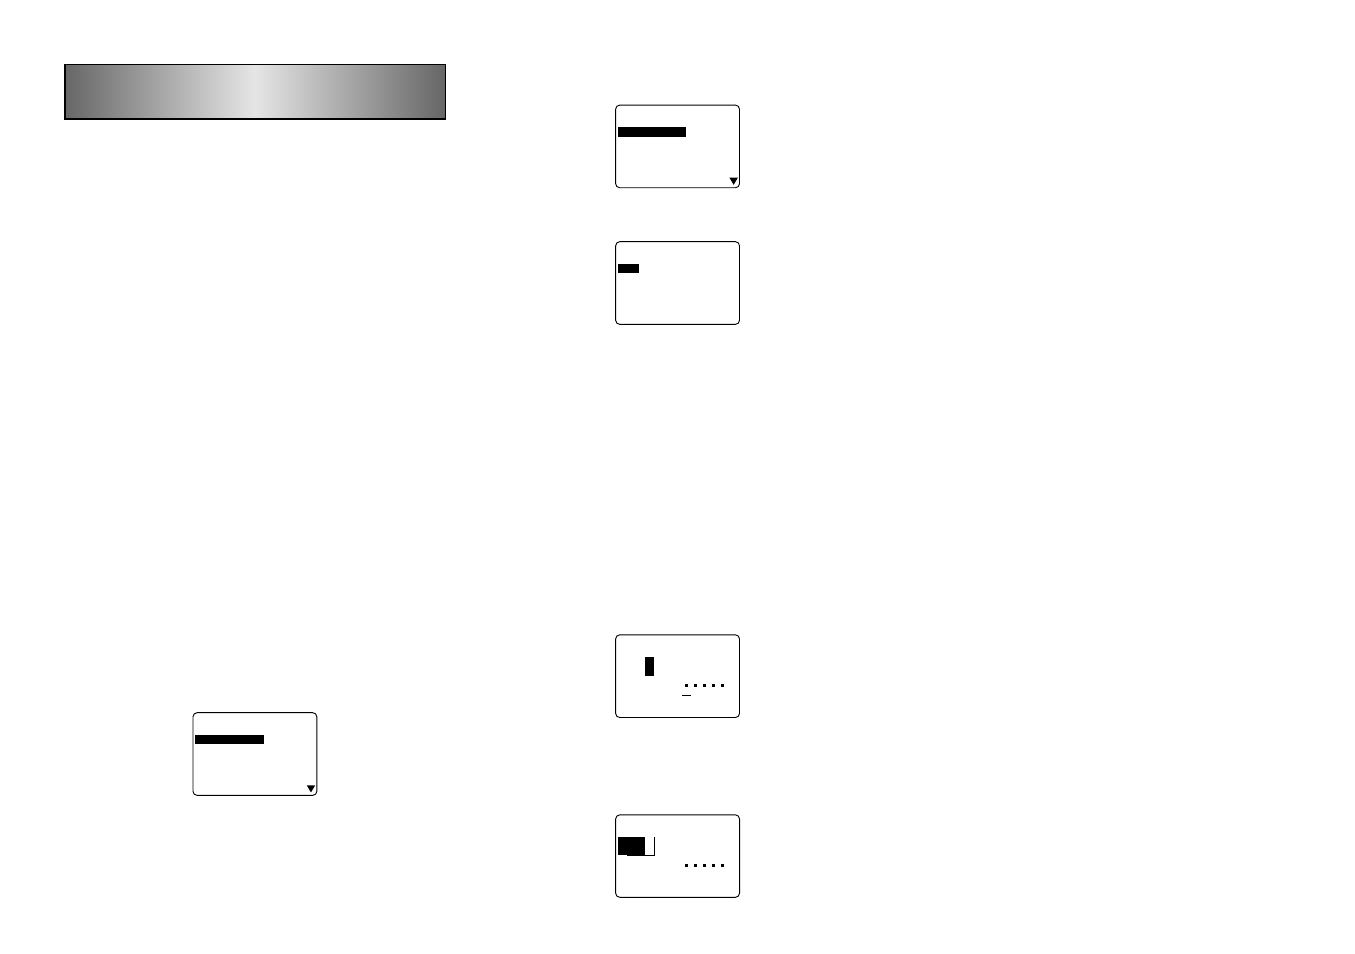
To change the default font setting
1. Press SET UP to display the SET UP menu.
2. Highlight “DEFAULT FONT” and then press SET.
–
T
N
O
F
T
L
U
A
F
E
D
–
F
I
R
E
S
-
S
N
A
S
I
L
A
T
I
F
I
R
E
S
-
S
N
A
S
D
N
U
O
R
F
I
R
E
S
-
S
N
A
S
N
A
M
O
R
C
I
L
A
T
I
N
A
M
O
R
E
C
A
F
D
L
O
3. Use u and i to highlight the font you want to set as
the default and then press SET.
To change the font for displayed text
1. While there is text on the display, press FONT.
–
–
–
–
–
T
N
O
F
–
–
–
–
–
F
I
R
E
S
-
S
N
A
S
I
L
A
T
I
F
I
R
E
S
-
S
N
A
S
D
N
U
O
R
F
I
R
E
S
-
S
N
A
S
N
A
M
O
R
C
I
L
A
T
I
N
A
M
O
R
E
C
A
F
D
L
O
2. Use u and i to highlight the font you want to change
to and then press SET.
–
–
–
–
–
T
N
O
F
–
–
–
–
–
–
E
G
N
A
R
–
L
L
A
K
C
O
L
B
E
N
I
L
R
E
T
C
A
R
A
H
C
• What you should do next depends on the range you want
to use.
To change the font for all the text
1. After performing the two steps under “To change the font
for displayed text”, use u and i to highlight “ALL” and
then press SET.
2. Press SET to change the font for all the text on the display.
• At this point, the label printer returns to the text input
screen.
• Pressing ESC returns to the RANGE menu without chang-
ing anything.
To change the font for blocks of text
1. After performing the two steps under “To change the font
for displayed text”, use u and i to highlight “BLOCK”
and then press SET.
B
L
y
n
a
p
m
o
C
C
B
A
–
–
–
–
–
T
N
O
F
–
–
–
–
–
K
C
O
L
B
?
M
O
R
F
• See page E-16 for details about how to use blocks.
2. Move the cursor to the start block from which you want
to change the font and then press SET to register your
selection.
B
L
y
n
a
p
m
o
C
C
B
A
–
–
–
–
–
T
N
O
F
–
–
–
–
–
K
C
O
L
B
?
O
T
3. Move the cursor to the end block up to which you want to
change the font and then press SET to register your se-
lection and change the font.
• At this point, the label printer returns to the text input
screen.
To change the font for lines of text
1. After performing the two steps under “To change the font
for displayed text”, use u and i to highlight “LINE” and
then press SET.
2. Move the cursor to the start line from which you want to
change the font and then press SET to register your se-
lection.
3. Move the cursor to the end line up to which you want to
change the font and then press SET to register your se-
lection and change the font.
• At this point, the label printer returns to the text input
screen.
To change the font for specific characters
1. After performing the two steps under “To change the font
for displayed text”, use u and i to highlight “CHARAC-
TER” and then press SET.
2. Move the cursor to the start character from which you
want to change the font and then press SET to register
your selection.
3. Move the cursor to the end character up to which you
want to change the font and then press SET to register
your selection and change the font.
• At this point, the label printer returns to the text input
screen.
To find out current font settings
Use the t and y cursor keys to move the cursor around the
display. The font indicator shows the current font setting for
the character where the cursor is located.
Character Styles
There are five character styles: normal, bold, outline,
shadow, and raised.
The following sections describe how to change the charac-
ter style for displayed text, and how you can find out what
the character style setting is for text on the display.