About the set up menu, Removing the tape cartridge – Casio KL-8200 User Manual
Page 8
E-7
Important! Never try to push the tape back into the cas-
sette. Once tape is out of the cassette, there is no way to
wind it back in. Trying to do so can cause operational prob-
lems with the label printer.
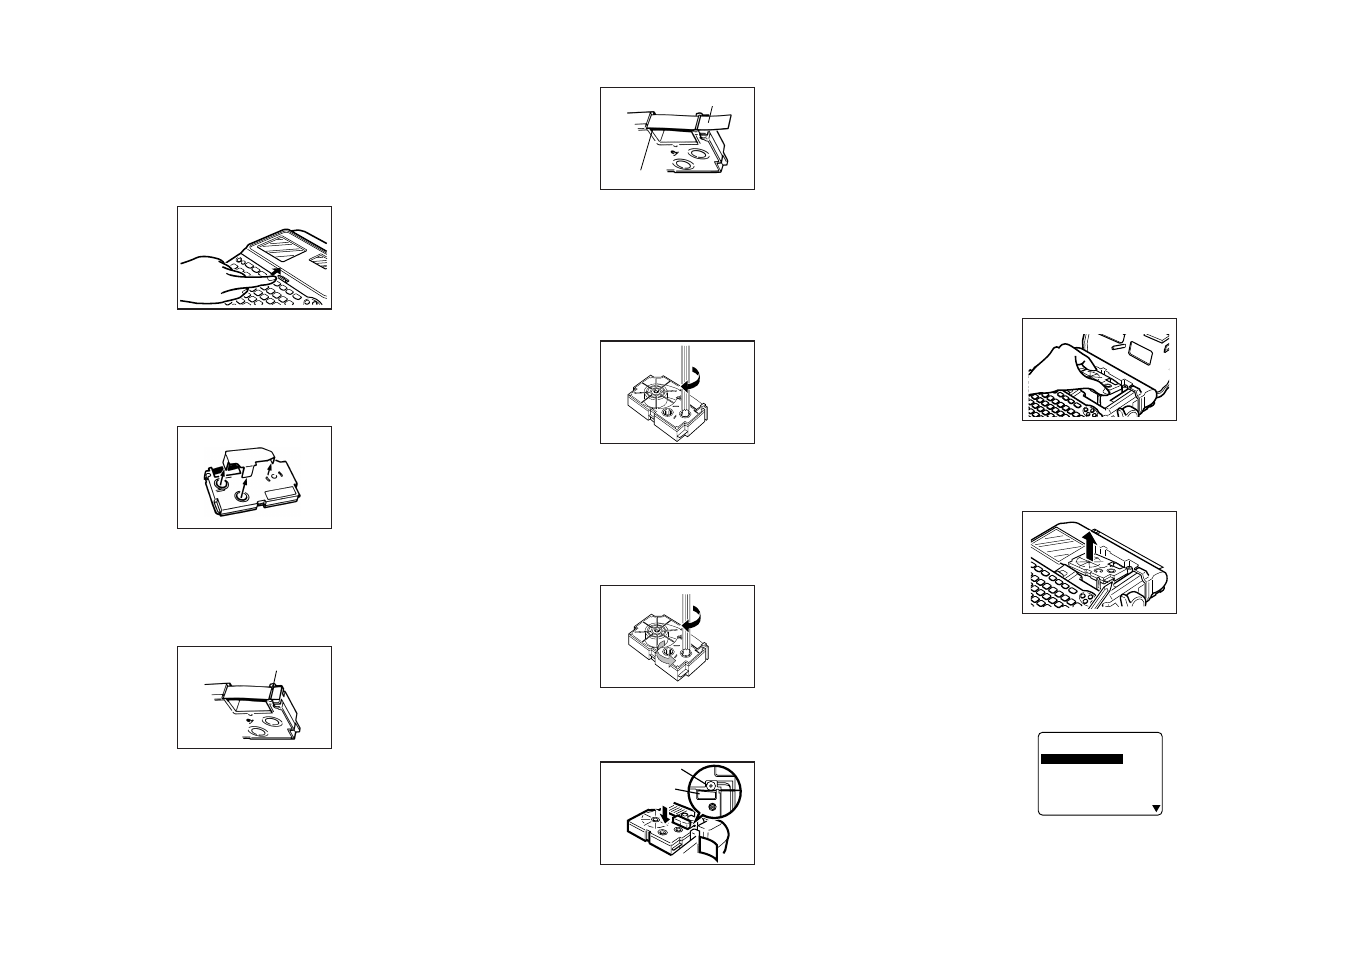
To load a tape cartridge
1. Make sure the label printer is turned off.
2. Press the cover release and open the cover.
• If there is a cartridge already in the label printer, remove it
by grasping the cartridge on both sides with your thumb
and forefinger, and lift straight up.
3. Remove the stopper from a new tape cartridge and check
to see that the tape is ready to use.
4. Check to make sure that the end of the tape is not bent.
• If the end of the tape is bent, use scissors to cut off the
bent portion.
5. Make sure that the tape is under the tape guide and that
it is not bent or twisted.
• Make sure the end of the tape is passing through the tape
guide. If it isn’t, pass the end of the tape through the tape
guide as shown in the illustration.
Tape guide
6. Pull out about 3cm (1
1
/
8
") of tape.
• Never try to force tape back into the cartridge once it is
pulled out.
• Do not pull on the tape too hard. Doing so can break the
ink ribbon and result in malfunction.
7. Use a pencil or some other thin object to take up slack in
the ink ribbon as shown in the illustration. Note that the
tape does not move at this time.
• If the ink ribbon is slack when you load it into the label
printer, it can break or cause some other problem.
• Be sure to turn the ink ribbon take up spool only in the
direction indicated by the arrow (a).
• Turn the spool until the other spool (b) starts turning in
the direction noted by the arrow. This indicates there is no
slack in the ribbon.
8. Load the tape cartridge into the label printer, making sure
that the tape and ink ribbon pass between the head and
roller.
Ink ribbon
Tape
• Be sure to lower the tape cartridge straight down into the
label printer, and press down on it until it clicks securely
into place.
9. Close the cover and operate the tape cut lever to cut off
the tape.
10. Turn on label printer power and press FUNC and then
PRINT (FEED) two or three times to make sure that the
tape comes out without any problem.
• If the tape does not come out normally, turn off power and
start again from step 1 above.
Removing the Tape Cartridge
• Grasp the tape cartridge with your fingers as shown in
the illustration, and lift it straight up out of the label printer.
• To make it easier to remove a narrow (6mm, 9mm) tape
cartridge, insert a pencil or some other thin, pointed ob-
ject under the right side of the tape and lift up, as shown
in the illustration.
About the SET UP menu
The SET UP menu lets you change various basic settings
quickly and easily. To display the SET UP menu, press the
SET UP key.
–
–
–
–
P
U
T
E
S
–
–
–
–
T
N
O
F
T
L
U
A
F
E
D
T
U
P
N
I
T
S
A
R
T
N
O
C
Y
T
I
S
N
E
D
D
N
U
O
S
E
G
A
U
G
N
A
L
Roller
(a)
(b)
Printer head