Front panel assembly replacement, Disassembly – Precision Medical PM4351 EasyFlow5 User Manual
Page 14
12
Front Panel Assembly Replacement
(PM4350
– 507593 PM4351 – 507321)
Disassembly
Tools and equipment required:
#2 Phillips Screwdriver
5/16 Hex Nut Driver
Small Diagonal Cutting Pliers
Needle Nose Pliers
1. Switch the device power to the off position.
2. Unplug the device from the AC power source.
3. Place the device onto a table or bench top.
4. Using a Phillips Head Screwdriver, remove the two (2) Screws
located on top of Enclosure in front of the Handle and set aside.
5. Gently lay the device onto one of its sides.
6. Using 5/16 Hex Nut Driver, remove the four corner Hex Screws and
set aside.
7. While holding the Top Enclosure and Base together, return the
device back to an upright position.
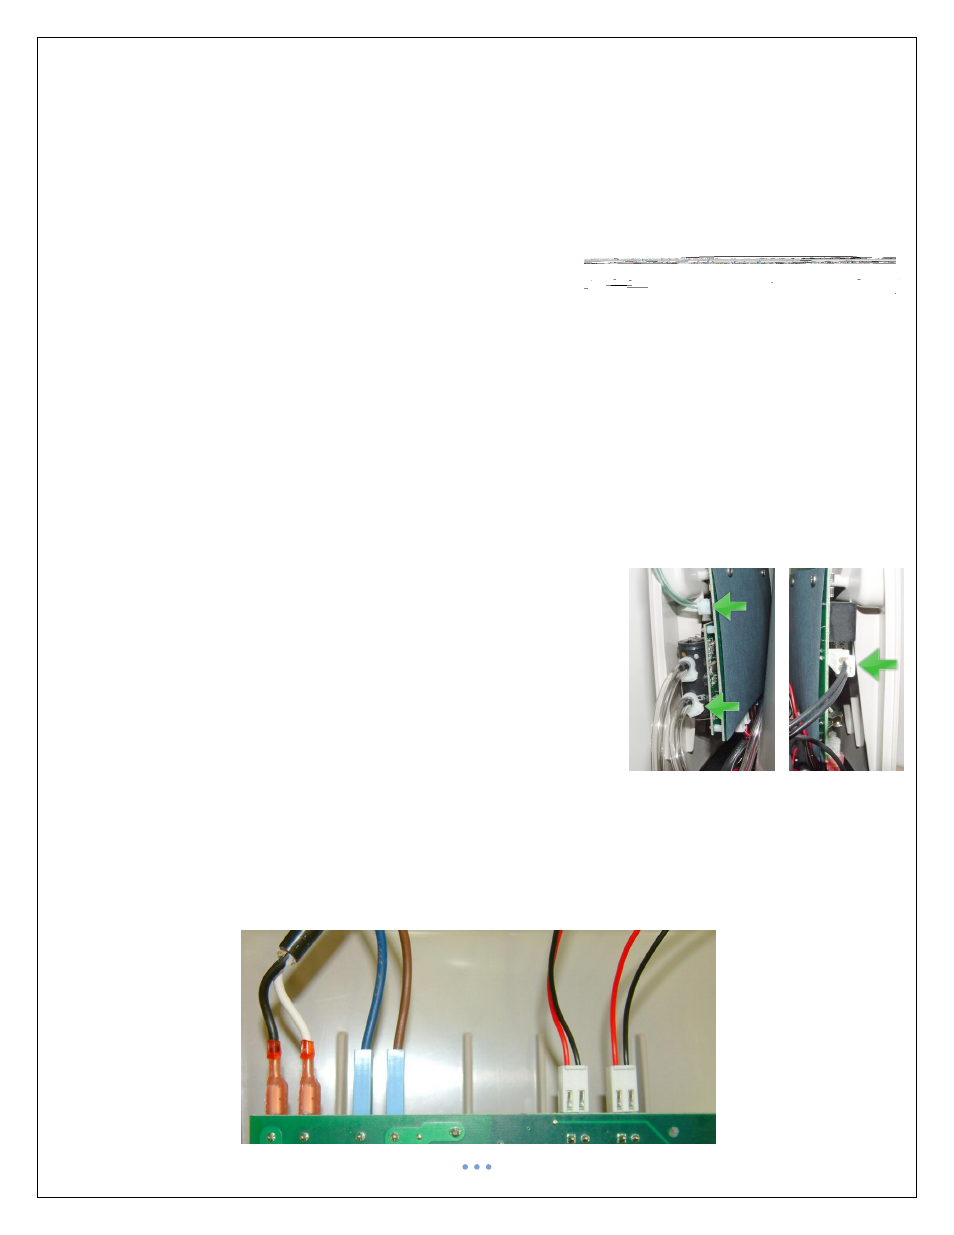
8. Grasp the Handle on the Top Enclosure and lift upward to remove it from the Base Assembly.
9. Using Needle Nose Pliers, slide Tubing Sleeve Clamp on Blue/Green tubing
off bard.
10. Carefully remove the Blue/Green Tube from the Pressure Sensor on the
PCB.
10.1.
Set aside Clamp for re-assembly.
11. For PM4351 Models:
11.1.
Release Nylon Hose Clamp on Tubing connected to the bottom
port of the Oxygen Sensor.
11.2.
Remove the bottom Tube connected to the bottom port of the
Oxygen Sensor.
11.3.
Set aside Nylon Hose Clamp for re-assembly.
12. Unplug Fan Wire Harness connected to left side of the PCB.
13. Carefully lift the Front Panel Assembly upward and lay it down in front of the device.
14. Disconnect all Wire Connectors shown below.
15. Remove the Front Panel assembly from the device.