Performing, Holding the aerophone pro, Selecting the key in which to play – Roland Aerophone Pro Digital Wind Instrument User Manual
Page 7: Embouchure, Pressing the performance keys, Embouchure” (p. 7), Pressing the performance keys” (p. 7), Holding the aerophone pro” (p. 7), Selecting the key in which to play” (p. 7)
7
Performing
Holding the Aerophone Pro
1.
Hold the Aerophone Pro as
shown in the illustration.
2.
Place your left thumb on
the thumb rest, and place
your right thumb under
the thumb hook.
* Use a commercially available
neck strap designed for musical
instruments.
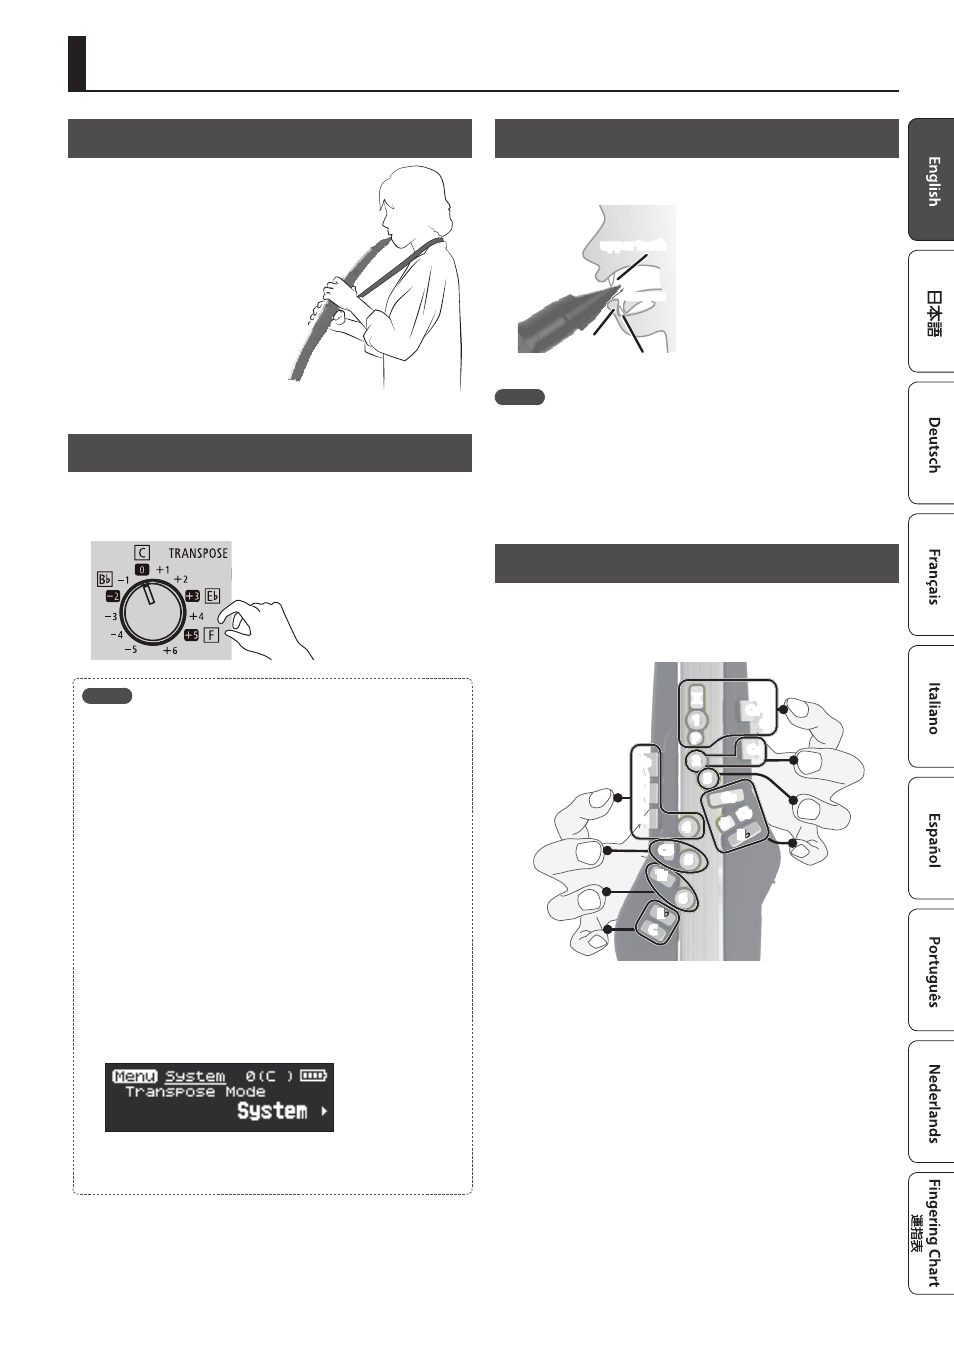
Selecting the Key in Which to Play
Transposes the pitch range of the tone in semitone steps.
1.
Turn the [TRANSPOSE] knob.
MEMO
The operation of the [TRANSPOSE] knob differs depending on the
value of the system setting “Transpose Mode.”
5
If Transpose Mode is “System” (default value)
Transposition is always the value of the [TRANSPOSE] knob.
5
If Transpose Mode is “Scene”
The transposition will be as specified by the scene.
* The value indicated by the [TRANSPOSE] knob might be different
than the actual transposition.
* Even if transposition is specified for the scene, turning the
[TRANSPOSE] knob sets the transposition to the value of the knob.
How to set the Transpose Mode
1.
Press the [MENU] button.
The Menu screen appears.
2.
Use the [-][+] (
C
/
A
) buttons to select “Transpose Mode,” and
press the [MENU] button.
The cursor position moves to the lower line.
3.
Use the [-][+] (
C
/
A
) buttons to change the value.
Embouchure
Hold the mouthpiece lightly between your upper teeth and lower lip,
and blow into it.
tongue
upper teeth
lower teeth
lower lip
MEMO
5
By using tonguing (using your tongue to control your breath) and
legato you can control the sound more expressively.
5
You can control the pitch by the strength with which you bite the
reed.
&
“Aerophone Pro Parameter Guide” (PDF)
Pressing the Performance Keys
You can perform using the same fingering as on a saxophone.
&
For details on fingering, refer to “Fingering Chart” at the end of this
manual.
X
P
2
3
1
C
2
C
1
C
4
G
#
B
C
#
B
4
C
3
T
c
T
a
5
T
f
6
E
C
C5
right index finger
left index finger
* When you lay down this unit, attach the mouthpiece cap and lay the
unit down with the performance keys upward. Laying down the unit
with the performance keys downward might cause problems such
as the buttons failing to return.