Installation recommendations, Mounting options, Plastic backbox – AMX MT-1002 Modero G5 Tabletop 10.1" Multi-Touch Panel User Manual
Page 26
Modero G5 Touch Panels - Installation & Hardware Reference Manual
26
| TOC
Installation Recommendations
During any installation, a lack of ventilation may produce conditions that may adversely affect the device’s operation. In these
circumstances, special care must be made to make sure that temperatures within enclosed areas do not exceed the device’s
maximum rated temperature.
NOTE: While the outside temperature of the device may be at or below its maximum operating temperature, special care must be
taken before and during installation to ensure that the maximum operating temperature is not exceeded within wall or rack
installation spaces.
Mounting Options
Use the included clear plastic Backbox to attach the panel to most standard wall materials.
NOTE: Other optional AMX mounting solutions include the MSA-MMK-07/10 Multi Mount Kits, and the MSA-AMK-07/10 Any Mount
Kits, and CB-MXSA-07/10 Rough-In Boxes. Refer to the Quick Start Guide included with each mounting kit for instructions.
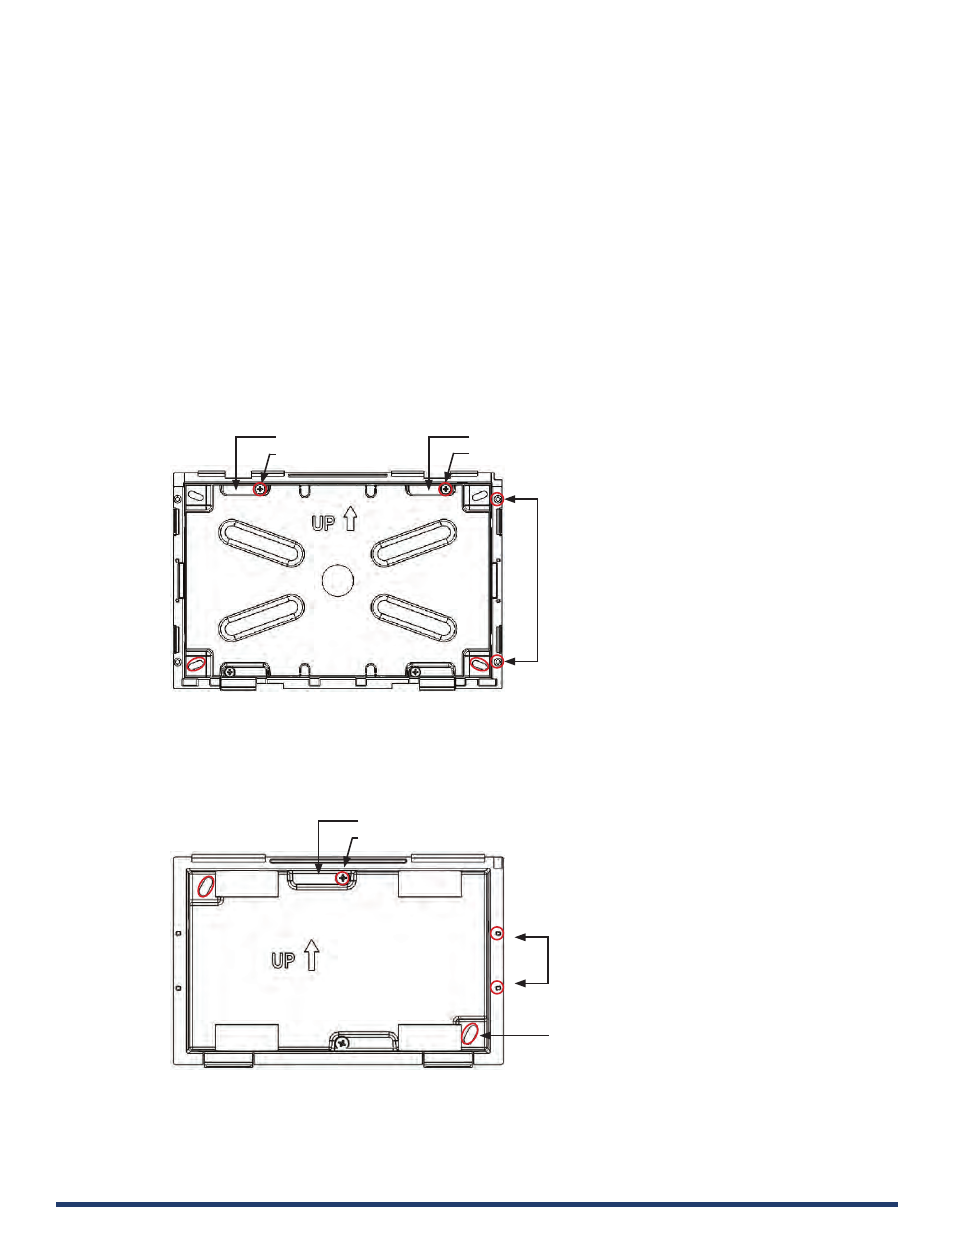
Plastic Backbox
Modero wall mount panels comes with a clear plastic Backbox. This Backbox can be used to mount the touch panel into most
standard wall materials. The Backbox can also used to mount the panel into other mounting options.
•
FIG. 20 shows the Backbox for the MD-1002:
Locking Tab (X4)
Locking Tab screw (X4)
Mounting holes (X4) for installing the Backbox into a
Rough-In Box (screws not included)
Mounting holes (X4) for use with
mounting screws (not included)
Use these mounting holes to install
the Backbox into thin walls (less than
0.5” thick) or solid surfaces
Locking Tab screw (X4)
Locking Tab (X4)
FIG. 20 10.1” MODERO Backbox (Front View)
•
FIG. 21 shows the Backbox for the MD-702:
Locking Tab (X2)
Locking Tab screw (X2)
Mounting holes (X4) for use with mounting
screws (not included)
Use these mounting holes to install the
Backbox into thin walls (less than 0.5” thick)
or solid surfaces
Mounting holes (X2) for installing the Backbox
into a Rough-In Box (screws not included)
FIG. 21 7” MODERO Backbox (Front View)