Bottom – Dell 23.8" OptiPlex 7410 All-in-One Desktop Computer (Gray) User Manual
Page 12
Enables you to video chat, capture photos, and record videos.
2.
Camera-status light
Turns on when the camera is in use.
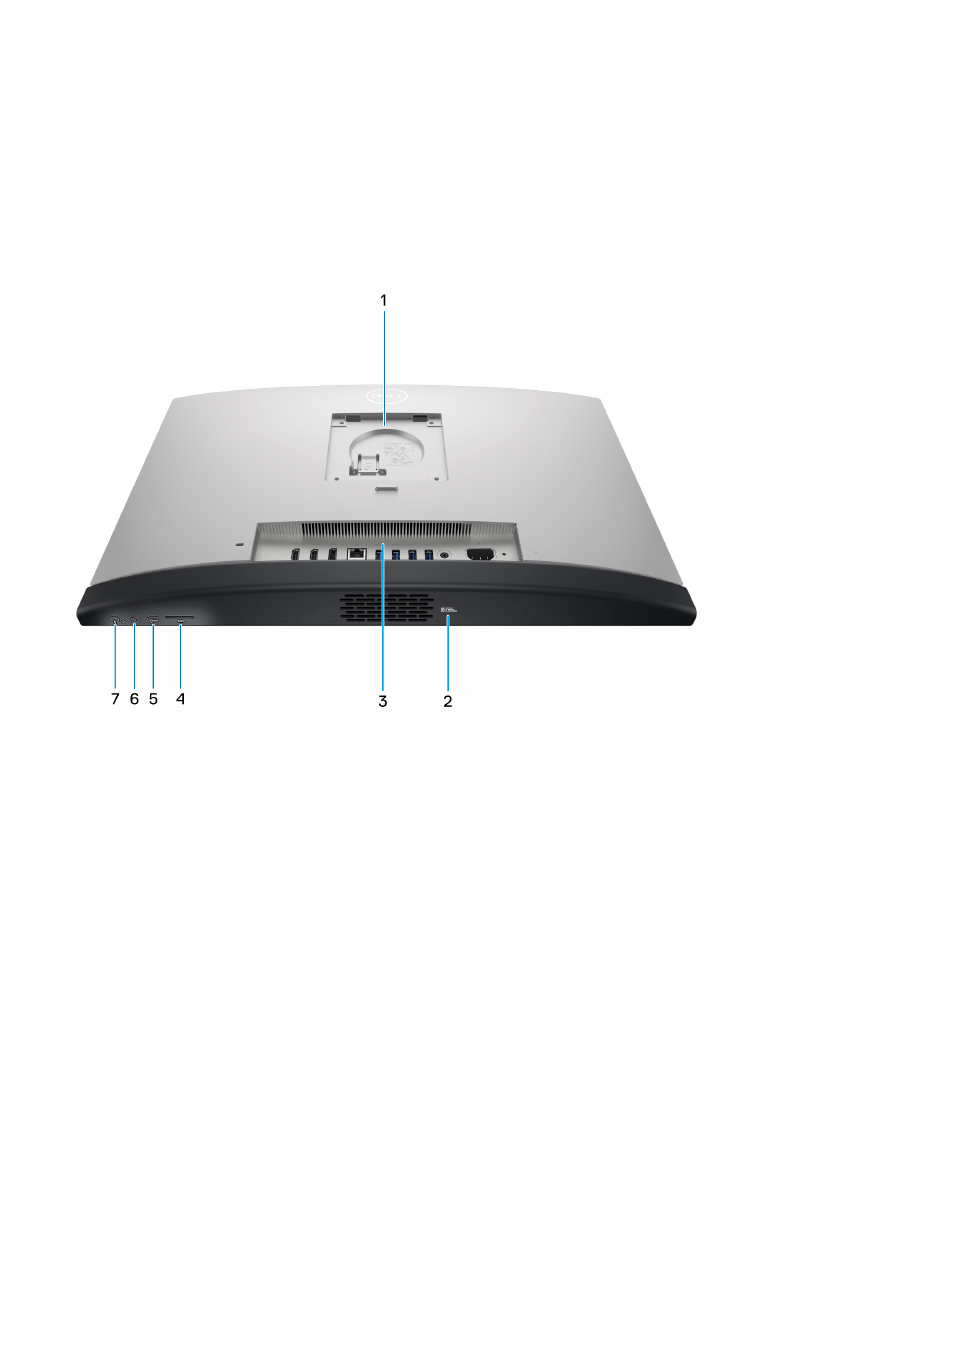
Bottom
1.
Stand/VESA mount location
Allows for the installation of a 100 mm x 100 mm screw pitch VESA connection for use in standard environmental conditions,
or one of the stands offered by Dell for your OptiPlex All-in-One Plus 7410.
2.
Service Tag label
The Service Tag is a unique alphanumeric identifier that enables Dell service technicians to identify the hardware
components in your computer and access warranty information.
3.
Back panel
Connect USB, audio, video, and other devices.
4.
SD-card slot
Reads from and writes to the SD card.
5.
USB 3.2 Gen 2x2 Type C port
Connect devices such as external storage devices and printers. Provides data transfer rate of up to 20 Gbps.
6.
Display Built-in Self Test (BIST)/Display input button
Press and hold for your computer to enter a display Built-in Self Test (BIST).
Press to switch display input to and from the device connected to the HDMI-in port on the back panel.
7.
Power button
Press to turn on the computer if it is turned off, in sleep state, or in hibernate state.
When the computer is turned on, press the power button to put the computer into sleep state; press and hold the power
button for 10 seconds to force shut-down the computer.
12
Views of OptiPlex All-in-One Plus 7410