Dell 23.8" OptiPlex 7410 All-in-One Desktop Computer (Gray) User Manual
Page 97
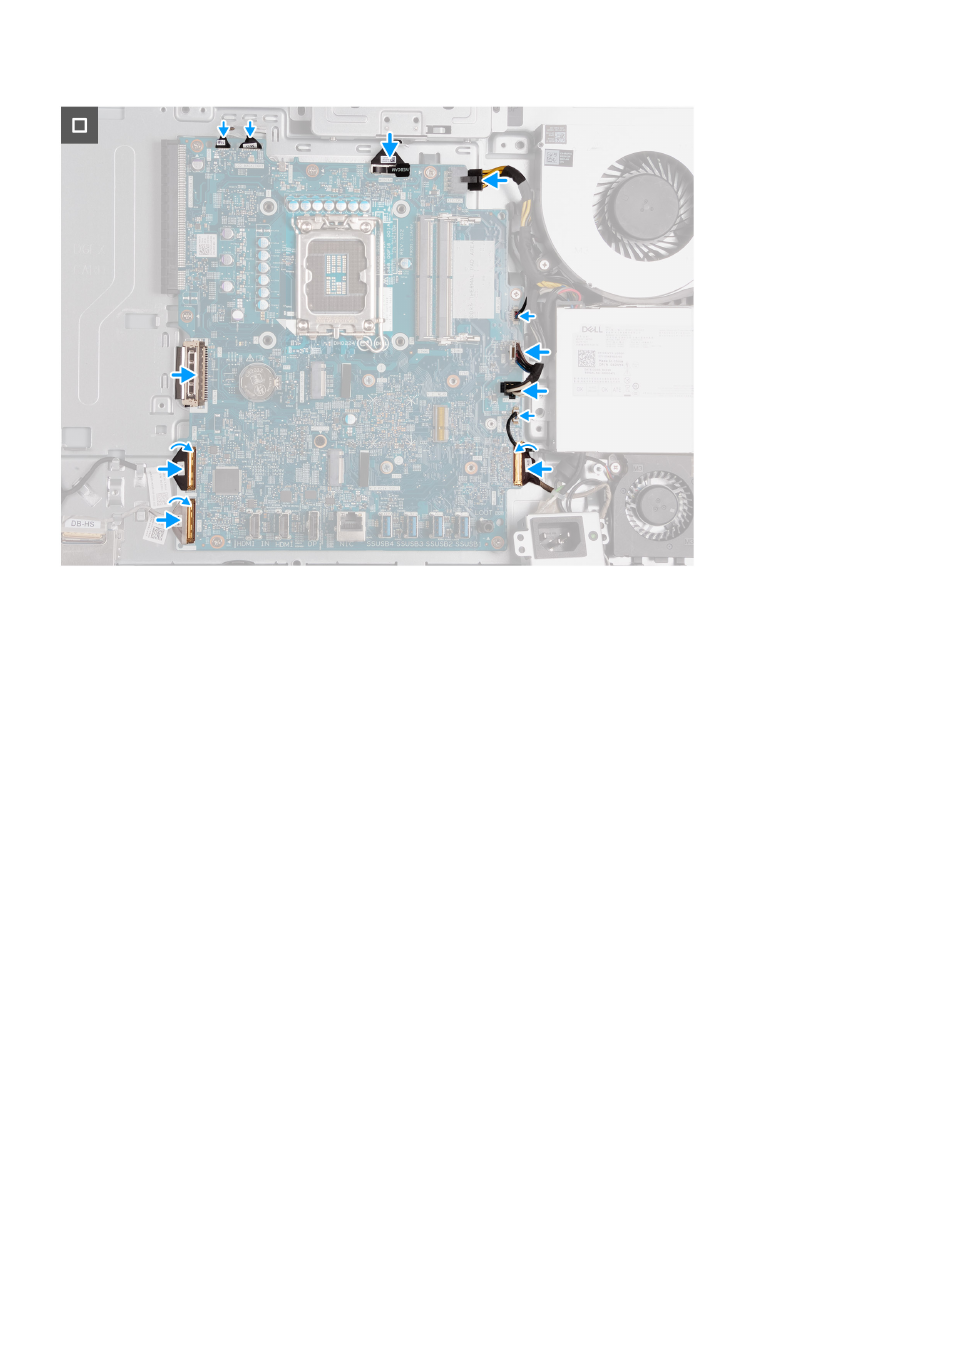
Steps
1. Gently place the system board on the display-assembly base.
2. Align the screw holes on the system board with the screw holes on the display-assembly base.
3. Replace the seven screws (M3x5) that secure the system board to the display-assembly base.
4. Replace the screw (M3x12) that secures the system board to the display-assembly base.
5. Connect the touchscreen cable (TOUCH) to the system board.
6. Connect the display-backlight cable (LCB BACKLIGHT) to the system board.
7. Connect the camera cable (WEBCAM) to the system board.
8. Connect the processor-power cable (ATX CPU) to the system board.
9. Connect the fan cable (FAN CPU) to the system board.
10. Connect the control-signal cable (CTRL) to the system board.
11. Connect the system-board power cable (ATX SYS) to the system board.
12. Connect the power-supply fan cable (FAN SYS) to the system board.
13. Connect the audio cable (MB-AUDIO) to the system board and close the latch.
14. Connect the high-speed cable (MB-HS) to the system board and close the latch.
15. Connect the power cable (MB-PWR) to the system board and close the latch.
16. Connect the display cable (CVDS) to the system board.
Next steps
1. Install the
.
2. Install the
.
3. Install the
.
4. Install the
M.2 2230 solid-state drive in M.2 slot 0
M.2 2280 solid-state drive in M.2 slot 0
, whichever applicable.
5. Install the
M.2 2230 solid-state drive in M.2 slot 1
M.2 2280 solid-state drive in M.2 slot 1
, whichever applicable.
6. Install the
.
7. Install the
.
8. Install the
.
9. Install the
10. Install the
.
Removing and installing Field Replaceable Units (FRUs)
97