Dell 23.8" OptiPlex 7410 All-in-One Desktop Computer (Gray) User Manual
Page 94
Steps
1. Disconnect the touchscreen cable (TOUCH) from the system board.
2. Disconnect the display-backlight cable (LCB BACKLIGHT) from the system board.
3. Using the pull tab, disconnect the camera cable (WEBCAM) from the system board.
4. Press and hold the securing clip and disconnect the processor-power cable (ATX CPU) from the system board.
5. Disconnect the fan cable (FAN CPU) from the system board.
6. Disconnect the control-signal cable (CTRL) from the system board.
7. Disconnect the system-board power cable (ATX SYS) from the system board.
8. Disconnect the power-supply fan cable (FAN SYS) from the system board.
9. Lift the latch and disconnect the audio cable (MB-AUDIO) from the system board.
10. Lift the latch and disconnect the high-speed cable (MB-HS) from the system board.
11. Lift the latch and disconnect the power cable (MB-PWR) from the system board.
12. Pinching the securing clips on either side of the hard-drive cable connector, disconnect the display cable (CVDS) from the
system board.
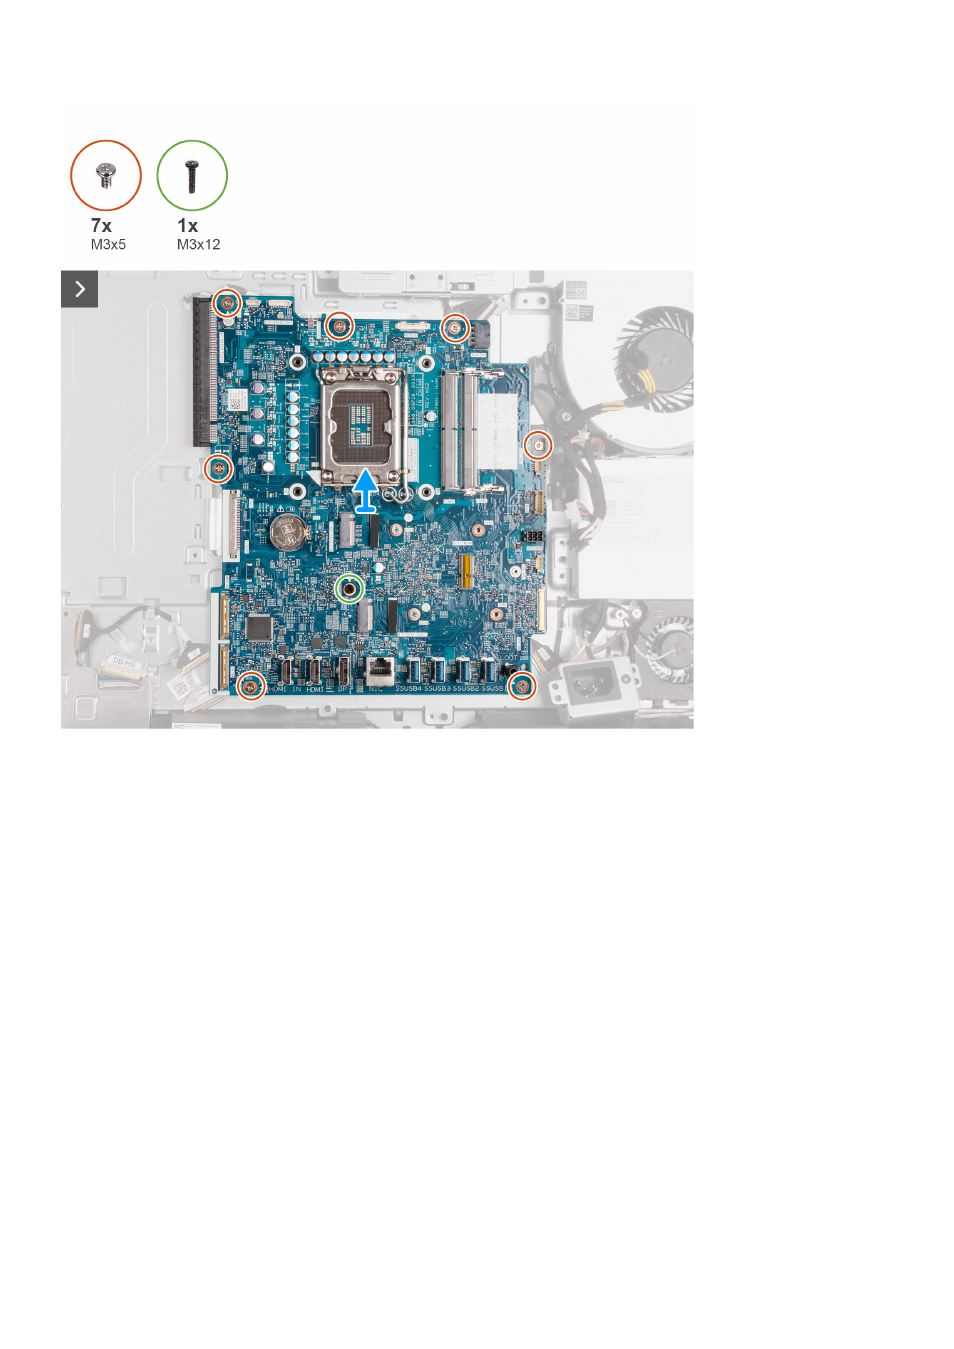
13. Remove the seven screws (M3x5) that secure the system board to the display-assembly base.
14. Remove the screw (M3x12) that secures the system board to the display-assembly base.
15. Gently lift the system board off the display-assembly base.
94
Removing and installing Field Replaceable Units (FRUs)