Assembly – Ryobi BTS10S User Manual
Page 19
19
ASSEMBLY
Fig. 14
FRAMING
SQUARE
Reposition the blade guard assembly left or right as
needed to align the spreader with the saw blade.
Once properly aligned, securely retighten the screws.
SOCKET
HEAD CAP
SCREWS
BLADE
ADJUSTING
HANDLE
Fig. 13
WARNING:
It is important to install and adjust the blade guard
assembly correctly. Poor alignment could cause kickback
and throw the workpiece at the operator.
WARNING:
Do not loosen the screws holding the spreader to the
blade guard assembly. Unsecured pawls or spreader
could cause personal injury while making adjustments.
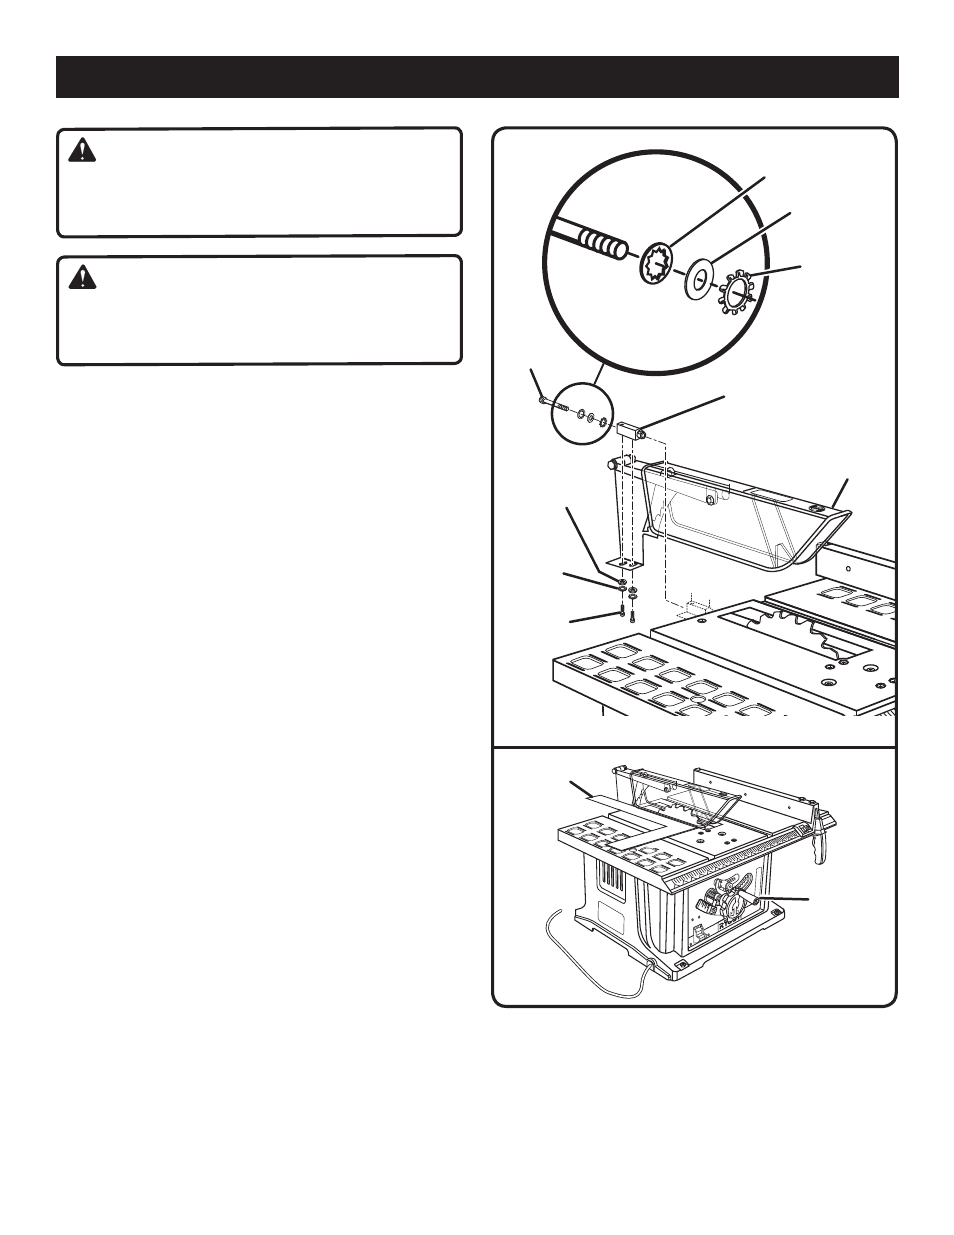
TO INSTALL BLADE GUARD ASSEMBLY
See Figure 13.
Lower the blade by turning the blade adjusting handle
clockwise.
Feed an external tooth lock washer, flat washer, and
internal tooth lock washer on the socket head bolt then
slide the bolt and washers into the hole in the mounting
bracket.
Slide the mounting bracket into the back of the saw over
the rod and tighten the socket head bolt using the hex
key provided.
NOTE: Before tightening the bolt, be sure there is at least
1/8 in. between the blade and the spreader.
Securely tighten the bolt using the hex key provided.
Attach the blade guard assembly to the mounting bracket
using the socket head cap screws, flat washers, and
external tooth lock washers as shown in figure 13.
The blade guard assembly must be aligned with the saw
blade. See the following section for instructions.
TO CHECK AND ALIGN THE SAW BLADE AND
BLADE GUARD ASSEMBLY
See Figure 14.
This saw has been adjusted at the factory and, unless
damaged in shipping, should not require adjustments during
assembly. After extensive use, it may need to be checked. If
the blade guard assembly is out of alignment with the saw
blade, adjust the alignment of the blade guard assembly.
The spreader must be aligned with the saw blade.
To check alignment of the spreader:
Raise the saw blade by turning the blade adjusting handle
counterclockwise.
Place a framing square or straight edge beside the saw
blade on the left.
If the spreader and saw blade are not in alignment,
adjustment is needed. To adjust:
Unplug the saw then raise the blade guard assembly.
Loosen the socket head cap screws holding the blade
guard assembly to the mounting bracket.
EXTERNAL
TOOTH LOCK
WASHER
FLAT
WASHER
SOCKET
HEAD BOLT
MOUNTING
BRACKET
BLADE
GUARD
ASSEMBLY
EXTERNAL
TOOTH LOCK
WASHER
INTERNAL TOOTH
LOCK WASHER
FLAT WASHER