Paxton Superchargers Carbureted Mustang Novi 2000 User Manual
Page 19
3-3
P/N: 4PFX020-020
©2006 Paxton Automotive
All Rights Reserved, Intl. Copr. Secured
24APR06 v1.1 MusGT(4PFX..020 v1.1)
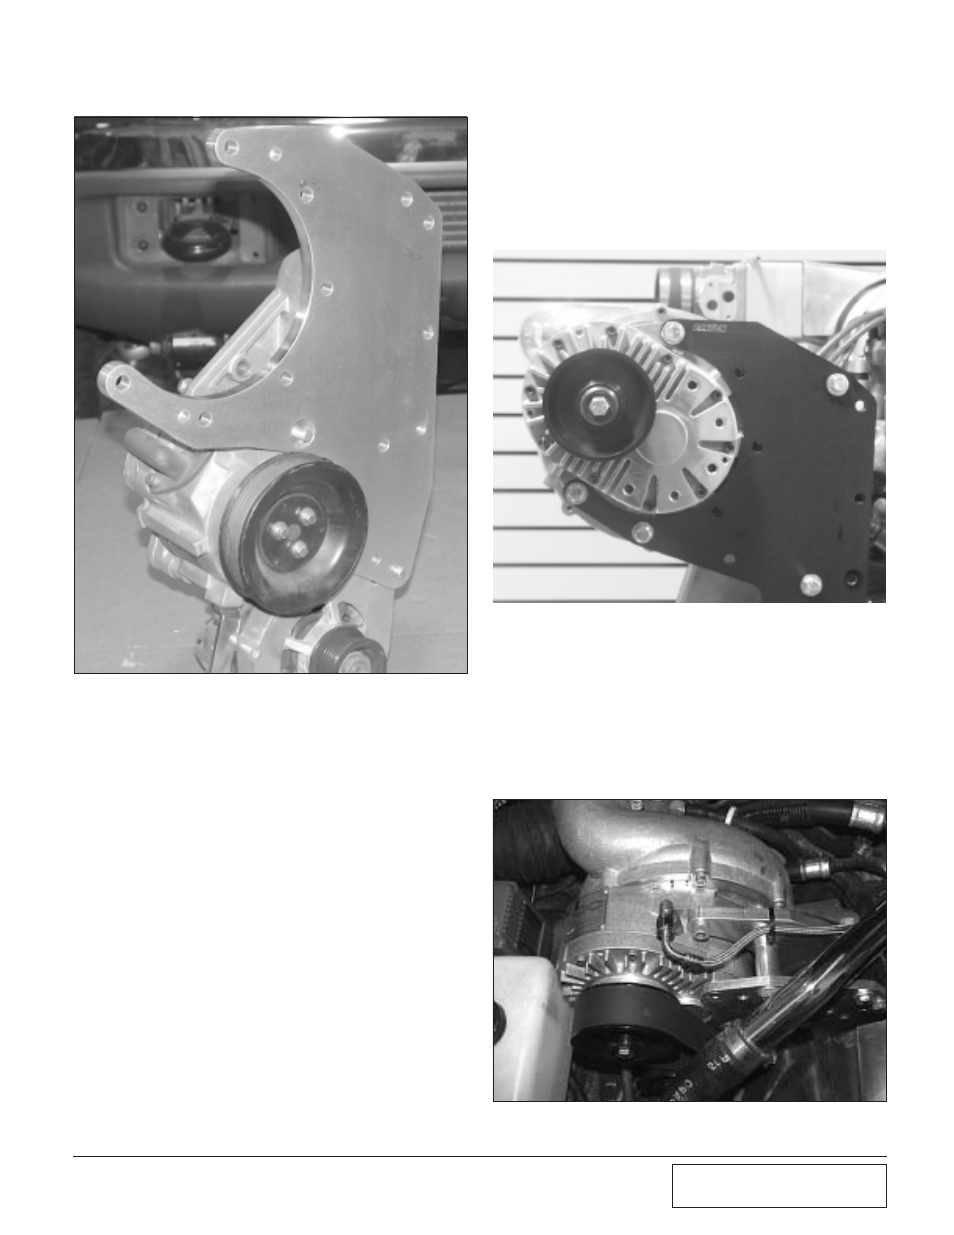
Fig. 3-f
H.
Bolt the Supercharger to the mounting
bracket with one of the 3/8" x 1" bolts and
washers through the upper most hole and the
two lower holes in the mounting plate. Place
the support plate over the front of the super-
charger and secure with the 3/8" counter-
sunk bolts. (See Fig. 3-f.)
E.
Locate nuts and washers and secure the
supercharger mounting plate. Leave these
nuts loose.
Locate the 7/16-14 1.75" bolt and washer
and the 3/8-16 x 1.75" bolt and washer, the
3/8-16 x 6.75" bolt and washer. Install these
bolts as noted in Appendix #1016611.
Install this assembly as a unit to the engine
and tighten all bolts and nuts.
F.
Install the 90° x -4 fitting using engine oil
only on the threads going into the super-
charger. Attach the oil drain hose to the fit-
ting and route the hose so there are no kinks
or dips. See that it is routed away from hot
or sharp objects and there are no kink or
dips in the line.
Fig. 3-e
G.
Install the supercharger into the supercharg-
er mounting plate using three of the 3/8-16 x
1.25" bolts and the 3/8" washers. Refer to
Appendix #1016611 for their location. When
attaching the belt tensioner plate, it is rec-
ommended that the use of anti-seize be used
on the heads and threads of the counter-sunk
bolts.
I.
Connect the oil drain hose to the previously
installed fitting in the oil pan. Secure using a
#8 hose clamp. Trim for best fit so there are
no kinks or sharp bends in the hose.
J.
Connect the previously install oil feed line
to the -4 x 90° fitting on the supercharger.
Position as shown in Fig. 3-g and secure to
the bracket.
Fig. 3-g