Paxton Superchargers Ford Mustang GT User Manual
Page 10
2-2
P/N: 4809628
©2003 Paxton Automotive
All Rights Reserved, Intl. Copr. Secured
05JUN03 v2.1 MusGT(4809628 v2.1)
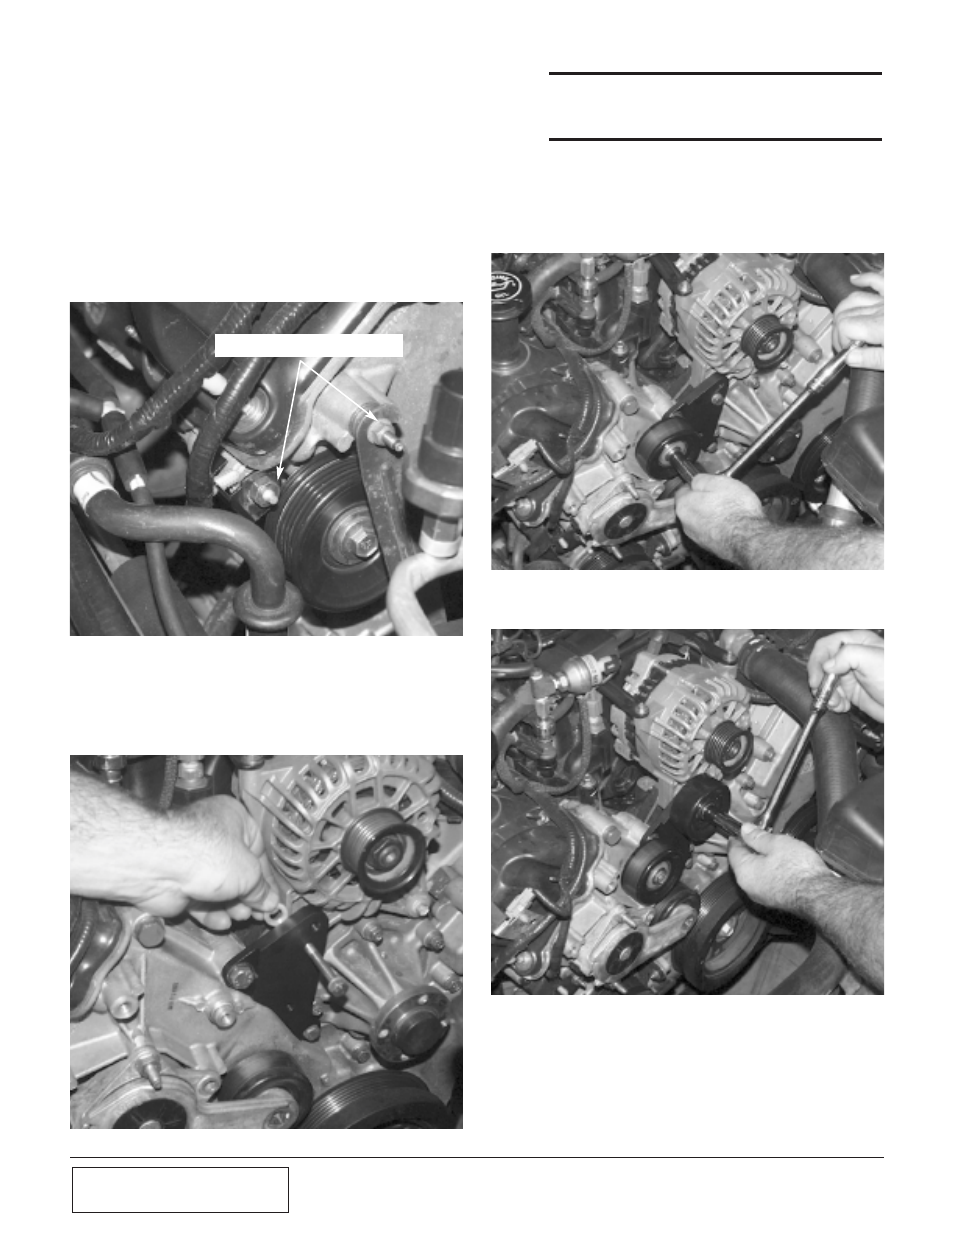
D.
Remove both nuts using a 10mm and 13mm
socket. Then remove both studs using a
13mm and 18mm socket. Enlarge the hole in
the tab that held the wiring harness to the
outermost stud. Using a round file, enlarge
the hole so that it will slip over the large
diameter of the stud. This tab will get sand-
wiched between the cylinder head and a
spacer in a later step.(See Fig 2-d.) Note that
on some of the 2001-2003 GTs this step will
not be required and a .065 shim will go in
its place.
REMOVE THESE TWO STUD BOLTS
Fig. 2-d
E.
Install the supercharger idler pulley bracket
using the supplied hardware. Be sure to
install spacer between bracket and alternator.
(See Fig 2-e)
Fig. 2-e
***NOTE***
This photo is for illustration purposes. It will be easi-
er for you to install this bolt/spacer first, then install
the other two mounting bolts.
F.
Re-install the factory idler pulley using the
factory hardware (see Fig. 2-f), followed by
the supplied supercharger idler pulley (see
Fig. 2-g).
Fig. 2-f
Fig. 2-g